Getting a clean, lag-free picture from your Nintendo Switch on a TV comes down to three priorities: correct signal matching between the console and the display, minimizing input lag, and preserving color and sharpness. The Switch outputs a maximum of 1080p at 60Hz and does not support HDR, VRR, or 4K upscaling natively, so the best results come from telling the TV exactly what to expect instead of leaving it to guess. That means locking resolution, setting the right RGB range, disabling extra TV processing, and using the right HDMI port. Do this first and you avoid the most common issues of washed-out colors, soft image, overscan cropping, and added delay.
As of early 2026 the menu layout on both the original Switch and Switch OLED remains identical for TV output, so these settings apply to all docked configurations.
As an Amazon Associate we earn from qualifying purchases at no extra cost to you.


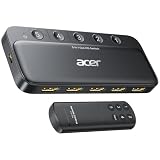


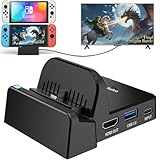

Our Top Picks




Top 3 picks at a glance
Quick Recommended Settings
| Setting | Recommended value | Why |
|---|---|---|
| System Settings > TV Output > TV Resolution | 1080p | Forces native output without auto-negotiation errors; prevents 720p lock on some TVs |
| System Settings > TV Output > RGB Range | Automatic (Limited if Automatic looks washed out) | Matches TV’s expected range; Limited is correct for most TVs, Full for PC monitors |
| System Settings > TV Output > Adjust Screen Size | 100% (no underscan) after disabling TV overscan | Eliminates black borders while keeping 1:1 pixels |
| System Settings > TV Output > Match TV Power State | On | Lets TV remote wake/sleep Switch via HDMI-CEC |
| System Settings > TV Output > Sound > TV Sound | Stereo or Surround depending on setup (Surround only with AVR/soundbar via HDMI) | Prevents downmix issues and audio delay |
| TV Picture Mode | Game Mode | Disables post-processing and cuts input lag to lowest value |
| TV HDMI Port | HDMI 1 or labeled Game/4K@60Hz port | Ensures full bandwidth and lowest latency path |
| TV Aspect Ratio / Overscan | Just Scan / Screen Fit / 1:1 / Overscan: Off | Shows full 1080p frame without cropping HUD elements |
| TV Sharpness | 0 – 10 / 100 (or 0% if scale is 0-50) | Avoids artificial edge ringing on already sharp 1080p signal |
| TV Color / HDMI Black Level | Low / Limited (to match Switch Limited) | Prevents crushed blacks or gray blacks |
Setting-by-Setting
TV Resolution: 1080p
Found at Home > System Settings > TV Output > TV Resolution. Options are Automatic, 480p, 720p, and 1080p. Automatic often works but can negotiate to 720p if the TV was last on a different input or if HDMI-CEC handshake is slow. Set it manually to 1080p to force full HD. Dock the Switch, wait for the TV to sync, then press Home and check that resolution still reads 1080p in the menu. Trade-off: If you move the Switch between a 720p TV and a 1080p TV frequently, Automatic saves you a manual change, but for a fixed setup 1080p is more stable. There is no 4K option; the Switch will be upscaled to 4K by your TV if you own a 4K set.
RGB Range: Automatic, or Limited for most TVs
Found at Home > System Settings > TV Output > RGB Range. Choices are Automatic, Limited, and Full. Most televisions expect Limited (16-235) while PC monitors expect Full (0-255). Leave it on Automatic first. If blacks look gray and washed or whites look clipped, force Limited and then set your TV’s HDMI Black Level / HDMI Range to Low / Limited as well. If you use a monitor, force Full on both console and display. Trade-off: Mismatched ranges are the number one cause of washed-out Switch images. Matching Limited/Limited or Full/Full restores contrast. Avoid Full on a TV that expects Limited as it will crush shadow detail.
Adjust Screen Size: 100%
Found at Home > System Settings > TV Output > Adjust Screen Size. You will see a screen with arrows at the corners and a slider from 90% to 100%. Use the ZL/ZR buttons to adjust. Always start by disabling overscan on the TV itself first, then set this to 100% so you get a true 1:1 pixel map. Set it lower only if your TV has no way to disable overscan and is cropping the edges. Trade-off: Lowering this value adds a soft scaling step and introduces a thin black border. Correcting at the TV level is always sharper.
Match TV Power State: On
Found at Home > System Settings > TV Output > Match TV Power State. When On, putting the Switch to sleep turns off the TV if HDMI-CEC is enabled, and turning on the TV can wake the dock. This relies on TV settings named Anynet+, Bravia Sync, SimpLink, CEC, or HDMI Control. Trade-off: On some soundbar/AVR setups, CEC can switch inputs unexpectedly. If your soundbar keeps jumping to the Switch input when you want another device, turn this Off.
TV Sound: Stereo vs Surround
Found at Home > System Settings > TV Output > TV Sound. Options are Stereo, Mono, and Surround. Choose Surround only if your Switch goes HDMI > AV Receiver or HDMI > TV > Receiver via ARC/eARC and your receiver actually decodes 5.1 LPCM. For direct TV speakers or a stereo soundbar, choose Stereo. Trade-off: Selecting Surround without a 5.1 system does not improve sound and can make dialogue quieter or add delay through the TV’s audio processing.
TV Picture Mode: Game Mode On
This is a TV setting, not a Switch setting. Enable Game Mode for the HDMI input the Switch uses. On Samsung: Home > Settings > All Settings > Connection > Game Mode > On. On LG: Settings > Picture > Advanced Settings > Game Optimizer > On. On Sony: Settings > Display & Sound > Picture > Picture Mode > Game. Game Mode bypasses motion smoothing, noise reduction, and extra scaling that add 30-80ms of lag. Trade-off: Game Mode may make colors look slightly less saturated out of the box; calibrate brightness and color after enabling it rather than turning it off.
HDMI Port and Cable
Use the HDMI cable included with the Switch dock and connect to your TV’s best port, usually HDMI 1 or any port labeled 4K@60Hz, Game, or eARC. Avoid HDMI ports labeled Service if present. For the dock, route the cable through the rear channel to avoid strain and ensure it clicks fully into HDMI OUT. Trade-off: Ultra High Speed HDMI cables are not required, any High Speed cable works at 1080p60, but a damaged or very long 15+ foot cable can cause flicker or Automatic resolution downgrades.
Aspect Ratio, Overscan, and Sharpness
On your TV, set Picture Size to Just Scan on LG, Screen Fit on Samsung, or Display Area Full Pixel on Sony. This disables overscan. Then set Sharpness to 0. On a 0-100 scale use 0-10, on a 0-50 scale use 0. The Switch outputs a clean digital signal with no need for edge enhancement. Trade-off: Raising sharpness adds white halos around sprites and text, especially noticeable in games like The Legend of Zelda: Tears of the Kingdom or Super Smash Bros. Ultimate.
By Hardware Tier
Low Tier: Older 720p / 1080p TVs (2012-2017, no Game Mode toggle)
Prioritize getting a stable 1080p signal and disabling processing that you cannot fully turn off. Set Switch to TV Resolution 1080p and RGB Range Limited. On the TV, look for Picture Mode Standard or Movie and then manually turn off anything named Motion Plus, Auto Motion, Noise Reduction, MPEG Noise Reduction, and Dynamic Contrast. Set HDMI Black Level to Low. If the TV lacks a Just Scan option, use Adjust Screen Size on the Switch and reduce to 95-97% until arrow indicators are fully visible. Use the HDMI port closest to the power input; on older sets it often has the best compatibility. Keep TV Sound on Stereo to avoid ARC issues.
Mid Tier: Modern 4K LED / QLED TVs (4K 60Hz, dedicated Game Mode)
This is the most common setup and benefits most from correct range matching. Set Switch 1080p, RGB Limited, TV Black Level Low/Limited. Enable Game Mode for that specific HDMI input. Set Color Temperature to Warm 2 or Warm 50 and turn off Energy Saving / Eco Mode which auto-dims the picture. Leave the TV’s upscaling on default; do not add extra sharpness. If your TV has HDMI Input Signal Plus / HDMI Enhanced / Full Color, leave it Off for the Switch input because 1080p does not need enhanced bandwidth and on some models Enhanced forces extra processing. Set Match TV Power State On if you use the Switch as a primary device on this input.
High Tier: 4K 120Hz / OLED TVs with AV Receiver or Soundbar (LG C/G Series, Samsung S95, Sony A95)
Prioritize latency and color accuracy and avoid unnecessary conversion. Connect Switch dock HDMI OUT > Receiver HDMI In (Game-labeled) > Receiver HDMI Out (eARC) > TV eARC port. Set Switch to 1080p Limited, receiver to pass-through with no upscaling, TV to Game Optimizer On and Instant Game Response On. On LG OLED, set HDMI Deep Color to On for the port then verify Black Level Low. On Sony, set HDMI Signal Format to Standard Format, not Enhanced, for the Switch input. Disable any receiver Video Conversion or 4K Upscaling. For audio, set Switch to Surround only if your receiver shows Multi-Channel PCM or LPCM 5.1 on its front display. If you see audio delay, set Switch back to Stereo and set TV eARC to Pass Through and Digital Sound Out to Pass Through.
Common Mistakes
1. Washed out gray blacks and pale colors
What causes it: RGB Range mismatch between Switch and TV, typically Switch on Full while TV expects Limited. How to check: Open System Settings > TV Output > RGB Range, then on TV open Picture > Expert Settings > HDMI Black Level. Launch a dark game scene; if black loading screens look dark gray, mismatch is likely. What to do: Set Switch RGB Range to Limited and TV HDMI Black Level to Low/Limited. On some brands Low = Limited and High = Full. What to undo: If shadow detail is lost after, set both back to Automatic/ Auto and re-test.
2. Soft image with halos or oversharpening
What causes it: TV Sharpness too high and motion smoothing enabled. How to check: Look at text on the Switch Home Menu on TV; if white text has a faint white edge, sharpness is adding ringing. What to do: In TV Picture Mode Game, set Sharpness to 0, turn off Digital Clean View, Noise Reduction, and Motion Smoothing. What to undo: Restore Sharpness to 20 on Samsung or 10 on LG if you prefer a slightly crisper look for other devices, but keep it at 0 for Switch.
3. Edges cropped, HUD cut off
What causes it: TV overscan enabled. How to check: Open Adjust Screen Size; if arrows are cut off at 100%, overscan is on. What to do: On TV set Picture Size to Just Scan / Screen Fit / Full Pixel / Overscan Off, then set Switch Adjust Screen Size to 100% with ZL/ZR. What to undo: If you cannot find the TV setting, reduce Switch Adjust Screen Size to 96% and leave TV as is.
4. Noticeable input delay
What causes it: Not using Game Mode, or routing through a TV that post-processes even in Standard mode. How to check: Compare Joy-Con response in Game Mode On versus Off in a timing-sensitive game; if button presses feel late, lag is present. What to do: Enable Game Mode per-input, disable VRR/FreeSync for that port if it adds processing, and connect Joy-Con wirelessly close to the console with no USB 3.0 drives near the dock causing interference. What to undo: Turn Game Mode off if you need accurate colors for movie watching on the same input, but create a separate picture preset for Switch.
5. Flicker, no signal, or resolution drops to 480p
What causes it: Loose HDMI, faulty cable, or dock not powered with the official AC adapter HAC-002. How to check: Undock and re-dock, watch TV for HDMI handshake; check System Settings > TV Output > TV Resolution after re-dock. What to do: Use the Nintendo HAC-002 adapter into the dock’s AC ADAPTER port, use the supplied HDMI cable into HDMI OUT, reseat both ends, and power cycle TV and dock. Try another HDMI port. What to undo: Swap back to your original cable if the issue persists to isolate the port.
FAQ
Should I set the Switch to 1080p or Automatic on a 4K TV?
Set it to 1080p. Automatic can negotiate down to 720p after a power cycle or input switch. The Switch always outputs 1080p maximum docked, and your 4K TV will upscale that to 4K. Forcing 1080p removes the negotiation step and keeps the signal consistent. If you frequently swap the Switch between TVs of different resolutions, Automatic is the only reason to not lock it.
Why does my Switch look better on my monitor than on my TV?
Monitors default to RGB Full and have no overscan or heavy processing, so they show the Switch signal unaltered. TVs default to RGB Limited and apply sharpening and motion smoothing. To match the monitor look, set Switch RGB Range to Limited, TV HDMI Black Level to Low, Picture Mode to Game, Sharpness to 0, and Picture Size to Just Scan. This removes the TV’s extra processing that softens or washes the image.
Do I need a new HDMI cable or 4K HDMI port for the Switch?
No. The Switch outputs 1080p60 which fits within standard High Speed HDMI. The cable included in the box is correct. Using a premium Ultra High Speed cable does not increase quality. Plug into any HDMI port, but prefer the port labeled Game or the lowest-numbered port for the most reliable handshake. Only use the dock’s HDMI OUT; the USB-C port on the dock is not a video output.
Can the Switch output HDR, 1440p, or 4K if my TV supports it?
No. The Switch family does not support HDR10, Dolby Vision, 1440p, or 4K output. Options in System Settings > TV Output are limited to 480p, 720p, and 1080p and SDR. If your TV shows an HDR badge when the Switch is connected, the TV is incorrectly tonemapping SDR to HDR; turn off HDMI Deep Color / HDR Mode for that input and keep the TV in SDR Game Mode for accurate colors.