If you play on an OLED TV, the PlayStation 5 is capable of some of the best-looking HDR images available on any console, but only if you configure it correctly. Sony ships the PS5 with conservative defaults, and many OLED panels apply their own processing on top, which means the picture you get out of the box is rarely the picture the developers intended. The good news: dialing it in takes about fifteen minutes and requires no calibration discs or professional equipment.
Before touching anything, understand what to prioritize. On an OLED, black level accuracy matters more than peak brightness — OLED pixels turn off entirely, so crushed shadow detail is the most common and most damaging misconfiguration. Second priority is the PS5’s own HDR calibration screen, which most owners skip or rush through. Third is making sure your TV’s game mode is active, because input lag, not image quality, is what game mode actually fixes. Everything else — tone mapping, color space, local dimming equivalents — matters less than getting those three right.
As an Amazon Associate we earn from qualifying purchases at no extra cost to you.


One more note before we start: update your PS5 to current system software and your TV to its latest firmware before calibrating. HDR handling has changed across console updates, and a guide written for earlier firmware can steer you wrong. As of 2026, the settings below reflect the current PS5 interface.
Our Top Picks
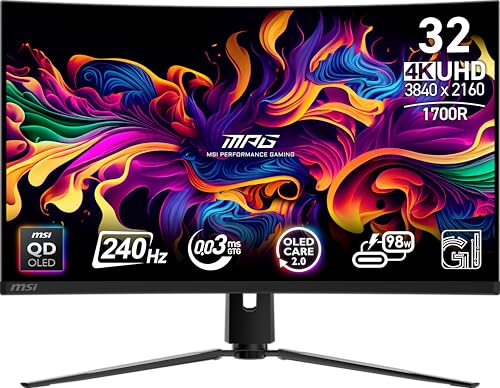
 ASUS ROG Strix 26.5” 1440P QD-OLED Gaming Monitor6.408.6 x 24 x 20.3 Inches16.4 poundsCheck on Amazon
 Sony QD-OLED 77 inch BRAVIA XR A95L Series77 inches15.38 x 67.88 x 40.38 inches81.3 PoundsCheck on Amazon



Top 3 picks at a glance
Quick Recommended Settings
| Setting | Recommended value | Why |
|---|---|---|
| PS5 HDR calibration: brightness (first screen) | Adjust until the logo is barely visible | Sets black level; OLEDs crush blacks easily, so err toward dimmer |
| PS5 HDR calibration: brightness (second screen) | Adjust until the logo is barely visible | Sets peak white; slightly conservative values preserve highlight detail |
| PS5 HDR calibration: darkness (third screen) | Adjust until the logo is barely visible | Fine-tunes shadow detail specific to your room and panel |
| PS5 Color depth | Always | 10-bit output prevents banding in gradients (skies, fog, water) |
| PS5 RGB Range | Full (0-255) | Match TV to Full as well; avoids washed-out or crushed grays |
| TV picture mode | Game (with HDR game preset) | Lowest input lag; game-specific HDR presets on OLEDs are well tuned |
| TV dynamic tone mapping | On (HGIG-compatible setting off for most users) | Lets the TV adapt HDR to its panel; disable only if you use HGIG titles exclusively |
| VRR | On (PS5 and TV) | Eliminates screen tearing; check for flicker on your model |
Setting-by-Setting
PS5 HDR Calibration (Settings › Screen and Video › Video Output › Adjust HDR)
This three-screen wizard is the single highest-impact calibration you can do. On the first screen, lower the brightness slider until the logo on the left nearly disappears, then raise it until you can just barely make it out. On the second screen, raise brightness until the right-side logo is just barely visible against the white background — stop earlier than feels natural, because OLED peak brightness is limited and pushing this too high clips highlight detail in games. The third screen adjusts shadow detail: again, stop at the point of bare visibility.
The trade-off is straightforward. Setting the first screen too low crushes shadows into pure black; too high makes the whole image look washed out and gray. On an OLED, slightly conservative (dimmer) values almost always look better in a dark room than aggressive ones. Redo this calibration whenever you change TV picture modes or firmware, because the TV’s own processing changes what the PS5 “sees.”
Color Depth (Settings › Screen and Video › Video Output)
Set Color Depth to Always. This forces 10-bit output even for SDR content, guaranteeing the full HDR color depth in games. The trade-off is negligible on modern TVs; on older 4K60 sets with limited HDMI bandwidth, forcing 10-bit may drop you from 4K60 to 4K30 in some titles. If you have an HDMI 2.1 port and an Ultra High Speed HDMI cable, this is not a concern.
RGB Range (Settings › Screen and Video › Video Output › RGB Range)
Set it to Full on the PS5, then verify your TV is also set to Full — the TV menu location varies by manufacturer (often Picture › Expert Settings › HDMI Black Level on Samsung, Picture › Picture Adjustments › HDMI Video Range on LG). A mismatch causes either washed-out blacks or crushed shadow detail. Check it by playing any game with dark scenes and confirming you can distinguish near-black objects from pure black. The only trade-off is that some older receivers or capture devices only support Limited; if your signal chain includes such hardware, set both ends to Limited instead.
Video Output: 4K and VRR
Under Video Output, set Resolution to 4K and enable VRR (Variable Refresh Rate), plus Enable Uncompressed 4K60 if your TV supports it. VRR eliminates frame pacing stutter in games that miss their frame targets. Trade-off: some OLED models exhibit visible flicker at low frame rates with VRR on. If you notice brightness pulsing in dim scenes, toggle VRR off on both ends and compare.
TV Picture Mode and Dynamic Tone Mapping
Select your TV’s Game picture mode (on LG OLEDs: Settings › Picture › Select Mode › Game; on Samsung: Game Mode or the Game Bar shortcut by holding the play/pause button). Game mode on OLEDs includes HDR-specific presets that are generally close to reference. Then look for dynamic tone mapping — LG calls it Dynamic Tone Mapping, Samsung calls it Dynamic or HDR10+ handling, Sony calls it something similar under Picture settings. For most users, leave it On: it remaps HDR content to your specific panel’s capabilities. If you primarily play HGIG-aware titles, you can enable HGIG (usually under Game Optimizer or a similar menu) instead, which lets the game do the tone mapping itself. Pick one system, not both — running dynamic tone mapping and HGIG simultaneously double-processes the image and washes out highlights.
By Hardware Tier
Low Tier: HDMI 2.0 TVs (4K60, no VRR)
If your OLED lacks HDMI 2.1, bandwidth is your constraint. Set Color Depth to Automatic instead of Always so the PS5 doesn’t force 10-bit at the expense of resolution, keep Resolution at 4K, and leave VRR off since your TV can’t do it. Use a certified Premium High Speed (18 Gbps) HDMI cable in the TV’s game-labeled HDMI port. Skip 120 Hz entirely — a stable 4K60 with correct HDR beats a 1080p120 image on a panel not built for it. Focus your effort on the HDR calibration screens, which cost nothing and matter more than refresh rate.
Mid Tier: HDMI 2.1 TV with 4K120 Support, Standard Console
Enable VRR on both ends, set Resolution to 4K and leave 120 Hz output enabled in supported games. Use an Ultra High Speed certified (48 Gbps) cable, ideally the one bundled with the console. Verify your HDMI port supports 4K120 — many TVs only enable full bandwidth on one or two inputs (often HDMI 2 and HDMI 3 on LG OLEDs). Keep dynamic tone mapping On in Game Optimizer, and calibrate the PS5’s HDR with Game mode active, since tone mapping behavior changes between modes.
High Tier: High-End OLED with Full HDMI 2.1 Bandwidth (2026 flagships)
On a current-generation OLED panel with four full-bandwidth HDMI 2.1 ports and bright QD-OLED or MLA-type panels, you can afford more aggressive settings. Set Color Depth to Always, enable Uncompressed 4K60, enable VRR and ALLM, and experiment with HGIG in supported titles — brighter panels handle the game-side tone mapping better than dimmer ones. Consider running Dolby Vision support on if your TV and specific games support it via a firmware update, and verify every game individually, since Dolby Vision gaming support is inconsistent. Run the PS5 HDR calibration once per picture mode and once after every major TV firmware update.
Common Mistakes
Crushed blacks from a mismatched RGB range
What causes it: PS5 set to Full while the TV is set to Limited (or vice versa), so shadow detail is lost or the image looks milky. How to check: open any game’s dark interior scene and see whether near-black objects blend into pure black. What to do: set both PS5 and TV to Full, using the TV’s HDMI Black Level or HDMI Video Range menu. How to undo: revert both ends to Auto or Limited if your signal chain (receiver, capture card) can’t pass full range.
Blown-out highlights from rushing the HDR calibration
What causes it: sliding the second calibration screen (peak white) to maximum, which the on-screen logo seems to reward. How to check: look at fire, explosions, or bright skies in a game — if highlights lose texture and turn into flat white blobs, you’re clipping. What to do: rerun Settings › Screen and Video › Video Output › Adjust HDR and stop at “barely visible” on every screen. How to undo: simply rerun the wizard; nothing is saved permanently except the final values.
Brightness flicker with VRR enabled
What causes it: OLED panels’ automatic brightness limiting interacting with variable frame rates. How to check: play a game with a locked camera in a dark scene and watch for subtle pulsing. What to do: toggle VRR off on the PS5 (Settings › Screen and Video › Video Output › VRR) and on the TV, then compare. How to undo: turn VRR back on if you decide the tearing it prevents bothers you more than the flicker.
Double tone mapping from HGIG plus dynamic tone mapping
What causes it: enabling both HGIG on the TV and the TV’s dynamic tone mapping engine. How to check: highlights look washed out or hazy in HGIG-supported games despite correct calibration. What to do: pick one — disable dynamic tone mapping when HGIG is on, or leave HGIG off for everything else. How to undo: restore the previous setting per game if you switch between HGIG and non-HGIG titles often.
Using the wrong HDMI port
What causes it: plugging the console into a port without full bandwidth or game mode support. How to check: if 4K120 or VRR options are grayed out on the PS5, your port or cable is the bottleneck. What to do: move to the port your TV manual identifies as full-bandwidth/game-enabled, and confirm you’re using an Ultra High Speed certified cable. How to undo: move the cable back if another device needs the game port more.
FAQ
Should I turn on HDR on the PS5 at all for a small or bright room?
Yes. OLEDs produce deep blacks that make HDR worthwhile even at modest peak brightness, and in a bright room the perceived contrast gain is larger, not smaller. If washout bothers you in daylight, the fix is raising the TV’s OLED pixel brightness in Game mode, not disabling HDR.
Do I need to recalibrate after every TV firmware update?
You don’t need to, but it’s cheap insurance. Firmware updates occasionally change tone mapping behavior, which shifts what the PS5 calibration screens look like. If you notice shadows or highlights looking off after an update, rerun the three-screen wizard — it takes two minutes.
Is HGIG worth using?
If you mostly play titles that explicitly support it, yes — it lets developers tone map for known console hardware instead of guessing at your TV. Check a game’s in-game video settings for an HGIG or tone mapping option. If it’s absent, dynamic tone mapping on the TV is the safer default.
Full or Limited RGB range on OLED?
Full, as long as both the PS5 and the TV agree. Full range gives you cleaner banding-free grays and no risk of crushed or lifted blacks. The only reason to use Limited is hardware in your signal chain — an older AV receiver or capture device — that doesn’t pass full range reliably. Whatever you choose, match both ends exactly.