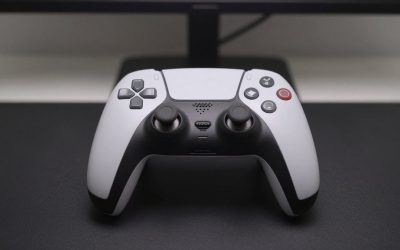
The Xbox Series X controller is a masterpiece of modern ergonomics, featuring a fine, laser-etched tactile pattern on the back grips to prevent slipping during intense play sessions. However, those microscopic ridges and valleys act as a magnet for sweat, sebum (natural skin oils), dead skin cells, and microscopic food particles. Over time, this mixture solidifies into a gray, unsightly residue that ruins the tactile feel of your controller and harbors bacteria.
Learning how to safely clean xbox series x controller grips is essential to preserving both the aesthetics and the functionality of your gamepad. If you approach this task with the wrong tools or excessive moisture, you risk permanent damage. Liquid can easily seep through the thin seams of the two-part shell via capillary action, dripping directly onto the internal printed circuit board (PCB) and causing short circuits, button stickiness, or permanent stick drift. Harsh household chemicals can also dissolve the ABS plastic or strip away the matte finish, leaving your controller permanently sticky or discolored. This guide will walk you through the precise, editor-approved method to clean your controller grips safely without damaging the delicate hardware inside.
As an Amazon Associate we earn from qualifying purchases at no extra cost to you.

Our Top Picks


What You Need
Before you begin, gather the correct cleaning supplies. Using the wrong materials—such as paper towels that shed fibers or harsh kitchen cleaners—can ruin your gear.
| Item | Why You Need It | Optional? |
|---|---|---|
| 70% Isopropyl Alcohol | Breaks down stubborn skin oils and disinfects without lingering moisture. | No |
| Lint-Free Microfiber Cloth | Lifts and traps dirt without scratching the plastic or leaving lint behind. | No |
| Wooden Toothpicks | Safely scrapes out packed grime from the tight shell seams. | No |
| Cotton Swabs | Allows for precise, dry-damp moisture application in tight crevices. | No |
| Soft-Bristled Toothbrush | Agitates and lifts dirt out of the laser-etched textured grip pattern. | Yes |
| Can of Compressed Air | Blows away loose dry dust and scraped debris before liquid is applied. | Yes |
Step-by-Step
Follow these steps in order to ensure no moisture penetrates the controller shell and that all physical debris is safely lifted away.
1. Power Down and Remove Batteries (Time: 2 Minutes)
Safety begins with cutting all electrical current. Turn off your Xbox console and disconnect the controller. Remove the back battery cover and take out the two AA batteries (which weigh approximately 48 grams combined) or the rechargeable battery pack. If your controller is connected via a USB-C cable, unplug it entirely. Press and hold the Xbox button for 5 seconds to drain any residual power stored in the internal capacitors. This ensures that even if a tiny drop of moisture accidentally slips inside, it will not cause a short circuit.
2. Clear the Seams of Packed Grime (Time: 5 Minutes)
Hold the controller firmly. Take a standard wooden toothpick (about 2.5 inches in length) and gently insert the tip at a 45-degree angle into the seam where the front plate meets the textured back grip. Slowly slide the toothpick along the seam line. You will see a ribbon of gray, compacted skin oils and dust peel out of the crevice. Wipe the toothpick on a dry tissue frequently. Do not use metal needles or safety pins for this step, as metal will gouge and permanently scar the soft ABS plastic of the controller.
3. Blow Away Loose Debris (Time: 1 Minute)
Once you have scraped the seams, use a can of compressed air to blow away the loose debris. Hold the can upright (about 6 inches away from the controller) and spray in short, controlled bursts. This prevents any of the dislodged dry grime from slipping further into the controller seams or settling under the thumbsticks.
4. Scrub the Textured Grip Surface (Time: 5 Minutes)
Dampen—do not soak—your lint-free microfiber cloth with the 70% isopropyl alcohol. It should feel slightly cool to the touch but should not drip when squeezed. Wrap the damp cloth over your index finger and rub the textured back grips in firm, circular motions. For stubborn spots where dirt is deeply embedded in the micro-texture, apply a single drop of alcohol to the bristles of a soft-toothed toothbrush. Gently brush the textured area in circles. The bristles will reach into the micro-grooves where a cloth cannot. Immediately follow up with a dry section of your microfiber cloth to lift the loosened grime.
5. Detail the Edge Zones and Buttons (Time: 5 Minutes)
Dip a cotton swab into the isopropyl alcohol and press it against a clean tissue to remove excess moisture. Use this damp swab to clean around the battery compartment edges, the triggers, and the bumper seams. Pay close attention to the transition zone between the smooth plastic top and the textured grip sides. Use the dry end of the swab to dry each area immediately after cleaning.
6. Dry, Inspect, and Reassemble (Time: 10 Minutes)
Set the controller on a clean, dry surface in a well-ventilated room. Allow it to air-dry completely for at least 10 minutes. Isopropyl alcohol evaporates quickly, but this waiting period ensures that any micro-moisture trapped in the seams has fully dissipated. Inspect the grips under a bright light. If any gray residue remains in the texture, repeat the toothbrush scrub. Once clean and dry, reinsert the batteries and snap the cover back in place.
Mistakes to Avoid
- Using 100% or 99% Isopropyl Alcohol Excessively: While high-concentration alcohol evaporates faster, it can occasionally degrade rubberized coatings (like those on the Elite Series 2 controller) and can flash off too quickly to lift heavy organic oils effectively. Stick to 70% concentration.
- Spraying Liquid Directly Onto the Controller: Never spray alcohol, water, or cleaning solutions directly onto the controller. The liquid will immediately run into the seam lines and pool around the triggers or thumbsticks, ruining the internal motherboard.
- Using Acetone or Nail Polish Remover: Acetone is a solvent that chemically melts ABS plastic. Using it will permanently dissolve the textured grip pattern and ruin your controller instantly.
- Using Abrasive Scrubbing Pads: Steel wool, scouring pads, or stiff wire brushes will scratch the plastic, turning the beautiful matte finish into a scuffed, shiny mess.
How Often
How frequently you clean your controller grips depends heavily on your gaming habits. For casual gamers playing 2 to 3 hours a week, a quick dry wipe with a microfiber cloth once a week and a deep clean every two months is sufficient. For daily gamers or those who enjoy snacks during play, a deep clean should be performed every two to three weeks. As game development pushes new boundaries heading into 2026, keeping your physical hardware in peak condition ensures your controller remains responsive and sanitary for years to come.
When to Call a Pro or Replace
If your controller grips are physically worn down—meaning the textured pattern has been rubbed completely smooth by hundreds of hours of friction—no amount of cleaning will restore the original grip. Similarly, if you notice the rubberized grip panels on an Elite Series 2 controller (which weighs approximately 345 grams) are peeling away or bubbling due to heat and sweat, cleaning will not fix the adhesive failure.
A brand-new standard Xbox Series X controller costs between $50 and $65, while an Elite Series 2 controller ranges from $130 to $180. If your controller is mechanically perfect but the grips are unsightly or worn out, you do not need to buy a whole new controller. You can easily restore the feel of your gamepad with affordable, high-quality third-party accessories.
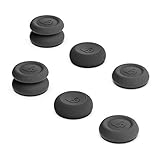
For example, options like the NEWDERY LIFE Anti-Slip Silicone Thumb Grips for Xbox Controllers, Black (priced at around $9) or the Skull & Co. Skin, CQC and FPS Thumb Grips Joystick Cap Analog Stick Cover for Xbox Controller and ROG Xbox Ally- Black, Set of 6 (priced at around $9) offer an excellent way to regain precision and comfort at a fraction of the cost of a replacement controller.
FAQ
Can I use baby wipes or makeup wipes to clean my controller grips?
No. Baby wipes and makeup wipes contain moisturizing oils, fragrances, and skin conditioners that leave a thin, greasy film on the plastic. This film actually attracts more dirt and sweat, making your controller dirtier much faster. Stick to 70% isopropyl alcohol, which leaves zero residue behind.
How do I clean white Xbox Series X controller grips without yellowing them?
White controllers show dirt and skin oils much faster than black ones, often taking on a dingy yellow tint. To clean them safely, use 70% isopropyl alcohol on a microfiber cloth. If the yellowing is caused by dirt, this will remove it. If the yellowing is due to UV damage from sunlight, it cannot be cleaned off as the plastic itself has degraded chemically.
Is it safe to use a hair dryer to speed up the drying process?
You should never use a hair dryer on your controller. The concentrated heat can deform the thin ABS plastic shell, melt internal adhesive tape, or damage the delicate lithium-ion batteries if they are left inside. Always let the controller air-dry naturally at room temperature.
My controller grips still feel sticky even after cleaning them with alcohol. What should I do?
If the grips feel sticky after a thorough cleaning, the plastic may have suffered chemical degradation from a previous cleaning agent (like acetone or harsh kitchen degreasers), or the adhesive under rubberized panels is melting. In this case, your best option is to cover the sticky areas with slip-on silicone grip covers or replace the outer shell plates.
Related guides
- Best Free MMOs on Steam: Subscription Limits, Pay-to-Win and Time Cost (2026)
- Best Free Horror Games on Steam: How to Pick One That Fits Your PC and Your Nerves (2026)
- Black Frame Insertion vs VRR: Which Smoothness Feature Should You Use?
- Best Webcams for Streaming: 11 Listings Compared by Resolution, Focus and Light (2026)