The most effective ways to improve VRM cooling are to push air across the area around the CPU socket, fix the airflow path through the case, make sure the existing heatsink makes good contact, and lower sustained CPU power if heat is still a problem. Work through them in that order, because the first two cost little and do not need you to open the board. Measure before and after so you know whether each step helped.
The guidance below draws on published documentation, general cooling principles and buyer reports. Boards vary a great deal, so when your manual says something different, follow the manual.
First, confirm you have a VRM heat problem
Do not buy parts for a problem you have not confirmed. The typical clues are CPU clock speeds that drop during long all-core loads while the CPU’s own temperature is moderate, a hot area near the socket when you hold a hand close to the heatsink with the case open, or a VRM sensor reading that keeps climbing in a monitoring tool. If your board has no VRM sensor, watch CPU power and clocks together.
Log a baseline before changing anything. Run the same sustained load for ten minutes, write down the peak VRM or heatsink reading, the lowest CPU clock and the rough room temperature. Every later change should be compared against that note.
Method 1: put air across the socket area
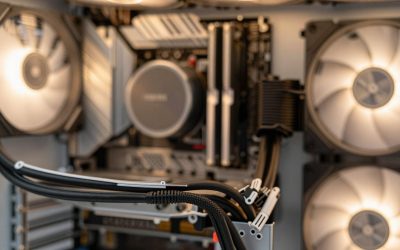
VRM heatsinks work by passing heat to the surrounding air, so moving that air is the biggest lever. Tower air coolers with a fan that blows toward the rear exhaust provide this airflow as a by-product. Liquid coolers do not, which is why builders using them sometimes see warmer power stages.
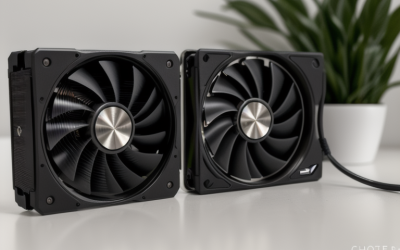
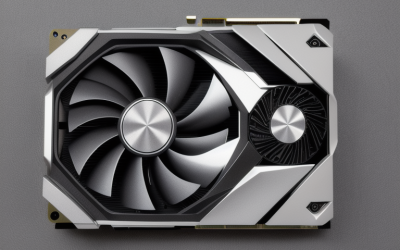
- Add a small fan. A 60 to 92mm fan mounted to blow over the heatsinks, or a case fan positioned near the top rear of the board, can lower the heatsink temperature noticeably. Treat the size of the effect as board and case specific.
- Use a rear or top exhaust. Hot air near the socket needs an exit.
- Keep cables out of the path. A bundle of 8-pin CPU power cables across the VRM heatsink acts as a baffle.
Make sure any added fan is mounted securely and the blades clear every cable. Follow the case and fan manufacturers’ mounting instructions.
Placement matters as much as fan size. A fan that blows straight down onto the heatsink fins tends to work better than one that blows across the top of them, because the air reaches the gaps between fins. Keep the fan close enough to push air through the fins without touching the heatsink, and avoid pointing it so the air simply bounces off the I/O shroud and returns. If your board has a large plastic shroud over the rear I/O area, check whether it traps heat above the power stages. Some builders find that removing a decorative cover that is not part of the heatsink itself, where the manufacturer allows it, opens the airflow path.
Method 2: fix case pressure and fan layout
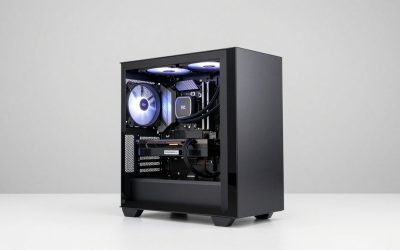
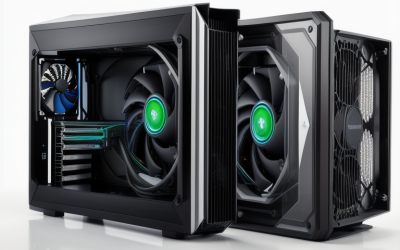
A case that is starved of intake air cannot cool anything, including the board. The aim is a clear path: cool air enters at the front or bottom, passes over the GPU and socket area, and leaves at the rear and top.
| Layout choice | Effect on VRM area | Watch out for |
|---|---|---|
| More intake than exhaust (positive pressure) | Pushes cool air through gaps, helps keep dust down | Needs filtered intakes; hot spots can persist without an exit |
| More exhaust than intake (negative pressure) | Pulls air through the case, often through unfiltered gaps | Dust buildup; weak flow if intake is blocked |
| Balanced fans, clear front-to-back path | Steady cooling over the socket region | Needs good cable management |
| Glass-front case with a closed panel | Often restricts intake | Check whether side or bottom intakes exist |
If the front panel is solid or covered with a dense dust filter, test with the panel removed for a quick comparison. A clear drop in VRM temperature tells you the case, not the board, is the bottleneck. Our look at whether handhelds need external cooling fans covers the same airflow reasoning in a much smaller chassis.
Method 3: check the heatsink and thermal pads
The VRM heatsink only works if heat reaches it. A thin thermal pad usually sits between the power stage and the metal. If the pad is poorly seated, too thin or degraded, the heatsink stays cooler than the chip.
Be careful here. Opening the heatsink can affect your warranty, and some boards use a clip system rather than screws. Read the manufacturer’s guidance first, and if you are not comfortable working inside the board, ask a qualified technician.
- Match thickness. The pad must fill the gap without lifting the heatsink. Too thick lifts it off the component, and too thin leaves an air gap.
- Use non-conductive pads. Avoid anything that conducts electricity, and keep conductive pastes and liquid metal away from the board. If you work near the socket, our explainer on liquid metal cooling shows why conductive compounds are a short-circuit risk.
- Clean old residue. Remove leftover pad pieces gently with isopropyl alcohol and a lint-free cloth, letting everything dry fully before reassembly.
- Do not stack extra heatsinks without checking height. Stick-on aluminum sinks can help on bare power stages, but they add weight and can interfere with coolers.
Method 4: lower the electrical load
VRM heat comes from current. Reduce what the processor pulls and the regulator has less to dissipate. This is the reliable fix when airflow cannot be improved.
| Adjustment | How it helps | Trade-off |
|---|---|---|
| Lower the long-term CPU power limit | Directly reduces sustained current | Less all-core speed in long workloads |
| Modest undervolt or negative offset | Same speed with less power, if the chip is stable | Needs stability testing; can cause crashes if too aggressive |
| Avoid maximum load-line calibration settings | Less voltage overshoot and heat | Slightly more voltage droop under load |
| Disable aggressive automatic overclocking | Removes extra current peaks | Gives up a little peak speed |
Make changes one at a time and note the result. Never raise voltage to chase stability without checking temperatures, and follow your CPU and board maker’s published limits. Settings differ between BIOS versions, so look for the exact labels in your manual.
A worked example: deciding which fix to try
This decision flow uses assumed numbers to show the logic. Replace them with your own log.
- Baseline: a ten-minute all-core load. Assume the VRM reading peaks at 96 and the CPU clock drops from its target to a lower figure in the last three minutes.
- Add a small fan over the heatsinks and repeat. Assume the peak falls to 88 and the clock holds longer. Problem improved, so keep it.
- If the peak is still at the board’s stated limit, remove the front panel to test the case. A big drop points to intake restriction.
- If the case is fine and the reading is still high, lower the sustained power limit in steps and retest each time.
- If a single step cuts the peak by a useful amount with minimal loss in the games you play, stop. More changes add risk and little benefit.
The point of the exercise is to change one variable per run. If you add a fan, lower the power limit and swap pads all at once, you will not know which one worked.
Which fix suits which build
| Your situation | Start with | Why |
|---|---|---|
| Liquid-cooled CPU, closed case | Small VRM fan and rear exhaust | The radiator fan does not sweep the socket area |
| Tower air cooler, good front intake | Check clearances and cable routing | The cooler already helps; look for blocked paths |
| Compact case with little room | Lower sustained power limit | Airflow upgrades may not fit |
| Manual overclock on an entry-level board | Back off the overclock first | The board may be at its design limit |
| Older board, years of dust | Clean the heatsinks and filters | Dust acts like insulation |
Verification and monitoring checklist
- Same load, same duration, same room each time.
- Record the peak VRM figure, minimum clock and CPU package power.
- Run the load long enough for temperatures to flatten, usually several minutes.
- Compare with the board manual’s stated sensor limits where available.
- Re-check after a few weeks, because dust slowly reduces airflow.
Safety and when to stop
Power the system down and unplug it before reaching inside, and discharge static by touching bare metal on the case first. Never touch the board while the PC is running. Do not bend the board when mounting fans or heatsinks, and avoid working near the CPU socket with metal tools.
Stop and contact the board maker or a qualified technician if you see discoloration or bulging near the power stages, notice a burning smell, or the system shuts down under normal load. Those signs point to a failing part, not a cooling gap, and further stress testing could make things worse. Follow the manufacturer’s instructions throughout.
Related guides
- How To Check Motherboard Vrm Temperature In Hwinfo
- How To Clean Quest 3 Lenses And Facial Interface
- Micro Sd Cards For Samsung Galaxy Phones
Frequently asked questions
What is the easiest way to lower VRM temperature?
Move air across the area around the CPU socket. A small intake or exhaust fan aimed at the VRM heatsink, or a case layout with a clear front-to-back path, often helps more than any other single change. It costs little and does not involve opening the board. If temperatures stay high after that, look at power limits and heatsink contact next.
Does an AIO liquid cooler make VRM temperatures worse?
It can. A tower air cooler’s fan blows across the socket area as a side effect, while a liquid cooler’s radiator fan sits elsewhere, so less air reaches the VRM heatsinks. Many builders add a small fan or rely on the case exhaust to make up for it. The effect depends on case layout and board design.
Can I replace the thermal pads on my VRM?
It is possible, but it carries risk. It usually means removing the heatsink, which can void the warranty on some boards, and the wrong pad thickness leaves a gap or crushes components. Check your board maker’s policy first. If you proceed, match the original thickness and work with the system fully powered down and unplugged.
Will lowering CPU power limits reduce VRM heat?
Yes. VRM heat rises with the current your processor pulls, so a lower sustained power limit or a modest undervolt reduces the load on the power stages. You give up some all-core performance, though often a small amount in games. This is a useful fix when you cannot improve airflow, such as in a compact case.
Is a VRM heatsink fan worth buying?
It can be for hot-running setups, such as a high-power processor on a modest board in a closed case. For a mainstream chip on a mid-range board with decent case airflow, it is usually unnecessary. Confirm you actually have a VRM heat problem by logging temperatures before spending money.