Short answer: yes, a case fan helps VRM cooling when its airflow crosses the heatsink that sits beside the CPU socket, and it helps very little when it does not. The VRM is the group of power stages that converts the 12V supply into the low, high-current voltage a processor runs on. Every conversion wastes a little energy as heat, and that heat has to leave through a metal heatsink into the air. Case fans do not touch the chips; they change how warm the surrounding air is and how fast it moves. This guide explains where that matters, shows a simple heat-loss worked example with stated assumptions, and ends with a checklist so you can decide whether a fan change is enough or the board is the real limit. It rests on published specifications and manufacturer documentation, not lab runs by the editorial team.
How VRM heat actually leaves the board
A typical motherboard VRM is a row of power stages (MOSFETs plus drivers), chokes and capacitors arranged around the CPU socket. The stages are the hottest part. On most mainstream boards they carry a block of aluminum, sometimes linked by a heat pipe to a second block, and the surface of those blocks is what the air touches.
Heat travels in a chain: silicon, then the chip package, then a thermal pad, then the heatsink, then the air. A fan can only improve the last link. If the heatsink is a thin strip with little surface area, or the pad is poorly seated, fast air will still leave the chips hotter than you would like. If the heatsink is generous, the air link is often the bottleneck and a fan helps noticeably.
Air temperature matters as much as air speed. The heat leaves faster when the temperature gap between the heatsink and the air is large. A case that recirculates warm exhaust around the socket shrinks that gap, so a fan that removes warm air from the VRM zone can work like turning down the room thermostat for that one part of the board.
Which fans influence the VRM, and how
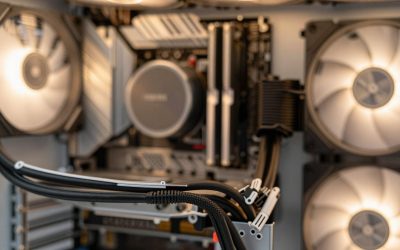
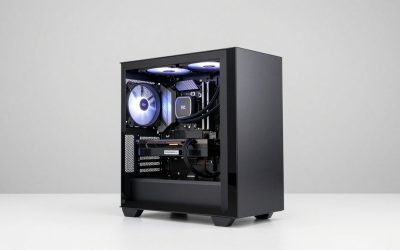
On a standard ATX tower the VRM wraps the top and left edges of the socket. That puts it close to the rear exhaust fan and the top of the case, and directly behind the CPU cooler. Three airflow sources matter most: the CPU cooler fan, the rear exhaust, and the front or top fans that feed fresh air into the zone.
A tower-style air cooler pushes air through its fins toward the rear of the case, and part of that stream spills over the VRM on the way. That is why boards in air-cooled builds often show lower VRM readings than the same board under a liquid cooler with a radiator at the front or top, where nothing blows across the socket area. If you run liquid cooling, a rear or top exhaust fan carries more of that job.
Front intake fans help indirectly. They supply cool air, but the stream reaches the VRM only after crossing the graphics card and drive area. In a high-airflow case with a mesh front it arrives still fairly cool. In a case with a solid front panel it may already be warm.
Fan placement versus likely VRM effect
| Fan position | What it does for the VRM | Typical strength of effect | Watch out for |
|---|---|---|---|
| Rear exhaust | Pulls air across the upper VRM block and ejects it | Often the most direct on ATX layouts | Weak or blocked rear vents reduce the benefit |
| Top exhaust | Lifts hot air that rises off the heatsink and CPU cooler | Moderate | A top radiator can block it entirely |
| Front intake | Brings in cooler air for the whole case | Indirect | Dust filters and solid panels cut airflow |
| CPU cooler fan (air cooler) | Spills part of its stream over the socket area | Often significant | Absent with many liquid coolers |
| Clip-on spot fan at the heatsink | Forces air straight across the fins | Strong for the sensor reading | Extra noise, cable clearance |
| Bottom intake | Feeds the graphics card more than the VRM | Minimal | Can disturb the main flow path |
The strength column is a general pattern rather than a number from any specific case. Your own layout, heatsink and fan speeds decide the real result.
Worked example: how much heat are we talking about?
Take an illustrative setup so the numbers are visible. Assumptions: a processor drawing 180W in a sustained all-core load, a VRM that is 88% efficient at that load, and a combined heatsink-to-air thermal resistance of 1.5 degrees Celsius per watt in still air and 1.0 with strong airflow. These are round teaching values, not data for any board.
Heat lost in the VRM equals input power minus output power. Input is 180 divided by 0.88, about 204.5W, so roughly 24.5W is lost as heat. That heat is spread over the power stages and shared with the inductors, but a heatsink that handles the bulk of it sees something close to that figure.
| Case airflow | Heatsink-to-air resistance (assumed) | Temperature rise over local air | With 40 C local air |
|---|---|---|---|
| Weak, stagnant | 1.5 C/W | about 37 C | about 77 C at the heatsink |
| Strong, directed | 1.0 C/W | about 25 C | about 65 C at the heatsink |
| Strong plus cooler local air (35 C) | 1.0 C/W | about 25 C | about 60 C at the heatsink |
The semiconductor junction sits hotter than the heatsink surface by an extra margin that depends on the pad and the package, so treat these figures as the part a fan can change. The takeaway is the shape of the result: better airflow cut roughly a dozen degrees in this scenario, and cooler local air cut a few more. That is a useful gain, yet it will not rescue a design that dissipates far more than the heatsink was sized for.
Conditions that decide whether you need extra airflow
- CPU power draw. VRM heat rises faster than linearly with load, because current losses scale with the square of current. A processor that sits at 65W rarely troubles a board; one that sustains 200W or more is a different story.
- Heatsink size. Entry boards sometimes use a small strip or only cover part of the stages. Boards aimed at high-core processors tend to use larger blocks.
- Cooler type. A tower air cooler provides incidental VRM airflow; a front-mounted radiator does not.
- Case design. Mesh panels and open vents help; sealed or glass-heavy fronts hold warm air near the board.
- Workload length. Short gaming bursts rarely heat-soak the VRM. Long renders, compiles or video exports do.
- Room temperature. Every degree of room warmth passes straight through to the heatsink.
Step-by-step VRM thermal checklist
- Confirm the sensor exists. Not every board exposes a VRM temperature. Check monitoring software and the board manual. Without a reading you are guessing.
- Record a baseline. Run a steady all-core load for 15 to 20 minutes at stock settings and note the highest VRM reading, CPU power and clock speed.
- Check for throttling. If the CPU clock sags while power drops, the board or CPU limits may be kicking in. Compare against the processor’s all-core behaviour on a cool day.
- Change one thing. Raise the rear fan speed, or add a top exhaust, or aim a small fan at the heatsink. Never change three variables together.
- Repeat the same load. Same duration, same room, same settings. Compare the peak.
- Judge the gap. A drop of ten degrees or more usually means airflow was a real limit. A drop of two or three means airflow is not your main constraint.
- Decide. If readings now sit comfortably under the limit the manufacturer documents, stop. If not, move to the next section.
Hardware constraints and trade-offs
Fans cost noise. A rear exhaust running at full speed to chase three degrees on a heatsink that was already fine is a poor trade. Use a fan curve tied to a motherboard or CPU sensor so it ramps only under sustained load.
Pressure balance is a quieter lever. More intake than exhaust pushes air out through gaps and keeps dust off filters if they are cleaned; more exhaust can pull dusty air through unfiltered openings. Either layout can serve the VRM so long as the air has a path across the socket area.
A clip-on spot fan is the bluntest tool and often the most effective one in small or passively cooled builds, but it adds clutter, and it must be secured so nothing can touch a spinning blade. Dust buildup in heatsink fins quietly undoes all of this, so a yearly cleaning with the system powered off and unplugged is part of the fix.
Symptom-to-fix table
| What you see | Likely cause | First move |
|---|---|---|
| VRM reading high only during long loads | Heat-soak in a low-airflow case | Raise exhaust speed or add a top exhaust |
| VRM hot with a front radiator cooler | No airflow across the socket area | Add or speed up a rear or top exhaust |
| Clock speed drops while the CPU is cool | VRM or power limit throttling | Check board limits, lower the CPU power cap |
| Readings barely move with fan changes | Heatsink or pad is the bottleneck | Check mounting, consider a sturdier board |
| Random shutdowns under load | Overheating protection or power fault | Stop, power down, inspect, contact support |
When to stop tuning and replace the part or call support
Stop adjusting fans and look at the hardware itself if the VRM keeps throttling at stock settings with strong airflow, if the system shuts down under normal load, or if you notice discoloration, a burnt smell or a swollen capacitor near the socket. Power the system off, unplug it, and do not keep running it to confirm the problem.
If the board is under warranty, contact the manufacturer before removing the heatsink, since opening it can void coverage. Follow the manufacturer’s instructions for any mounting or pad work. If the processor you chose draws more than the board’s documented support list allows, the fix is a better-matched board or a lower power limit, not another fan.
Related guides
- How To Check Motherboard Vrm Temperature In Hwinfo
- How To Clean Quest 3 Lenses And Facial Interface
- Micro Sd Cards For Samsung Galaxy Phones
Frequently asked questions
Does a case fan really lower VRM temperature?
Usually yes, as long as the moving air actually passes over the VRM heatsink. The power stages shed heat into a metal block, and the block hands that heat to the air around it. Cooler, faster air improves that handoff. A fan that pushes air somewhere else in the case does little for the VRM, so placement matters as much as fan count.
Is a rear exhaust fan or a top exhaust fan better for VRM cooling?
Both sit close to the VRM area on most ATX layouts, because the power stages wrap the CPU socket on the top and left side. A rear exhaust fan pulls air across the upper VRM block, and a top exhaust fan lifts hot air away from it. Which one helps more depends on case design and where your board puts its heatsinks, so compare readings with one change at a time.
Will adding more case fans fix a VRM that throttles?
Not if the cause is an undersized power design. If the VRM already runs hot with strong airflow, more fans only buy a few degrees. Throttling under sustained load with good airflow is a sign that the CPU draws more power than the board was built for, and the real fix is lowering CPU power limits or moving to a sturdier board.
Can I point a small fan directly at the VRM heatsink?
Yes, many builders clip a slim fan to a bracket or the cooler to blow across the heatsink, and it can lower the sensor reading in a cramped or passively cooled build. Keep blades and cables clear of other parts, avoid blocking the CPU power connectors, and mount it so it cannot touch anything that moves.
What VRM temperature is too high?
There is no single number, because MOSFET ratings, sensor placement and board design differ. Many manufacturers rate their power stages well above 100 degrees Celsius, but the reading you see may come from a different spot than the hottest component. Check the board maker’s documentation, and treat steady throttling, shutdowns or a burnt smell as a problem regardless of the displayed figure.