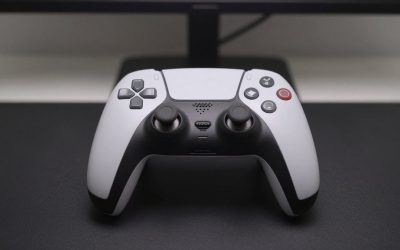
Sticky thumbsticks can turn a precise PS5 controller into a frustrating mess. That tacky film you feel is usually a mix of hand oils, sweat, dust, and leftover drink residue that migrates into the textured rim and the narrow gap around the base of the stick. If you try to power through it or clean it the wrong way, you will make it worse. Spraying cleaner directly onto the controller can force liquid under the analog module and cause stick drift or button failure. Using sharp tools to scrape off grime can tear the soft rubber cap or scratch the faceplate. Soaking the thumbstick or running the controller under water can corrode the internal potentiometers and void your warranty. The right approach is dry-first, then lightly damp, with a focus on lifting debris rather than pushing it deeper.
With the method below you can restore smooth, tack-free movement in about 10 to 15 minutes using inexpensive supplies, and add a protective option to keep the sticks cleaner longer. As of 2026, even well-used DualSense controllers respond very well to this routine if the analog modules themselves are still mechanically sound.
As an Amazon Associate we earn from qualifying purchases at no extra cost to you.


Our Top Picks


What You Need
Gather everything before you start so you are not leaving alcohol on the thumbstick for too long while you search for a swab. Use 90% or higher isopropyl alcohol for the best evaporation rate, and avoid bleach, ammonia, or hydrogen peroxide.
| Item | Why You Need It | Optional? |
|---|---|---|
| 90%+ isopropyl alcohol (8 oz bottle, $3 – $6) | Dissolves oils and sugary residue without leaving moisture behind | No |
| Lint-free microfiber cloths, 6 x 6 inches or larger ($5 – $10 for a 6-pack) | Wipes surfaces without shedding fibers that snag on textured rubber | No |
| Cotton swabs, pointed tip ($3 – $5 for 100-count) | Reaches the recessed ring around the thumbstick base | No |
| Soft-bristle toothbrush or small detail brush ($4 – $8) | Loosens dried grime from the grip texture without scratching | No |
| Wooden or plastic toothpicks | Gently lifts compacted dust from the crevice | Yes |
| Compressed air can, 8 oz ($7 – $12) with straw nozzle | Blows out loose debris before wet cleaning | Yes |
| Painter’s tape or masking tape | Helps lift lint and protects the faceplate if you are detail-oriented | Yes |
| Replacement thumbstick caps or grips, e.g., KontrolFreek FPS Freek Galaxy Black (includes 1 high-rise approx. 10.2 mm and 1 mid-rise approx. 6.5 mm, around $16) or eXtremeRate Black Replacement Thumbsticks (pair of dome caps, approx. 18 mm diameter, around $9) | Refreshes worn rubber or adds a raised grip to reduce future buildup | Yes |
Step-by-Step
-
Step 1: Power Down and Disconnect – 1 minute
Turn off the PS5 fully, not just rest mode. Disconnect the USB-C cable from the controller and power it off by holding the PS button until the light bar goes dark. If you use a charging station, remove the controller from it. This prevents accidental inputs and protects the electronics from any incidental moisture. If your controller has a headset or charging cable attached, unplug it and set the controller on a clean, dry microfiber cloth with good light.
-
Step 2: Dry Wipe and Air Out Loose Debris – 2 minutes
Use a dry microfiber cloth to wipe each thumbstick cap, rotating the stick to expose the sides. Then tilt the controller so the thumbstick faces slightly downward and give one or two short bursts of compressed air around the base ring, holding the can upright and 3 to 4 inches away. Keep bursts under 1 second to avoid moisture from the propellant. Follow with a dry, soft-bristle brush in a circular motion around the textured edge to dislodge dust. The goal is to remove as much dry grit as possible before introducing any liquid, so you do not create a paste that works its way under the module housing.
-
Step 3: Detail the Base Ring With a Dry Swab and Toothpick – 2 minutes
With the thumbstick pushed gently to one side, run a dry pointed cotton swab around the exposed crescent of the base ring. Rotate the stick and repeat until you have covered 360 degrees. If you see a dark line of compacted debris, lightly trace it with a wooden toothpick, using no pressure on the rubber itself. Wrap a small piece of masking tape around the tip of the toothpick for extra lifting power if needed. Do not insert the toothpick more than 2 to 3 mm into the gap and never pry upward on the stick.
-
Step 4: Clean the Cap With Lightly Dampened Alcohol – 3 to 4 minutes
Dampen, do not soak, a fresh swab or the corner of a microfiber cloth with 90%+ isopropyl alcohol. It should feel just moist, not dripping. If using a swab, press it against the bottle rim to remove excess. Wipe the top dome, the outer sidewall, and the concave edge where your thumb rests. For the textured grip pattern, use the soft brush lightly dampened with alcohol to agitate the residue, then immediately wipe clean with a dry cloth section. Work one thumbstick at a time and dry each one thoroughly before moving on. Avoid getting alcohol to pool around the base; if it does, blot it immediately with a dry swab.
-
Step 5: Clean the Housing Gap With a Controlled Swab – 2 to 3 minutes
Lightly moisten a new pointed swab with alcohol and squeeze out any excess with a clean cloth. With the thumbstick tilted, trace the inner rim where the plastic housing meets the rubber skirt. Use a rolling motion to pick up dissolved oils rather than scrubbing back and forth. Rotate the stick through its full range of motion while you work to expose all sides. Swap swabs as soon as the tip looks gray or yellowed. Finish by running a dry swab around the same path to absorb any remaining moisture. Let the controller sit for 2 minutes to ensure complete evaporation.
-
Step 6: Test Movement and Reassemble Grips – 2 minutes
Move each thumbstick slowly through full circles and clicks (L3/R3) to check for smoothness and tackiness. The motion should feel light and uniform with no catching or squeaking. Wipe once more with a dry microfiber cloth to remove any cotton fibers. If your original caps are slick, torn, or have lost their texture, this is a good time to press on fresh caps. Replacement caps like the eXtremeRate pair simply friction-fit over the stem, while add-on performance thumbsticks like the KontrolFreek FPS Freek Galaxy Black (one high-rise and one mid-rise in the package) snap over the existing cap to add height and grip. Both options weigh only a few grams and do not affect battery life or wattage draw, but they do reduce direct skin contact with the base rubber, which helps keep future stickiness at bay.
Mistakes to Avoid
Do not spray or pour isopropyl alcohol, window cleaner, or disinfectant directly onto the controller. Even a small amount can seep past the dust skirt and damage the analog sensors. Do not use 70% isopropyl alcohol if you can avoid it; the higher water content (30%) evaporates more slowly and increases the risk of moisture inside the module.
Skip abrasive pads,Magic Erasers, acetone, and bleach. They will dull the matte finish, discolor the plastic, and break down the soft rubber compound on the thumbstick. Avoid metal tools, needles, or razor blades for scraping. The thumbstick cap is approximately 18 mm in diameter and only about 7 to 8 mm tall, with a thin rubber layer that punctures easily.
Do not submerge the controller or hold it under running water, and never put it in a dishwasher or ultrasonic cleaner. Also, do not apply lubricant such as WD-40 or silicone oil to make the stick feel smoother; it attracts more dust and will make the stickiness worse within days.
Finally, do not reassemble or charge the controller while any part still feels damp. If you cleaned with the right amount of 90%+ alcohol, drying time is typically 2 to 3 minutes in a well-ventilated room. If you used too much liquid, allow 10 to 15 minutes and use a dry swab to wick moisture from the base ring.
How Often
For daily players (1 to 3 hours per day), do a quick 60-second dry wipe of both thumbsticks with a microfiber cloth after each session and a full alcohol detail as described every 2 to 4 weeks. For light or occasional use, a full clean every 6 to 8 weeks is usually enough. If you eat while gaming, use hand lotion, or play in a warm room where hands perspire more, shorten the interval to every 2 weeks.
Adding washable thumbstick grips can stretch the interval because they create a barrier between skin oils and the rubber texture. Remove and wash those grips weekly with mild soap and water, dry completely, and then reinstall. Replace the grips themselves every 6 to 12 months, or sooner if the texture flattens, as flattened texture holds onto oils more readily.
When to Call a Pro or Replace
Cleaning solves surface stickiness, but it will not fix mechanical wear. Seek repair or replacement if you notice any of the following after a thorough clean and dry: the thumbstick physically sticks in a tilted position and does not return to center, you feel grinding or hear clicking outside the normal L3 press, the stick drifts on screen without touch, or the rubber cap is torn and exposing hard plastic underneath.
A new DualSense controller typically costs $69 – $79 for standard colors and $74 – $84 for special editions, which is often more cost-effective than a professional analog module replacement that can run $40 – $60 plus labor. Replacement thumbstick caps (around $9 – around $16 for most aftermarket sets) are an easy DIY fix for cosmetic wear, but if drift or centering issues persist, the internal potentiometer module itself needs service. Sony support and reputable local game console repair shops can replace the module, usually within 30 to 60 minutes, but opening the controller yourself will void any remaining warranty.
FAQ
Why do my PS5 thumbsticks feel sticky even when my hands are clean?
The rubber compound is slightly porous and the concave texture traps microscopic layers of oil, even from clean hands. Over time, dust bonds to that oil and creates a tacky film. Heat makes it worse by softening the oils and rubber surface. Regular dry wiping prevents the bond from building up to a noticeable layer.
Can I use rubbing alcohol from the medicine cabinet?
Only if it is 90% or higher isopropyl alcohol and contains no added oils, fragrances, or moisturizers. Many drugstore bottles are 70% isopropyl alcohol with added water and sometimes glycerin. Those additives leave residue and dry slowly, which increases risk to the electronics. Check the label for “90% isopropyl alcohol” and “first aid antiseptic” with no other active ingredients.
Will cleaning fix stick drift?
Sometimes. If drift is caused by dust or debris around the sensor at the base of the stick, a careful dry and lightly dampened clean around the base ring can help. If the drift comes from worn internal components, often called potentiometer wear, cleaning the exterior will not resolve it. If drift remains after cleaning, test the controller in the PS5 Accessories menu or a controller tester and consider professional module replacement.
Are taller thumbstick attachments worth it for stickiness?
They can be. A taller cap like a high-rise attachment (about 10 mm of added height) gives you more leverage so you use less thumb pressure, which reduces oil transfer. It also covers the original rubber so the base cap stays cleaner. Choose a set with two heights, such as one mid-rise and one high-rise, so you can test comfort for aiming versus movement. Look for a textured, non-slip top and a snug friction fit that does not wobble during play.
Related guides
- Best Free MMOs on Steam: Subscription Limits, Pay-to-Win and Time Cost (2026)
- Best Free Horror Games on Steam: How to Pick One That Fits Your PC and Your Nerves (2026)
- Black Frame Insertion vs VRR: Which Smoothness Feature Should You Use?
- Best Webcams for Streaming: 11 Listings Compared by Resolution, Focus and Light (2026)