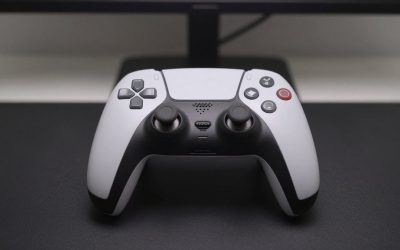
Stick drift on a Switch Pro Controller usually shows up as a character moving, a camera panning, or a menu selection wandering when you are not touching the thumbstick. It is often caused by dust, wear inside the analog-stick mechanism, moisture, or a damaged flex cable. A rushed repair can make the problem worse: stripped screws, torn ribbon cables, lost trigger springs, or excess cleaner inside the controller can turn a small fix into a replacement-level problem.
Start with the least invasive option: update the controller, recalibrate it, and clean around the stick. If drift remains, you can open the controller for a deeper cleaning or replace the joystick module. Replacement parts are relatively affordable in 2026, but the repair requires patience and the right small tools.
As an Amazon Associate we earn from qualifying purchases at no extra cost to you.

Our Top Picks

What You Need
| Item | Why | Optional? |
|---|---|---|
| Nintendo Switch console or compatible USB-C cable | For controller updates, stick calibration, and testing | No |
| Microfiber cloth | Removes loose dust and cleaner residue | No |
| 90% or higher isopropyl alcohol | Helps remove grime around the thumbstick base without leaving much moisture behind | Recommended |
| Compressed air or hand air blower | Blows out loose debris around the stick assembly | Recommended |
| Small Phillips screwdriver, PH00 or PH000 | Removes the controller shell screws | Needed for internal cleaning or replacement |
| Plastic pry pick or spudger | Separates the shell without gouging the plastic | Needed for internal cleaning or replacement |
| Fine tweezers | Handles screws, connectors, and small parts | Optional |
| Replacement joystick module | Replaces a worn or damaged analog-stick unit | Only if cleaning and calibration fail |
| Soldering iron, solder, and desoldering tools | Required for a soldered replacement module, such as some GuliKit TMR kits | Only for soldered repairs |
Step-by-Step
-
Confirm that the problem is truly stick drift (5 minutes)
Before opening anything, rule out a game-specific setting. Test the controller in more than one game, then go to the Switch Home menu. Open System Settings, select Controllers and Sensors, then choose Calibrate Control Sticks. Select the drifting stick and watch the indicator without touching it.
If the dot sits away from center, jitters, or moves on its own, the controller has a drift or calibration issue. If it looks centered but only one game misbehaves, check that game’s dead-zone and sensitivity settings first.
-
Update and recalibrate the controller (5 to 10 minutes)
In Controllers and Sensors, choose Update Controllers. Keep the controller close to the console or connect it with a USB-C cable during the update. When it is finished, return to Calibrate Control Sticks and follow the on-screen prompts.
Move the stick slowly to its full range in a circle, then release it. Calibration cannot repair worn electrical contacts, but it can correct an off-center reading caused by a software mismatch or a minor shift in the stick’s neutral position. Test the controller again after calibration.
-
Clean around the thumbstick without opening the controller (10 minutes)
Turn the controller off and disconnect it from its charging cable. Rotate the drifting thumbstick in a full circle while using short bursts of compressed air around the narrow gap at its base. Hold the can upright and keep the nozzle about 1 to 2 inches away; tilting the can can release cold liquid propellant.
Next, lightly dampen a cotton swab or the corner of a microfiber cloth with 90% or higher isopropyl alcohol. The material should be damp, not dripping. Pull the thumbstick gently to one side, wipe the exposed edge of the shaft and surrounding rim, then rotate and repeat around all sides. Let the controller dry for at least 15 minutes before powering it on.
Do not spray household lubricants, silicone spray, or large amounts of contact cleaner into the controller. These products can leave residue, damage nearby plastics, or wick onto the circuit board.
-
Open the controller carefully for a deeper inspection (20 to 30 minutes)
If basic cleaning does not help, work on a clean, well-lit table. Place a small tray nearby for screws. Remove the four Phillips screws from the rear shell. The screws are small, so press the screwdriver firmly into each head before turning to avoid stripping them.
Use a plastic pry pick along the seam to separate the rear cover slowly. Do not pull the halves apart quickly: the battery is connected inside. Lift the rear cover enough to locate the battery connector, then use a plastic spudger to gently disconnect it from the board. Set the battery aside on a nonmetal surface.
Take a quick photo before removing additional parts. It provides a useful reference for cable routing and screw locations during reassembly. Inspect the joystick area for visible dust, corrosion, sticky residue, or a partially unseated connector.
-
Clean the joystick assembly and check its connection (10 to 15 minutes)
Use compressed air to remove loose dust around the analog-stick module. Then apply a very small amount of isopropyl alcohol to a lint-free swab and clean the outer moving area of the stick mechanism. Avoid soaking the module. Let it air-dry completely for 20 to 30 minutes.
Check the joystick’s connector or flex cable, depending on your controller revision and replacement design. If a connector is present, make sure it is seated evenly and that its locking tab is not damaged. Never force a ribbon cable into place. If it does not slide in easily, it is likely misaligned or inserted upside down.
-
Replace the joystick module if drift persists (30 to 90 minutes)
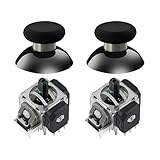
If the stick still drifts after cleaning, replacement is the most dependable repair. Standard replacement modules are often available around $15 to $25. The GuliKit TMR Joystick Replacement Module for Switch Pro Controller, for example, is listed around $17. Verify that any part you buy is specifically designed for the Switch Pro Controller rather than Joy-Con, Switch Lite, or another controller model.
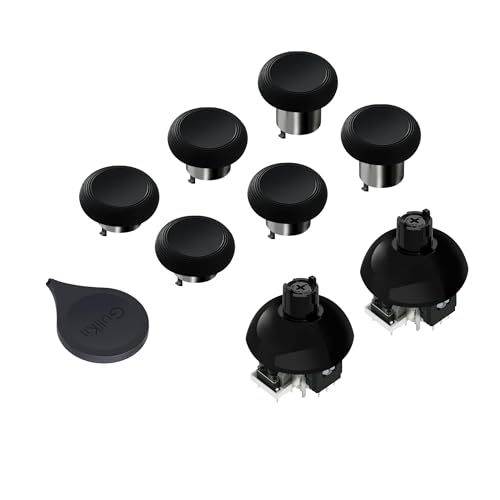
Some replacement modules use a plug-in or board-specific installation method, while others require desoldering the original joystick and soldering the new module in place. The GuliKit 720° Adjustable Tension TMR Magnetic Joystick Replacement Kit is listed around $19 and is sold as a soldering-required option. It may include thumbstick caps, but do not treat extra caps as a substitute for correct installation.
For soldered replacements, use a temperature-controlled iron, fine-tip soldering tools, and adequate ventilation. If you have not previously desoldered multi-pin components from a game controller board, this is the point to hand the job to a repair shop. Excess heat can lift copper pads from the circuit board, which is much harder to repair than stick drift.
-
Reassemble, calibrate, and test (15 minutes)
Reconnect the battery before closing the shell, then align the rear cover without pinching wires. Reinstall the screws until snug; do not overtighten them. The plastic posts can crack or strip under too much force.
Power on the controller and return to Calibrate Control Sticks. Check the center position, full travel in every direction, and button response. Test in a game with a visible aiming reticle or camera control. If the stick now centers properly but feels physically stiff or catches at one point, reopen the controller and check that the module, shell, and thumbstick cap are seated correctly.
Mistakes to Avoid
- Opening the controller before trying calibration. A software recalibration takes minutes and may solve a minor issue.
- Using WD-40, cooking oil, or heavy lubricant. These can attract more dust and may harm internal materials.
- Flooding the stick with cleaner. Use a lightly dampened swab, not a wet spray.
- Pulling the shell apart without disconnecting the battery. This can strain internal wiring.
- Mixing up screw lengths. Keep screws organized by location, especially if you remove internal brackets.
- Attempting solder work without the right equipment. A low-cost module can become an expensive board repair if pads are damaged.
How Often
Calibrate the controller whenever you notice a small center-position error or after a firmware update. For preventive care, wipe the controller exterior every few weeks and use compressed air around the thumbsticks every 2 to 3 months if it is used frequently. Deep internal cleaning is not routine maintenance; do it only when symptoms persist after external cleaning and calibration.
Heavy use, pets, food near the gaming area, and storage in dusty rooms can shorten the interval. Store the controller in a drawer, case, or covered charging area rather than leaving it on the floor or couch between sessions.
When to Call a Pro or Replace
Use a professional repair service if the controller has liquid damage, visible corrosion, torn ribbon cables, lifted solder pads, or drift that remains after a correctly installed replacement module. Professional help also makes sense if the repair requires soldering and you do not already own the necessary tools.
Replacement may be the better value if the controller also has battery problems, unreliable charging, cracked housing, failing buttons, or repeated connection dropouts. A single drifting stick is usually worth repairing; multiple unrelated faults can make a new controller the simpler long-term choice.
FAQ
Can you fix Switch Pro Controller drift without taking it apart?
Sometimes. Updating the controller, recalibrating the stick, blowing out dust, and cleaning carefully around the thumbstick base can resolve mild drift. If the internal sensor is worn, however, replacement is usually required.
Will recalibrating permanently fix stick drift?
Calibration can correct a slightly off-center reading, but it does not rebuild worn contacts or repair physical damage. If drift quickly returns after calibration, clean the stick or plan for module replacement.
Is isopropyl alcohol safe for cleaning a controller thumbstick?
Yes, when used sparingly. Choose 90% or higher isopropyl alcohol, apply it to a swab or cloth instead of pouring it into the controller, and allow the area to dry fully before use.
Are magnetic TMR joystick replacements worth considering?
TMR replacement modules are designed as an alternative to conventional analog-stick sensing systems and may appeal to owners repairing a worn controller. Confirm compatibility, installation method, and whether soldering is required before buying. A module that fits your skill level is more useful than a more advanced part you cannot install safely.
Related guides
- Best Free MMOs on Steam: Subscription Limits, Pay-to-Win and Time Cost (2026)
- Best Free Horror Games on Steam: How to Pick One That Fits Your PC and Your Nerves (2026)
- Black Frame Insertion vs VRR: Which Smoothness Feature Should You Use?
- Best Webcams for Streaming: 11 Listings Compared by Resolution, Focus and Light (2026)