Learning how to replace joystick modules on a drifting controller can save you from buying a whole new gamepad, but rushing the job creates bigger problems than drift itself. Forcing a module out at the wrong angle can crack the controller shell, bend the 12-pin connector, or strip the tiny screws that hold everything together. Using the wrong screwdriver will chew up the heads, leaving metal shavings inside the electronics. Worst of all, installing a module without properly seating it can cause constant phantom inputs, unresponsive dead zones, or even a short that fries the board. A careful, methodical swap takes minutes and restores pro-level accuracy; a sloppy one turns a $30 fix into a $200 replacement.
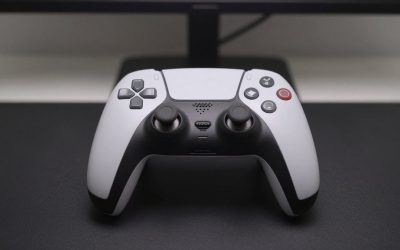
As of 2026, most modern pro-style controllers use user-replaceable stick modules specifically to address drift, so you no longer need to desolder components or void your warranty with a full teardown. This guide covers the slide-and-lock modular system found on controllers like the PlayStation DualSense Edge, which is the simplest and safest type for home repair.
As an Amazon Associate we earn from qualifying purchases at no extra cost to you.


Our Top Picks


What You Need
| Item | Why You Need It | Optional? |
|---|---|---|
| Replacement stick module(s) | Direct drop-in unit that contains the stick, potentiometer, and spring assembly. Modules for pro-style controllers typically measure about 1.6 x 1.2 x 0.8 inches and weigh 0.5 to 0.7 ounces. Expect to pay $10 to $35 per module, with official licensed modules at the higher end of the range. | No |
| Release lever or slider tool (often included with controller) | Unlocks the module carriage without prying. Some kits include a small plastic slider; otherwise a clean fingernail works. | No |
| Small Phillips #00 screwdriver | For removing the stick cap retention screw if your controller secures the module with screws rather than a lever. Avoid larger PH0 or PH1 drivers that will strip the head. | Yes – only for screw-secured designs |
| Microfiber cloth and isopropyl alcohol 70% or higher | Cleans dust and skin oils from the module bay and connector. Use sparingly on a cloth, never poured directly. | Yes |
| Small tray or magnetic mat | Keeps the tiny stick caps and screws from rolling away. Modules use screws as small as M1.4 x 3.5mm. | Yes |
| Anti-static wrist strap | Prevents electrostatic discharge (ESD) to the controller board. Low wattage electronics like this are sensitive to as little as 100 volts of static. | Yes – recommended in dry environments |
Step-by-Step
Step 1: Power Down and Disconnect (2 minutes)
Turn off your controller completely and disconnect it from the console and charging cable. For wireless controllers, hold the PS or Home button for 10 seconds until the light bar goes dark. Unplug any USB-C cable from the controller. Working on a live controller risks shorting the stick connector if a tool slips. Place the controller face-up on a clean, dry table with good lighting.
Step 2: Remove the Stick Cap and Expose the Module (1 minute)
Gently pull the rubber or plastic stick cap straight up. It is friction-fit and should pop off with 1 to 2 pounds of pressure. Do not twist or lever it sideways. Set it in your tray. You will now see the black plastic joystick module housing and the release mechanism. On lever-style controllers, you will see a small metal or plastic release switch directly in front of or behind the stick shaft.
Step 3: Release the Locking Mechanism (1 minute)
Slide the release lever toward the center of the controller and hold it. You should feel a light click as the internal latch disengages. On screw-secured designs, remove the single retaining screw at the base of the module. Keep pressure on the lever; do not force the module up while the lock is still engaged. If it does not slide smoothly, re-check the lever position rather than pulling harder.
Step 4: Lift and Remove the Old Module (1 minute)
With the lever still held, grip the module by its hard plastic edges, not the stick shaft, and pull straight up with even pressure. The module is connected via a 12-pin board-to-board connector underneath, so keep the motion perfectly vertical. It should lift out with minimal resistance. If you feel significant drag, stop and verify the lock is fully open. Set the old drifting module aside.
Step 5: Inspect and Clean the Bay (2-3 minutes)
Look inside the empty bay for dust, lint, or debris. Shine a phone flashlight at an angle to see the gold connector pins at the bottom. If needed, lightly dampen a microfiber cloth or cotton swab with isopropyl alcohol and wipe the plastic walls of the bay. Do not touch the gold pins with your fingers or wet them directly. Allow 30 seconds for any alcohol to fully evaporate before continuing.
Step 6: Install the New Joystick Module (1-2 minutes)
Unbox your new module and align it carefully. The connector is keyed so it only fits one way; the stick should face the same direction as the one you removed, with the flat side of the connector matching the slot. Hold the release lever open again and lower the new module straight down until it seats flush with the controller housing. You should feel a subtle click as the pins engage. Do not press on the stick shaft to seat it; press gently on the flat top housing around the stick base.
Step 7: Lock, Cap, and Test (3-5 minutes)
Release the locking lever so it snaps back to the locked position, or re-insert the retaining screw and tighten to just snug, about 2 to 3 inch-pounds. Do not overtighten. Press the stick cap back on until it clicks. Power on the controller and test. Navigate to your console’s controller settings or Accessories menu and open the stick calibration or test screen. Slowly rotate each new stick in a full circle and let it return to center. It should snap back to 0,0 without drifting and show smooth, consistent travel from edge to edge. Test in a game with fine aim control to confirm drift is gone.
Mistakes to Avoid
Forcing the module at an angle. Board-to-board connectors have pins spaced less than 0.5mm apart. Tilting the module while pulling or pressing can bend a pin and cause permanent connection issues.
Using the wrong tools. A PH1 screwdriver or a metal pry tool will strip screws and gouge plastic. Stick to a proper PH00 driver and use only fingers or plastic tools to lift the module.
Touching the electrical contacts. Oils from your skin accelerate corrosion on the gold-plated connector. Always hold modules by the plastic housing.
Over-tightening screws. The screws thread into soft plastic bosses. A quarter-turn past snug is enough to strip them, leaving the module loose and wobbling during play.
Buying the wrong module type. Standard controllers with soldered sticks are not interchangeable with drop-in modular systems. For example, a stick module replacement for PS5 DualSense Edge controller is specifically keyed for that model and will not fit a standard DualSense. Similarly, a for PS5 analog stick replacement for Sony Playstation 5 PS5 joysticks designed for soldering is not a tool-free swap. Check your exact controller model number on the back label before ordering.
How Often Should You Replace Joystick Modules?
There is no fixed schedule. For average players averaging 10 to 15 hours per week, a module typically lasts 12 to 18 months before dust ingress or potentiometer wear causes noticeable drift. Competitive players or those playing high-intensity stick-heavy games may see drift in 6 to 9 months. Replace a module only when you see symptoms: the character or cursor drifts with no input, you need to increase dead zone above 0.10 to compensate, or the stick fails to return cleanly to center in the calibration screen. Keeping modules clean and storing the controller in a case can extend life by several months.
When to Call a Pro or Replace the Controller
A tool-free module swap solves mechanical drift, but it will not fix deeper electronic faults. Seek professional repair or consider a full replacement if any of the following apply: drift persists immediately after installing a known-good new module, the connector pins in the bay are visibly bent, corroded, or missing, the controller has liquid damage or a swollen battery, buttons or triggers also malfunction, or the locking lever itself is broken and will not hold a module in place. If professional repair is quoted above $60 to $80, compare that to the cost of a new pro controller, which typically ranges from $150 to $220, before proceeding.
FAQ
How do I know the drift is from the module and not software?
Test the controller on two devices, such as your console and a PC or phone via Bluetooth. Open the system-level stick tester. If the stick visually drifts off-center with no touch on both devices, and recalibrating or resetting the controller does not fix it, the hardware module is almost always the cause. If drift only appears in one game, check that game’s dead zone and sensitivity settings first.
Do I need to replace both joystick modules at once?
No. Drift is almost always isolated to one stick, most often the left stick because it handles movement. You can replace just the drifting side and keep the other as a spare. Many players keep one spare module on hand so they can swap in under two minutes when drift appears mid-session.
Will a third-party module feel the same as the original?
Quality varies. Low-priced modules in the around $11 to $18 range may have slightly different tension, about 10 to 15 percent lighter or stiffer, and may develop drift sooner. Modules in the $30 to $35 range that are marketed as compatible with PlayStation Dual Sense Edge stick module specifications are usually tuned to closer tolerances for centering force and travel range. Read the compatibility listing carefully and keep your receipt in case calibration feels off.
Do I need to recalibrate after swapping?
Most modular controllers auto-calibrate when you install a new module and power cycle. After installation, turn the controller off and on once, then run the built-in calibration if your console offers it. On PlayStation, go to Settings, Accessories, Controller, and follow the stick calibration prompts. This ensures the center point is registered correctly and you get full 360-degree range without dead spots.
Related guides
- Best Free MMOs on Steam: Subscription Limits, Pay-to-Win and Time Cost (2026)
- Best Free Horror Games on Steam: How to Pick One That Fits Your PC and Your Nerves (2026)
- Black Frame Insertion vs VRR: Which Smoothness Feature Should You Use?
- Best Webcams for Streaming: 11 Listings Compared by Resolution, Focus and Light (2026)