Upgrading your PlayStation 5 storage is one of the most practical home-tech improvements you can make. With modern game installations routinely exceeding 100 gigabytes, the console’s built-in 825-gigabyte solid-state drive (SSD) fills up incredibly fast. Fortunately, Sony built an expansion bay directly into the hardware, allowing you to install a high-speed M.2 NVMe SSD to expand your storage capacity by 1 terabyte, 2 terabytes, or even 4 terabytes.
However, this is not a plug-and-play upgrade where you can afford to cut corners. Installing an M.2 SSD without a proper heatsink—or installing it incorrectly—can lead to severe consequences. Because the PS5 operates at high performance, drawing up to 350 watts of power, the expansion bay gets incredibly hot. Without efficient heat dissipation, your new SSD will quickly overheat, triggering thermal throttling. This drops your read speeds from the required 5,500 megabytes per second down to a crawl, causing stuttering, game crashes, and potentially permanent damage to a drive that cost you anywhere from $60 to $150.
As an Amazon Associate we earn from qualifying purchases at no extra cost to you.


Furthermore, simple physical mistakes can ruin your console. Using the wrong tools can easily strip the tiny, proprietary screws inside the bay, trapping your drive forever. Dropping a screw into the fan housing or generating static electricity can short-circuit the entire motherboard, turning your $500 console into an expensive paperweight. Following a precise, methodical installation process ensures your system runs cool, quiet, and lightning-fast.
Our Top Picks
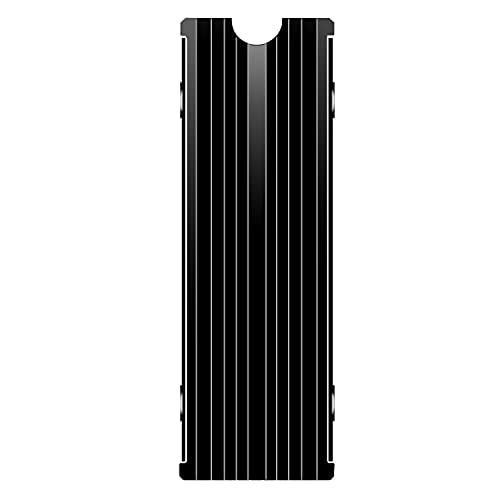 M.2 Heatsink Cooler 2280 SSD Double-Sided Heat Sink3"L x 0.95"W x 0.4"H3 x 0.95 x 0.4 inches0.1 PoundsCheck on Amazon

What You Need
Before clearing off your workspace, gather the necessary tools and hardware. Having everything prepared beforehand prevents static build-up from walking around and keeps your components safe from accidental drops.
| Item | Why | Optional? |
|---|---|---|
| PS5-Compatible M.2 SSD | Must be PCIe Gen4 x4 with a minimum sequential read speed of 5,500 MB/s. Sizes can range from 250 GB to 8 TB. | No |
| M.2 Heatsink | Dissipates heat from the flash memory chips. Can be pre-installed on the SSD or purchased separately (e.g., a budget-friendly around $5 double-sided heatsink or a premium around $13 Sabrent SB-PSHS heatsink). | No |
| #1 Phillips Screwdriver | The exact size needed for the PS5 outer plate screw and the internal M.2 drive screw. Using a #0 or #2 will strip the heads. | No |
| Microfiber Cloth or Clean Towel | Provides a soft, non-slip, anti-static surface to lay your PS5 down on, preventing scratches to the white outer plates. | No |
| Small Magnetic Dish or Tape | Holds the tiny screws secure so they do not roll off the table or drop inside the console’s fan. | Yes |
Step-by-Step
Set aside a clean, well-lit workspace, such as a wooden dining table or a clean desk. Avoid working on carpets to prevent static electricity discharge.
Step 1: Prep and Safety (Time: 5 minutes)
Turn off your PS5 completely. Do not leave it in Rest Mode. Unplug the power cable, HDMI cable, and any USB accessories. Press the power button once after unplugging to drain any residual electricity stored in the internal capacitors. Let the console sit for 10 minutes to cool down completely, as the internal metal plates can retain significant heat. Place your microfiber cloth flat on your work surface and lay the PS5 down so that the side with the disc drive (or the side where the disc drive would be on the digital edition) is facing down. The PS5 logo on the top cover should be facing down, and the power button should be facing away from you.
Step 2: Remove the PS5 Cover (Time: 5 minutes)
Position yourself at the top-right corner of the console (where the curved edge is). Gently grip the edge of the cover and lift it up slightly (about a quarter of an inch) to release the plastic hooks from the chassis. While lifting, slide the cover toward the bottom of the console (where the stand attaches). The cover should slide off smoothly with minimal force. Do not yank it upward violently, as this can snap the delicate plastic guide pins underneath.
Step 3: Access the Expansion Bay (Time: 3 minutes)
With the cover removed, locate the rectangular metal expansion slot cover near the cooling fan. It is secured by a single silver screw marked with the iconic PlayStation controller symbols (triangle, circle, cross, square). Use your #1 Phillips screwdriver to remove this screw. Lift the metal cover away and set it aside safely in your magnetic dish. Inside the bay, you will see a green printed circuit board with several screw holes labeled 30, 42, 60, 80, and 110 (representing SSD lengths in millimeters). At the “110” position, you will find a small silver screw and a metal ring spacer underneath it. Remove this screw and spacer, and set them aside.
Step 4: Attach the Heatsink to the SSD (Time: 7 minutes)
If your M.2 SSD did not come with a pre-installed heatsink, you must install one now.
If you are using a standard double-sided heatsink (typically priced around $5), peel the plastic protective film off the included thermal silicone pads. Place one pad inside the bottom metal tray of the heatsink, lay your SSD on top of it, place the second thermal pad on top of the SSD chips, and slide or screw the top metal cover of the heatsink into place.
If you are using a specialized cover-replacement heatsink like the Sabrent SB-PSHS (priced around $13), you will apply the thermal pad directly to the SSD, insert the SSD into the PS5 slot first, and then use the Sabrent heatsink as the actual expansion bay cover, screwing it directly into the console frame. This design offers a massive surface area for heat dissipation.
Step 5: Position the Spacer and Insert the SSD (Time: 5 minutes)
Take the small metal spacer you removed in Step 3 and place it directly over the hole that matches the length of your SSD (almost all consumer PS5 SSDs are size 2280, so place the spacer in the “80” hole). Hold the M.2 SSD by its edges; do not touch the gold contact pins. Insert the SSD into the terminal connector at a 30-degree angle. Push firmly until the gold pins are fully seated and no longer visible. Gently push the rear end of the SSD down so it rests flat on top of the metal spacer. Insert the silver screw back into the spacer and tighten it with your #1 screwdriver until it is snug. Do not over-tighten, as you can crack the SSD circuit board.
Step 6: Reassemble and Power Up (Time: 5 minutes)
If you used a standard heatsink, put the original metal expansion bay cover back in place and secure it with the PlayStation-symbol screw. If you used a cover-replacement heatsink like the Sabrent model, screw that directly over the bay instead. Align the hooks of the main white PS5 plastic cover with the slots on the console chassis, about an inch from the top. Slide the cover upward until you hear a firm click, indicating it is locked back into position. Reconnect all cables, plug in the power cord, and turn on your console. A screen will automatically appear prompting you to format the M.2 SSD. Select “Format M.2 SSD” using your controller, and the console will test its read speed before taking you to the home dashboard.
Mistakes to Avoid
- Omitting the Metal Spacer: The most common error is leaving the silver spacer out or screwing the SSD directly to the bottom of the bay without it. This bends the SSD at a sharp downward angle, which will crack the drive or snap the gold pins when you tighten the screw.
- Leaving Protective Film on Thermal Pads: Thermal silicone pads always come with thin plastic protective liners on both sides. Leaving this plastic on acts as a heat insulator rather than a conductor, causing your SSD to overheat within minutes of launching a game.
- Using the Wrong Screwdriver: The screws Sony uses are notoriously soft. Using a flathead screwdriver or a worn-out #0 Phillips driver will instantly strip the screw heads, requiring professional extraction.
- Exceeding Height Limits: The PS5 expansion bay has a strict height limit of 11.25 millimeters (0.44 inches) overall. If you buy a massive PC-focused heatsink, the metal cover will not fit back on, which disrupts the vacuum-sealed negative pressure cooling system of the console.
How Often
The physical installation of an M.2 SSD is a one-time project. Once the drive is securely mounted and formatted, you do not need to remove it unless you are upgrading to a larger capacity. However, dust accumulation can severely hinder thermal performance. It is wise to remove the outer white cover of your PS5 every 6 to 12 months to gently vacuum out the dust catchers and inspect the expansion bay area. By the time we reach 2026, game file sizes will likely demand even larger capacities, but the physical cleaning routine remains the same to keep your hardware running smoothly.
When to Call a Pro or Replace
While this is a straightforward DIY project, some scenarios require professional assistance or hardware replacement. If you strip the internal M.2 screw to the point where it cannot be turned, do not try to drill it out yourself; a technician can extract it safely without getting metal shavings in the motherboard. If your console fails to turn on entirely after installation, or if you get a constant black screen, you may have caused static damage or damaged the port pins, which requires motherboard repair. Finally, if your PS5 repeatedly shows a “Database Corrupted” error or fails to format the drive despite it being seated correctly, the SSD itself is likely defective and should be returned or replaced under its manufacturer warranty.
FAQ
Can I use any M.2 SSD in my PS5?
No. The PS5 has strict hardware requirements. The drive must be a PCIe Gen4 x4 M.2 NVMe SSD. Older Gen3 drives will physically fit in the slot but the console will refuse to boot past the warning screen. Additionally, the drive must have a sequential read speed of at least 5,500 MB/s to load modern games without stuttering.
Does installing an M.2 SSD void my PS5 warranty?
No, installing an M.2 SSD does not void your PlayStation 5 warranty. Sony designed the console with a user-accessible expansion bay specifically for this purpose. However, any physical damage you cause to the console during the installation process—such as scratching the motherboard, breaking the fan, or stripping screws—is not covered under the standard warranty.
What happens if I install an M.2 SSD without a heatsink?
If you run an M.2 SSD without a heatsink, the drive will quickly reach temperatures exceeding 80 degrees Celsius (176 degrees Fahrenheit). To protect itself from physical destruction, the SSD will trigger thermal throttling, reducing its performance to a fraction of its normal speed. This leads to severe lag, texture pop-in, and eventual game crashes.
Can I use a heatsink that is taller than 11.25mm if I leave the metal cover off?
It is highly discouraged. While some users leave the expansion bay cover off to fit oversized heatsinks, this disrupts the engineered airflow design of the PS5. The console relies on a sealed channel to pull air across the expansion bay. Leaving the cover off can cause heat to build up in other parts of the console, leading to system-wide overheating.
Related guides
- Best Free MMOs on Steam: Subscription Limits, Pay-to-Win and Time Cost (2026)
- Best Free Horror Games on Steam: How to Pick One That Fits Your PC and Your Nerves (2026)
- Black Frame Insertion vs VRR: Which Smoothness Feature Should You Use?
- Best Webcams for Streaming: 11 Listings Compared by Resolution, Focus and Light (2026)