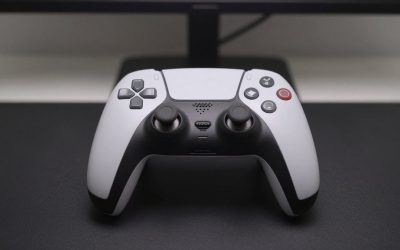
The Sony DualSense Edge controller is a premium piece of home entertainment hardware, weighing in at a substantial 325 grams (11.5 ounces). Its standout feature is its modularity, designed specifically to combat the industry-wide headache of analog stick drift. Instead of tossing out a $200 controller or attempting risky soldering work on delicate internal motherboards, you can swap out the individual analog sticks.
However, understanding how to replace thumbstick modules on ps5 dualsense edge safely is crucial. If done incorrectly, you risk snapping the plastic retaining clips, stripping the delicate alignment tracks, or bending the internal 10-pin connector layout. This guide will walk you through the precise, delicate process of swapping your modules to keep your gaming setup running flawlessly without damaging your premium gear.
As an Amazon Associate we earn from qualifying purchases at no extra cost to you.


Our Top Picks


What You Need
To perform this replacement, you do not need heavy-duty workshop tools, but having a clean, dedicated workspace is essential. Place a soft cloth down on your desk or table to avoid scratching the high-gloss black and white plastic of the controller shell during the swap.
| Item | Why You Need It | Optional? |
|---|---|---|
| Replacement Stick Module (Official: $20 – $30 range | Magnetic: $15 – $25 range) |
Restores smooth, drift-free analog inputs. You can choose official Sony carbon-potentiometer modules or third-party TMR magnetic modules. | No |
| Plastic Pry Tool or Spudger | Helps safely pop loose the front cover plate without scratching or gouging the controller’s plastic housing. | Yes (fingernails can work, but tools prevent damage) |
| Microfiber Cloth | Provides a soft, scratch-free resting surface for the controller and is used to clean dust out of the module bay. | No |
| Can of Compressed Air | Clears out accumulated skin flakes, dust, and pet hair from the exposed electronic bay before inserting the new module. | Yes |
Step-by-Step
Follow these steps in order to safely remove your worn-out analog sticks and install the fresh replacements.
Step 1: Power Down and Disconnect (Est. Time: 1 Minute)
Before touching any internal components, ensure the DualSense Edge is completely powered off. Disconnect the USB-C braided cable from the front of the controller. Press and hold the PlayStation button on the controller for approximately 10 seconds until the light bar turns off completely. Performing a hardware swap while the controller is receiving power or actively syncing can cause firmware glitches or minor electrical shorts across the connector pins.
Step 2: Release the Front Cover Plate (Est. Time: 2 Minutes)
Turn the controller over so the back is facing you. Locate the small black slide switch labeled “RELEASE” positioned near the rear paddle button slots. Slide this switch to the right. This mechanical release pops the glossy black front bezel plate (which weighs roughly 15 grams or 0.5 ounces) slightly loose from the main controller chassis. Flip the controller back over, gently lift the cover plate upward from the bottom grip area, and set it aside on your microfiber cloth.
Step 3: Lift the Metal Release Levers (Est. Time: 2 Minutes)
With the front faceplate removed, you will see the two individual joystick modules sitting in their respective bays. On the sides of each module, there are silver metal wire retaining levers. These levers lock the modules flat against the electrical contact board. Gently lift the metal lever on the module you wish to replace, pivoting it upward until it clicks into a vertical position. This releases the downward clamping force holding the module in place.
Step 4: Slide the Old Module Out (Est. Time: 1 Minute)
Each module measures approximately 1.5 x 1.2 x 1.1 inches. Grip the plastic housing of the thumbstick module firmly by its sides. Do not pull up by the thumbstick cap itself, as this can pull the cap off the dome stem. Instead, slide the entire plastic module housing straight forward, out of the controller bay along its guide rails. This action smoothly disconnects the module’s female port from the controller’s fixed 10-pin male connector block.
Step 5: Clean the Module Bay (Est. Time: 1 Minute)
Over months of gameplay, dust, dead skin cells, and pet hair can slip through the gaps around the thumbsticks and settle in the bay. Before inserting your new $20 to $30 module, use a brief blast of compressed air to clear the bay. Hold the can upright and at least six inches away from the controller to prevent liquid propellant from spraying onto the delicate electrical contacts.
Step 6: Slide in the New Module and Lock (Est. Time: 2 Minutes)
Align the guide grooves on the bottom of your new replacement module with the plastic rails inside the controller bay. Slide the module straight back into the bay until it sits completely flush. Once seated, push the silver metal wire retaining lever back down flat against the controller body until it snaps securely into place. This lock ensures the 10-pin connection remains stable during intense gaming sessions.
Step 7: Reattach the Faceplate and Test (Est. Time: 2 Minutes)
Take the glossy black front cover plate and align the plastic tabs at the top of the cover with the corresponding slots near the touchpad. Lower the bottom of the cover plate down onto the grips and press firmly until you hear a solid click. Plug the controller into your console or PC to verify the connection. Go to your system settings to calibrate the new stick and ensure the center deadzones are perfectly aligned.
Mistakes to Avoid
- Forcing the Release Switch: The mechanical “RELEASE” slider on the back of the controller is connected to a small plastic spring latch. If it feels stiff, do not force it with a screwdriver or tool. Gently press down on the black front faceplate while sliding the switch to relieve pressure on the internal latch mechanism.
- Using Metal Tools to Pry: Avoid using metal flathead screwdrivers or knives to pop off the front bezel. Metal will easily gouge the soft ABS plastic of the controller housing, leaving permanent, sharp scars on your premium accessory. Stick to plastic pry tools or your fingernails.
- Misaligning the Pins during Insertion: Never force a module down into the bay if it does not slide in smoothly. Forcing it can bend the gold-plated connector pins inside the controller, which can permanently ruin the main board. If you feel resistance, slide the module out, check the alignment rails, and try again.
- Hot-Swapping: Always power off the controller before swapping modules. Swapping the hardware while the device is actively transmitting data can corrupt the controller’s internal calibration profile.
How Often Should You Replace Modules?
The replacement frequency depends entirely on your gaming habits, playstyle intensity, and the type of modules you use. Standard carbon-potentiometer modules have physical contact pads that naturally wear down over time. If you play competitive shooters or action games for 15 to 20 hours a week, you can expect to replace standard modules every 12 to 18 months to maintain absolute precision.
By 2026, as many original DualSense Edge controllers log years of regular use, switching to modern magnetic TMR (Tunnel Magnetoresistance) or Hall Effect modules is becoming a popular choice. These magnetic options do not rely on physical friction plates, meaning they can theoretically last for years without developing stick drift, reducing your long-term maintenance needs to simple cleaning.
When to Call a Pro or Replace the Controller
While the DualSense Edge is highly user-serviceable, some issues cannot be fixed with a simple module swap. You should consider professional repair or a full controller replacement if you experience the following:
- Damaged Interface Pins: If the copper or gold-plated pins inside the controller’s receiving bay are bent, broken, or corroded, a new module will not establish an electrical connection. Repairing these pins requires advanced microsoldering.
- Broken Release Mechanism: If the internal plastic slider spring on the back of the controller snaps, the front faceplate will not lock down, leaving your modules exposed and unstable.
- Severe Battery Degradation: If your controller no longer holds a charge for more than an hour, or if the battery begins to swell (which can warp the outer shell), it requires professional battery replacement or complete disposal.
FAQ
Can I use standard DualSense modules in the DualSense Edge?
No. Standard PS5 DualSense controllers use analog stick assemblies that are soldered directly onto the main motherboard. The DualSense Edge uses proprietary, modular slide-in cartridges equipped with a 10-pin quick-connect interface. They are not interchangeable.
Do magnetic replacement modules completely eliminate stick drift?
Yes, magnetic modules (such as those using TMR or Hall Effect technology) eliminate mechanical stick drift caused by worn-down carbon tracks. Because they use magnetic sensors to measure stick position without physical contact, they do not wear down. However, they can still experience minor centering deviations if exposed to strong external magnetic fields.
Do I need to recalibrate the controller after inserting a new module?
Yes, it is highly recommended. While the module is plug-and-play, slight manufacturing tolerances mean the center point may differ by a few percentage points. Connect your controller to your PS5 console, navigate to Settings > Accessories > DualSense Edge Wireless Controller, and run the stick sensitivity and deadzone calibration tool to ensure perfect alignment.
Will replacing the thumbstick modules void my warranty?
No. Sony specifically designed the DualSense Edge to have user-replaceable stick modules. Replacing these modules using the official rear release latch is considered standard user maintenance and does not void your manufacturer’s warranty, provided you do not disassemble the main body of the controller beyond the faceplate.
Related guides
- Best Free MMOs on Steam: Subscription Limits, Pay-to-Win and Time Cost (2026)
- Best Free Horror Games on Steam: How to Pick One That Fits Your PC and Your Nerves (2026)
- Black Frame Insertion vs VRR: Which Smoothness Feature Should You Use?
- Best Webcams for Streaming: 11 Listings Compared by Resolution, Focus and Light (2026)