
Setting up SteamVR properly means doing four things in the right order: confirming your PC meets your headset’s requirements, completing room setup with an accurate boundary, configuring video and audio output before you configure controllers, and testing tracking in the actual space you’ll play in rather than just the setup screen. Skipping ahead to launch a game before finishing these steps is the most common reason people report shaky tracking or audio problems that aren’t actually SteamVR’s fault.
Quick answer
Install SteamVR through Steam, connect your headset following its manufacturer’s pairing instructions, then run room setup in the actual play space with the lighting you’ll normally use. Configure video and audio in SteamVR’s settings before launching your first game, and only then fine-tune controller bindings per game as needed.
| Step | When to do it | Why it matters |
|---|---|---|
| Room setup | First launch, and after any furniture move | Prevents boundary warnings mid-game |
| Video settings | Before first game launch | Sets a stable performance baseline |
| Audio routing | Before first game launch | Avoids sound playing from the wrong device |
| Controller check | After video/audio, before playing | Confirms tracking works before you’re mid-session |
Confirming your PC and headset are ready
Before installing anything, check your headset manufacturer’s published minimum and recommended specs against your PC’s GPU, CPU, and available USB or DisplayPort connections, since VR headsets are more sensitive to bandwidth and port type than a typical monitor. A headset that technically plugs in but is connected through the wrong port type or a hub can cause tracking dropouts that look like a software problem but aren’t.
If you’re still deciding on hardware, our guide to VR-ready gaming PCs breaks down what actually matters for headroom versus games that will stress your system in a few years, not just today.
Once your PC checks out, install Steam if it isn’t already installed, then install SteamVR itself from the Steam store as a standalone application. Most headset manufacturers also require you to install their own companion software alongside SteamVR, which handles firmware updates and headset-specific settings that SteamVR itself doesn’t control.
Plug in your headset following the manufacturer’s specific instructions, since cable routing and port choice vary by headset model. Give the initial firmware check and driver installation time to complete fully before moving to room setup, as interrupting this step is a common cause of headsets that show as connected but won’t track properly.
Running room setup correctly
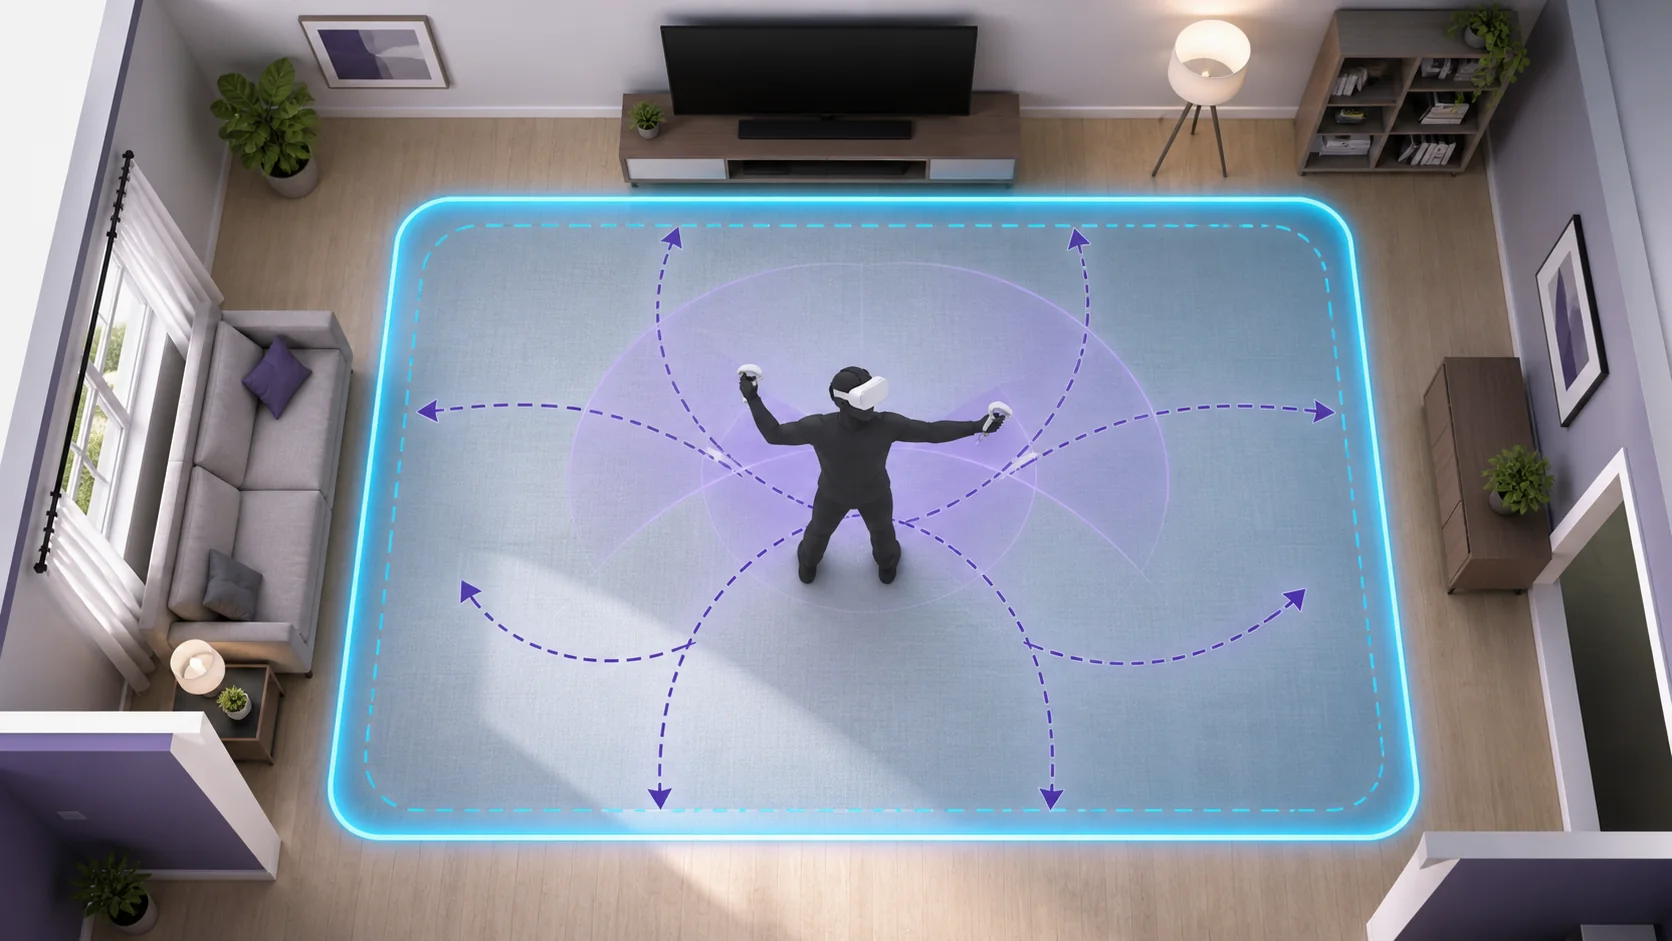
Room setup, sometimes called boundary or chaperone setup depending on your headset, defines the safe play area SteamVR uses to warn you before you walk into furniture or walls. Run this in the lighting conditions you’ll actually play in, not brighter or darker, since inside-out tracking headsets in particular rely on visible room detail that changes with lighting.
Walk the full perimeter of your intended play space slowly and completely rather than rushing through it, since an incomplete boundary trace is one of the most common causes of the boundary appearing in the wrong place once you’re in a game. If your headset supports both a stationary and room-scale mode, choose room-scale if you have at least the manufacturer’s minimum recommended clear floor space; stationary mode if you’re playing primarily seated.
For sim racing or seated setups specifically, boundary accuracy matters less than making sure your headset can see your controllers or wheel without losing tracking, which is a related but separate issue covered in our guide to VR headsets for sim racing.
Redo room setup any time you move furniture, rearrange the play space, or notice the boundary appearing in the wrong location in a game. This takes under two minutes and resolves the large majority of “my play space feels wrong” reports.
Configuring video settings before your first game
SteamVR’s video settings control render resolution, refresh rate, and related display behavior sent to your headset. Check these before launching your first game rather than after, since a resolution set far above what your GPU can sustain will make your very first VR impression a stuttery one, which can be discouraging even if the fix is simple.
SteamVR calculates a recommended render resolution based on your headset and detected GPU, and that default is a reasonable starting point for most players. If your headset supports multiple refresh rates, start at the manufacturer’s default rather than the maximum, since higher refresh rates demand more GPU headroom and aren’t worth the tracking or comfort tradeoff if your system can’t sustain them consistently.
Motion smoothing, sometimes called reprojection depending on the platform, helps maintain a smooth visual experience when your GPU can’t quite hit the target frame rate every frame. Leaving this on automatic is the right call for most setups, since it only engages when needed rather than always processing extra frames. Our deep dive on VR frame time and reprojection explains what’s actually happening under the hood if you want to understand why frame consistency matters more than raw frame rate in VR specifically.
Avoid changing multiple video settings at once when troubleshooting; adjust one variable, test, then move to the next so you know which change actually fixed or broke something.
Write down your working settings once you find a combination that runs comfortably for your specific hardware, since it’s easy to lose track of a good configuration after experimenting further, and having a known-good baseline to return to saves time if a later change makes things worse rather than better. This is particularly useful if you play a range of games with different performance demands, since you may want a slightly different baseline for lighter versus heavier titles.
Setting up audio routing correctly
SteamVR lets you choose separate audio output and microphone devices specifically for VR, independent of your Windows default audio device, which matters because many headsets have built-in speakers or a microphone that Windows won’t automatically prioritize. Set both explicitly in SteamVR’s audio settings rather than assuming Windows picked the right device.
If sound is playing from your monitor speakers instead of your headset once you’re in a game, this is almost always a mismatch between the SteamVR audio device selection and what the game itself is using, since some games pull audio device settings independently rather than deferring to SteamVR. Check both SteamVR’s setting and the specific game’s own audio options if this happens.
Microphone routing matters most if you’re playing multiplayer VR titles or streaming your gameplay; confirm your headset’s mic is selected as the input device in both SteamVR and, separately, in any voice chat or streaming software you’re running alongside it.
Controller and tracking setup
Pair your controllers following your headset manufacturer’s specific pairing process, since this differs meaningfully between inside-out tracked headsets and base-station tracked headsets. Base-station setups need controllers to have a clear line of sight to at least one station for reliable tracking; inside-out headsets rely on the headset’s own cameras seeing the controllers, which means keeping your hands within the headset’s camera field of view during fast movements.
Test basic tracking in SteamVR’s home environment before launching a full game, moving your controllers through the range of motion you expect to use in your games. This isolates whether a tracking issue is a general setup problem versus something specific to one game’s implementation.
If you’re using a specific controller model for VR beyond what came bundled with your headset, our guide to VR controllers covers compatibility considerations worth checking before you buy.
Grip and strap adjustments on your controllers affect tracking indirectly by affecting how naturally you hold and move them; a controller that feels loose or awkward in hand often leads to unconsciously altered grip and movement patterns that can push your hands toward the edge of the tracked volume more than a properly fitted controller would. Spend a few minutes adjusting straps before your first real session rather than treating this as a minor detail to fix later.
Tomas Berger, our VR & Handheld Editor, walks through this exact setup order on every new headset in his tracked play space before any comfort-session logging begins, specifically because skipping the video and audio steps before controller pairing was the most common source of avoidable early frustration in his own testing.
Step-by-step first-time setup process
- Verify your PC meets your headset’s published spec requirements and that you’re using the correct port type for your connection.
- Install SteamVR from Steam, then install your headset manufacturer’s companion software if required.
- Connect your headset and allow any firmware updates to complete fully before proceeding.
- Run room setup in your actual play space lighting, walking the full boundary perimeter slowly and completely.
- Open SteamVR’s video settings and confirm resolution and refresh rate are at sensible defaults for your hardware.
- Set your audio output and microphone devices explicitly in SteamVR’s audio settings.
- Pair and test your controllers in the SteamVR home environment before launching a full game.
- Launch a lightweight, well-optimized game first to confirm everything works before jumping into a demanding title.
Comfort and session length during initial setup
How you set things up in your first session affects how comfortable extended play feels later, so it’s worth thinking about comfort settings alongside the purely technical steps above. Most headsets and many individual games offer comfort options like vignetting during fast movement or snap turning instead of smooth turning, which reduce motion sickness risk for players still adjusting to VR. Enable a more conservative comfort setting during your first several sessions, even if you expect to eventually want a fuller, unrestricted experience.
Take breaks proactively rather than waiting until you feel unwell, particularly during your first few weeks with a new headset while your body is still adapting to VR’s specific sensory mismatch between visual and physical motion. A short break every twenty to thirty minutes during initial sessions is a reasonable starting point, and you can extend session length naturally as your tolerance builds.
Headset fit matters more for comfort than most first-time setups account for. Take time adjusting straps and interpupillary distance, if your headset supports manual adjustment, until the image looks sharp and the weight feels balanced rather than front-heavy. A poorly fitted headset can cause discomfort that gets mistakenly attributed to VR sickness generally rather than a simple fit adjustment. Our VR motion sickness prevention guide covers this in more depth if comfort is a bigger concern for you than the technical setup itself.
When this setup process doesn’t apply
Standalone headsets used wirelessly with a PC through streaming software follow a different setup path, since you’re configuring both SteamVR on the PC side and a separate streaming app’s settings on the headset side, and tracking quality depends partly on your Wi-Fi setup rather than SteamVR alone. If that’s your situation, room setup and video configuration still apply, but you’ll also need to tune the streaming app’s bitrate and resolution separately.
If you’re setting up a seated-only experience with no intention of moving around, room-scale boundary setup is largely unnecessary and you can use a minimal stationary boundary instead, which simplifies the process considerably.
Multi-room or very large play spaces beyond your headset’s supported tracking area won’t work correctly regardless of how carefully you follow setup steps, since this is a hardware tracking-range limitation rather than a configuration issue.
Troubleshooting SteamVR setup problems
Headset shows connected but display stays black: check the physical connection first, particularly if using an adapter or hub, since VR headsets are sensitive to bandwidth in ways monitors aren’t. Reseating the cable and confirming the correct port type resolves this in most cases.
Boundary appears in the wrong place or doesn’t match your room: redo room setup rather than trying to manually nudge the boundary, and make sure lighting hasn’t changed significantly since the last setup, particularly for inside-out tracked headsets.
Controllers lose tracking during fast movement: for base-station setups, check that nothing is blocking line of sight between controllers and stations. For inside-out tracking, this often means your hands moved outside the headset’s camera view, which is a known limitation rather than a bug.
Audio plays from the wrong device: re-check both SteamVR’s audio settings and the specific game’s own audio device selection, since some games don’t automatically defer to SteamVR’s choice.
Frame rate feels inconsistent even with motion smoothing on: lower render resolution one step at a time and retest, since motion smoothing helps with occasional dropped frames but can’t fully compensate for a GPU that’s consistently underpowered for a given game’s settings.
Headset shows a persistent firmware update prompt that won’t complete: confirm your PC stays connected and doesn’t sleep during the update, and close other USB-intensive applications temporarily, since an interrupted firmware update is a common cause of this loop repeating on subsequent launches.
Frequently asked questions
Do I need a powerful gaming PC to run SteamVR well?
You need a PC that meets or exceeds your headset’s recommended specs, but “well” depends on the games you play. Lighter titles run acceptably on modest hardware, while demanding sim or open-world VR games benefit from a stronger GPU. Check your headset’s official spec page rather than assuming any modern PC is automatically enough.
Why does SteamVR keep asking me to set up my play space again?
This usually happens after moving your headset’s base stations or sensors, changing furniture in the tracked area, or if tracking loses calibration due to lighting changes. Redoing room setup after any physical change to the space is normal and takes under two minutes.
What resolution should I set in SteamVR video settings?
Start at the default render resolution SteamVR selects for your headset and hardware, then adjust up or down based on how your specific games perform. There’s no universal best number since it depends on your GPU and how demanding each game is.
Does SteamVR work with headsets other than Valve Index?
Yes, SteamVR is a platform that supports headsets from many manufacturers, not just Valve’s own hardware, as long as the headset has SteamVR driver support, either built in or through the manufacturer’s companion software.
Should I use motion smoothing or reprojection all the time?
Leave it on automatic unless you have a specific reason to force it off or on. Automatic mode only engages smoothing when your PC can’t consistently hit your headset’s target frame rate, so it helps more than it hurts for most players in most games.


