Managing a modern living room entertainment center is a balancing act between aesthetics and performance. When your Xbox storage runs low, your immediate instinct is to look for an upgrade. However, the decision isn’t just about gigabytes; it is about how that hardware integrates into your home. The real choice comes down to a DIY approach versus a pre-packaged solution: a dedicated NVMe enclosure paired with an internal drive, or a traditional plug-and-play external solid-state drive.
For home decorators and tech-conscious organizers, this choice impacts cable management, dust accumulation, thermal safety on wooden furniture, and long-term electronics clutter. Deciding on the nvme enclosure vs external ssd xbox debate requires looking past the raw read/write speeds and examining how these devices live on your shelves, how they handle the occasional bump from a pet, and what they will cost you over the next several years.
As an Amazon Associate we earn from qualifying purchases at no extra cost to you.


Our Top Picks
 SABRENT USB-C NVMe Enclosure & Reader10Gbps NVMe Only4.59 x 1.24 x 0.6 inches0.2 PoundsCheck on Amazon

Top 3 picks at a glance
Quick Verdict
If you prioritize cost-efficiency, future-proofing, and a highly customizable aesthetic that can be tucked away out of sight, choose an NVMe enclosure. If you want a rugged, drop-proof, zero-setup storage solution with a manufacturer-backed warranty that can survive a busy family living room, choose a pre-built external SSD.
Side by Side
To help you visualize how these two storage paths compare in a residential setting, here is a breakdown of their physical, practical, and financial characteristics.
| Feature | NVMe Enclosure (DIY Setup) | External SSD (Pre-Built) |
|---|---|---|
| Comfort & Setup Ease | Moderate; requires installing an internal drive and fastening tiny screws or tool-free clips. | High; works instantly out of the box with a single cable connection. |
| Physical Durability | Moderate; aluminum shells protect well, but internal connections can loosen if dropped frequently. | High; often features shock-resistant rubber bumpers and integrated drop protection. |
| Price Range | $15 to $35 for the enclosure, plus $60 to $130 for an internal M.2 SSD. | $80 to $220 depending on capacity, brand, and speed ratings. |
| Maintenance & Upkeep | Occasional dust cleaning; thermal pad replacement may be needed after several years. | None; completely sealed unit prevents dust ingress. |
| Space Needed & Footprint | Extremely compact (approx. 4.3 x 1.5 x 0.5 inches); weighs under 2 ounces. | Slightly larger and heavier (approx. 4.5 x 2.0 x 0.6 inches); weighs 3 to 8 ounces. |
| Aesthetic & Look | Minimalist, industrial, usually matte black or silver anodized aluminum. | Polished, branded, occasionally features custom gaming accents or RGB lighting. |
| Resale & Reusability | Excellent; the enclosure and the internal SSD can be repurposed or sold separately. | Fair; locked into its proprietary configuration, harder to repurpose for internal PC use. |
| Best For | Tech-savvy homeowners, minimalists, and budget-conscious buyers. | Busy households, families with pets, and plug-and-play users. |
Where Nvme Enclosure Wins
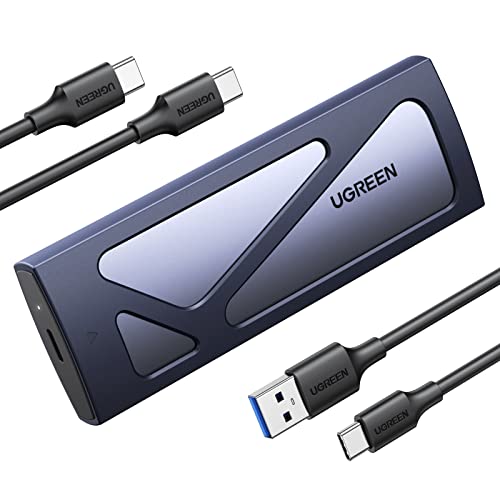
The primary advantage of choosing a dedicated enclosure is modularity. With options like the SABRENT USB-C NVMe Enclosure & Reader, M.2 PCIe SSD, 10Gbps (EC-PNVO) priced at around $19 or the highly rated UGREEN USB-C M.2 NVMe SSD Enclosure,10Gbps at around $16, the entry cost for the housing itself is incredibly low. You are free to shop around for the best deal on an internal M.2 NVMe solid-state drive, matching your exact budget and capacity preferences.
This modular design is a massive win for home sustainability. If the internal drive fails, you simply swap it out for a new one without discarding the enclosure. Conversely, if the USB port on the enclosure gets damaged, you can buy a new $17 shell and preserve your expensive data drive. By the time 2026 arrives, storage prices will likely fall even further, making it simple to upgrade your storage capacity without buying an entirely new external system.
From a home design perspective, enclosures are incredibly small and light. Measuring roughly 4 inches in length and drawing only 4 to 5 watts of power directly from the Xbox USB port, they do not require an unsightly external power brick. Their solid aluminum construction acts as a passive heatsink, dissipating heat efficiently without the need for noisy internal fans that could disrupt a quiet movie night in your living room.
Where External Ssd Xbox Wins
Pre-built external drives excel in ruggedness, reliability, and sheer convenience. A premium drive like the Western Digital 1TB P40 Game Drive SSD, which retails around $210, offers read speeds up to 2,000MB/s and a durable, shock-resistant outer shell. It also features integrated RGB lighting, which can add a beautiful, customizable glow to your entertainment center, matching the modern aesthetic of your gaming setup.
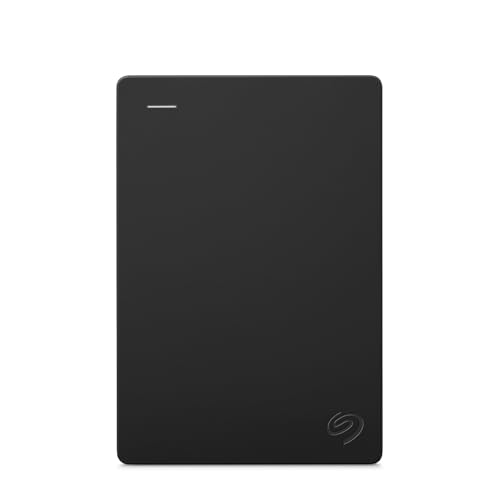
For those who prefer a massive archive drive and do not mind mechanical speeds, options like the Seagate 2TB Portable Hard Drive | USB 3.0 (STGX2000400) at $128 offer high capacities, though they lack the lightning-fast load times of solid-state drives.
The true value of a pre-built external SSD in a home setting is its structural integrity. These devices are sealed at the factory. There are no loose internal parts, no thermal pads that can slip out of alignment, and no risk of static electricity damage during assembly. If your console sits on a low shelf where children or pets might knock things over, a ruggedized external SSD is built to survive falls onto hard wood or tile floors without interrupting your game storage.
Cost Over 5 Years
When analyzing the financial impact of your storage over a five-year lifecycle, the DIY enclosure route consistently saves money, especially when factoring in upgrades.
Consider the initial setup. If you purchase a high-quality enclosure for $18 and pair it with a standard 1TB internal M.2 SSD for $70, your total initial investment is $88. If you choose a pre-built premium option like the Western Digital P40 1TB, your initial cost is around $210.
Over five years, your storage needs will likely double. With an enclosure, you only need to purchase a new 2TB internal drive (estimated at $100 in future pricing) and slide it into your existing USB-C housing. You can then sell or repurpose the old 1TB drive. With a pre-built external drive, you must buy an entirely new external unit, leaving you with extra cables, clutter, and redundant hardware sitting on your media console.
- Enclosure Route (5-Year Total): $88 (Initial) + $100 (Upgraded 2TB internal drive) – $30 (Resale of old 1TB drive) = $158 total spent.
- External SSD Route (5-Year Total): around $210 (Initial) + $150 (Future 2TB external SSD) = around $360 total spent.
Which One for Your Home
Every living space has its own unique demands. Here is how to choose the right storage setup based on your specific domestic environment.
Small Apartment
In a compact apartment, space is at a premium and clutter must be kept to an absolute minimum. An NVMe enclosure is the ideal choice here. Because of its tiny footprint, you can use a short, 6-inch USB-C cable to tuck the enclosure directly behind the Xbox console, completely hiding it from view. It occupies virtually zero shelf space, leaving room for decor, books, or clean, empty surfaces.
Family with Kids or Pets
If your home features active toddlers, curious cats, or dogs with wagging tails, safety and durability are your top priorities. A pre-built external SSD is the clear winner. The rugged, drop-resistant housing of a drive like the Western Digital P40 can withstand being pulled off a media console onto a hardwood floor. There are no small assembly screws that could present a choking hazard, and no exposed metal seams that can be pried open by curious fingers.
Rental Property
Renters often move every few years, requiring tech setups that are highly portable, versatile, and easy to pack. An NVMe enclosure offers excellent versatility for renters. If you decide to transition from console gaming to a PC setup in your next apartment, the internal drive can be pulled out of the enclosure and mounted directly onto a computer motherboard, saving you from buying new hardware for your next home office.
Long-Term Home
If you own your home and have built a custom, integrated home theater setup with routed in-wall cables and professional media cabinetry, the choice depends on your aesthetic styling. A premium external SSD with customizable RGB lighting can be showcased as a design accent next to your console. However, if you prefer a completely clean, hidden look inside ventilated AV closets, the low heat generation and compact size of an aluminum NVMe enclosure make it easy to mount discreetly using adhesive hook-and-loop strips.
FAQ
Can I play Xbox Series X/S games directly from an NVMe enclosure or external SSD?
No. Microsoft requires the ultra-fast speeds of their proprietary internal storage architecture to run native Xbox Series X/S games. Both NVMe enclosures and external SSDs connected via USB can only be used to store Series X/S games. To play them, you must copy them back to the console’s internal SSD. However, you can play older Xbox One, Xbox 360, and original Xbox games directly from your external USB storage device.
Do NVMe enclosures get hot enough to damage wooden media consoles?
Aluminum enclosures are designed to transfer heat away from the internal drive, meaning the metal shell can feel quite warm to the touch (sometimes reaching 115°F to 125°F under heavy load). While this is perfectly safe for the electronics, you should avoid placing a hot enclosure directly onto delicate, unfinished wood surfaces or leather mats. Placing it on a small silicone coaster or letting it rest in a well-ventilated area of your media console is highly recommended.
Is it difficult to assemble an NVMe enclosure at home?
Not at all. Most modern enclosures, such as the UGREEN or SABRENT models, feature tool-free designs. You simply slide open the aluminum cover, insert the M.2 SSD into the diagonal slot at a 30-degree angle, press it down, secure it with a small rubber peg, apply the included thermal silicone pad, and slide the cover back on. The entire process takes less than three minutes and requires no technical expertise.
Which option uses less power from my home’s electrical grid?
Both options are highly energy-efficient, drawing power directly from the console’s USB port (typically 5V at 1A to 2A, or about 5 to 10 watts maximum). They draw virtually zero power when the console is in deep standby mode. This is a massive improvement over older, desktop-style external hard drives that required dedicated wall outlets and contributed to passive “phantom” energy drain in your household.
Related guides
- Best Free MMOs on Steam: Subscription Limits, Pay-to-Win and Time Cost (2026)
- Best Free Horror Games on Steam: How to Pick One That Fits Your PC and Your Nerves (2026)
- Black Frame Insertion vs VRR: Which Smoothness Feature Should You Use?
- Best Webcams for Streaming: 11 Listings Compared by Resolution, Focus and Light (2026)