Shopping for a VR charging dock sounds simple until you plug it in and realize your headset is still at 40% hours later, your controllers won’t seat properly with their grips on, or the dock gets hot enough to make you nervous. When buyers search for what to look for in a vr charging dock wattage specs, the biggest mistakes are assuming higher wattage automatically means faster charging, trusting a big number on the box without checking how that power is split between the headset and controllers, and buying a dock that only works if you strip off every accessory you actually use. This guide breaks down what those wattage numbers really mean and what else has to line up for a dock to be worth your money and desk space.
Our Top Picks


Top 3 picks at a glance
Decide These 3 Things First
Before you compare specs, lock in these three decisions. They will filter out 80% of the docks that look good online but fail in daily use.
As an Amazon Associate we earn from qualifying purchases at no extra cost to you.


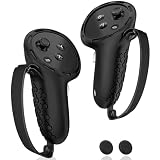
1. Which headset and controllers you need to charge together. A dock built for Meta Quest 2 will not correctly align the pogo pins or magnetic USB-C adapters for Quest 3 or Quest 3S, and vice versa. If you use controller grips, silicone covers, or a halo head strap with a battery, you need a dock that explicitly states it fits controllers with covers and has clearance for a rear battery pack. Bring your exact setup to the product page and verify the compatibility list.
2. Whether you want a true one-cable dock or just an organizer with passthrough charging. True charging docks include an AC adapter and internal power distribution to charge the headset via USB-C and the controllers via contacts or rechargeable batteries at the same time. Cheaper stands simply give you a place to drape your own cables. If you want to drop the headset on and walk away, you want the first type.
3. Where it will live and how you will use it. A compact dock with a 6 x 5 inch footprint fits a nightstand, while a wider cradle-style dock around 9 x 7 inches needs dedicated desk space but is far more stable. If you play daily, contact-based charging with included rechargeable batteries saves constant battery swaps. If you play weekly, a simpler USB-C cradle may be enough.
Wattage, Amperage and Real Charging Speed
Wattage is voltage multiplied by amperage, and it only matters as delivered wattage to each device, not the number printed on the power brick. Here is what to look for.
Total adapter wattage vs. allocated wattage: Many docks advertise a 30W adapter but then split it. A common and efficient split in 2026 is 18W to 20W dedicated to the headset via USB-C and 2W to 4W total to the two controllers. A dock that lists 15W total will charge noticeably slower, often adding 60 to 90 minutes to a full headset charge compared to an 18W+ allocation. Always check the listing for output per port, not just input.
Voltage profiles: Look for support for 5V/3A, 9V/2A, and 12V/1.5A or similar. This indicates the dock can negotiate faster charging rather than defaulting to slow 5V/1A trickle charging. For Quest 3 and Quest 3S, the headset ships with an 18W charger and charges fastest around that rate. A dock delivering a stable 18W to the headset will take roughly 2 to 2.5 hours for a 0 to 100% charge. Pushing 30W or 45W to the headset does not make it charge proportionally faster because the headset’s internal charging circuit limits intake.
Controller charging is low-wattage by design: Controllers use small rechargeable AA batteries, typically 1800mAh to 2600mAh, charged at 0.5W to 1.5W per controller via contact pins. They do not need and cannot use 10W or 15W. If a dock claims high wattage for controllers, that wattage is either shared or misleading. Expect 2 to 3 hours to fully charge depleted controller batteries on a dock.
Passthrough loss: Budget docks with magnetic USB-C tips can lose 10% to 20% efficiency if the tip or contact is loose or dirty. Docks with certified USB-C PD negotiation and well-seated magnetic adapters maintain more consistent wattage.
Compatibility, Connectors and Fit With Covers On
Wattage means nothing if the dock cannot make a reliable connection.
Connector type: The best docks for Quest 3, 3S, and Quest 2 use a short magnetic USB-C adapter that stays in the headset’s port plus aligned charging pins for the controllers. The adapter should be USB-C 2.0 or higher and support at least 18W passthrough. Avoid docks that require you to plug and unplug a cable manually each time, as this defeats the purpose and wears the port.
Cover and accessory clearance: Measure your controller with its cover on. Most silicone grips add 2mm to 4mm per side. A dock without at least 42mm to 45mm of wide cradle clearance per controller will force you to remove covers. Check for an adjustable or open cradle design. For headsets, if you use an elite-style strap or halo strap, confirm the headset cradle depth is at least 3.5 inches and does not press on the rear adjustment dial.
Battery inclusion: Controller charging requires either included rechargeable AA batteries with contact plates or a proprietary battery pack. Verify what is in the box. Some budget docks at the $22 to $30 range include no batteries, meaning you must supply your own NiMH batteries, while mid-range kits at $35 to $50 typically include two 1800mAh rechargeable batteries and covers with charging contacts.
Size, Weight and Desk Footprint
A charging dock is furniture for your tech, so dimensions and stability matter.
Footprint: Compact vertical stands measure roughly 5 to 6 inches wide by 5 to 6 inches deep. Full charging stations with headset cradle plus dual controller bays run 7 to 9 inches wide by 6 to 8 inches deep. Measure your surface and leave 2 inches of clearance on the sides for ventilation and for lifting the headset off.
Weight and stability: A dock weighing under 300 grams (about 0.66 pounds) will slide or tip when you dock with one hand. Look for 400 to 800 grams (0.9 to 1.8 pounds) with non-slip silicone pads on the base. Heavier is better for one-handed docking, especially with a front-heavy headset like Quest 3 at 515 grams.
Height: Total height with headset docked is typically 10 to 12 inches. Make sure it fits under a shelf if you plan to place it in a cabinet or entertainment center.
Materials, Build Quality and Heat Management
Materials affect heat, durability, and whether the dock will scuff your headset.
Plastic type: ABS plastic is standard and durable. Look for matte textured ABS rather than glossy plastic, which shows scratches and can trap heat. The headset contact point should be lined with soft silicone or TPU, at least 1.5mm thick, to prevent abrasion on the facial interface and head strap.
Ventilation: The headset generates heat while charging. A good dock leaves the front vents and top strap area open and does not wrap the headset tightly. Docks with enclosed wells trap heat and can cause the headset to pause charging at around 95 degrees Fahrenheit as a safety measure. Open cradle designs with air gaps of 5mm to 10mm around the headset body are preferable.
LED indicators: Useful indicators show solid when charging and change color or turn off when complete. Avoid overly bright LEDs for bedroom use. Dimmable or small pinpoint LEDs near the base are less disruptive than large light strips.
Cable quality: The included USB-C cable should be at least 3 feet long, rated for 3A, and have a right-angle or low-profile connector that routes cleanly through the base without kinking.
Price Tiers and What You Actually Get
Price tends to track power adapter quality, included batteries, and certification rather than just plastic.
Budget $20 to $30: This range includes stands like basic 15W to 18W cradles that charge the headset only or require you to supply your own batteries. Expect a single 18W USB-C cable routed through the stand, no AC adapter included in some cases, and controller bays that are storage only. Fine if you want an organizer with slow but functional headset charging.
Mid $30 to $50: This is the sweet spot for most buyers. You get a 25W to 30W AC adapter with intelligent power allocation, typically 18W to headset and dedicated pins for controllers, plus two rechargeable batteries and contact covers. Build quality is more stable, magnetic adapters are more precise, and LED indicators are more accurate. Many docks at around $45 in this bracket charge both headset and controllers simultaneously in about 2 to 3 hours.
Premium $55 to $90: Certified docks, such as Oculus/Meta certified models, with licensed magnetic connectors, higher-grade batteries rated for 500+ cycles, and better thermal management. You pay for guaranteed compatibility, faster and more consistent 18W delivery, and often a 2-year warranty. These make sense if you charge daily and want to preserve battery health.
Anything under $18 that claims to fast-charge both headset and controllers with included batteries should be viewed skeptically. The power supply is usually undersized or uncertified.
Warranty, Safety Certifications and Support
Do not overlook safety. A cheap power supply running at its limit for hours is a real risk.
Certifications: Look for FCC, CE, RoHS on the dock and UL or ETL listed on the AC adapter. For Quest docks, Meta/Oculus Certified or Made for Meta is a strong signal that wattage and connector tolerances were tested. The adapter should list over-voltage, over-current, short-circuit, and over-temperature protection.
Warranty length: Budget docks offer 6 to 12 months. Mid-range and premium docks should offer 12 to 24 months. Keep your order number, as many sellers require it for battery replacements. Good sellers provide replacement magnetic tips and battery covers for $5 to $10 without requiring a full repurchase.
Support and manuals: A clear manual with input/output ratings printed on both the box and the bottom of the dock is a good sign. If the only wattage claim is on the Amazon title and not on the device label, be cautious.
Spec Checklist
| Spec | Budget | Mid | Premium |
|---|---|---|---|
| Total Adapter Wattage | 15W – 18W | 25W – 30W | 30W – 45W with certified PD |
| Headset Allocated Power | 10W – 15W (5V/2A) | 18W – 20W (9V/2A) | Stable 18W with PD negotiation |
| Controller Charging | Storage only or user-supplied batteries | Included 1800mAh – 2600mAh rechargeables, 1W – 1.5W per controller | Included batteries, 500+ cycle rating, precise pogo pins |
| Time to Full Headset Charge (0-100%) | 3 – 4 hours | 2 – 2.5 hours | 2 – 2.5 hours, more consistent |
| Footprint and Weight | 5 x 5 in, 250 – 350g | 7 x 6 in, 400 – 600g, non-slip base | 8 x 7 in, 600 – 800g, weighted base |
| Cover Compatibility | Often requires removing covers | Fits most silicone grips, 42mm+ bay width | Tested with grips and elite straps |
| Safety and Warranty | FCC/CE, 6 – 12 month warranty | FCC/CE/RoHS, UL-listed adapter, 12 – 18 months | Meta Certified, UL/ETL, 18 – 24 months |
| Street Price Range | $20 – $30 | $35 – $50 | $55 – $90 |
Red Flags
Skip any dock that shows these warning signs, no matter how good the wattage claim looks.
- No allocated wattage listed, only a large total number like 45W without explaining how it is divided between headset and controllers.
- No AC adapter included and instructions to use your own phone charger. Your 5W or 10W phone brick will not deliver the advertised speed and may cause slow or intermittent charging.
- Magnetic USB-C tip that is loose, wobbly, or blocks the headset from sitting flush. Poor alignment reduces actual delivered wattage and generates heat.
- Controller bays without included rechargeable batteries but marketed as a charging dock. You will still need to buy compatible batteries and covers.
- No safety markings on the adapter or listing only generic certifications. Look for specific numbers and a brand name on the adapter.
- Glossy enclosed cradle with no ventilation and bright always-on LEDs. This combination traps heat and disrupts sleep if the dock is in a bedroom.
- Reviews mentioning headset not charging while controllers are docked. This indicates insufficient total power or poor power management.
FAQ
Does a higher wattage dock charge my Quest 3 faster than 18W?
No, not meaningfully. Quest 3 and Quest 3S limit charging to around 18W. A 30W or 45W dock is useful because it has headroom to charge the headset at a full 18W while simultaneously charging controllers, not because it will push 30W into the headset itself. Stability and consistent 18W delivery matter more than a higher headline number.
Can I leave my headset on the dock overnight?
Yes, with a reputable dock that has overcharge protection, you can leave it overnight. Most docks and the headset itself stop charging at 100% and trickle or cut off. To maximize long-term battery health, avoid keeping a lithium battery at 100% for days at a time if you are not using it. If you play daily, overnight docking is fine. If you will not use the headset for a week or more, store it around 50% to 70%.
Why won’t my controllers charge on a new dock?
The three most common reasons are the included rechargeable batteries are not installed correctly, the contact covers are not snapped in fully, or the controller grips are blocking the pins. Remove the disposable alkalines, install the supplied rechargeable AAs with the metal contact plates facing out, seat the special battery covers until they click, and clean the pogo pins with a dry cloth. Also confirm the dock’s AC adapter is plugged into the wall, not just into a USB port on a power strip or PC.
Do I need a Meta certified dock?
Not strictly, but certification reduces risk. Certified docks have been tested for correct voltage negotiation, magnetic tip dimensions, and thermal behavior with that specific headset family. Uncertified docks can work well, especially in the $35 to $50 range, but check that the adapter is UL or ETL listed and that the listing shows exact per-device output. If you want guaranteed fit with covers on and the most predictable wattage, choose certified.