Clean VR headset lenses with a dry, soft-bristle brush first to remove loose dust from the grooves, then a single light pass with a microfiber cloth dampened with distilled water or a lens-safe cleaning solution, working in one direction rather than a circular scrub. Skip anything containing alcohol, ammonia, or acetone, since those chemicals break down the anti-reflective and anti-fingerprint coatings that ship on nearly every modern VR lens.
Tomas Berger, who logs comfort and clarity data across every headset that comes through his tracked test setup, treats lens cleaning as maintenance rather than an occasional chore, since even a light film of facial oil measurably softens contrast and adds glare in bright scenes. This guide walks through the correct process for both Fresnel and pancake lens designs, the tools worth keeping on hand, and what to avoid entirely.
As an Amazon Associate we earn from qualifying purchases at no extra cost to you. Product prices and availability are accurate as of the date shown and are subject to change.

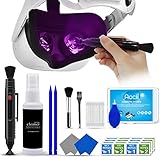

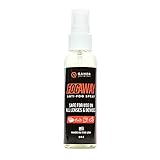


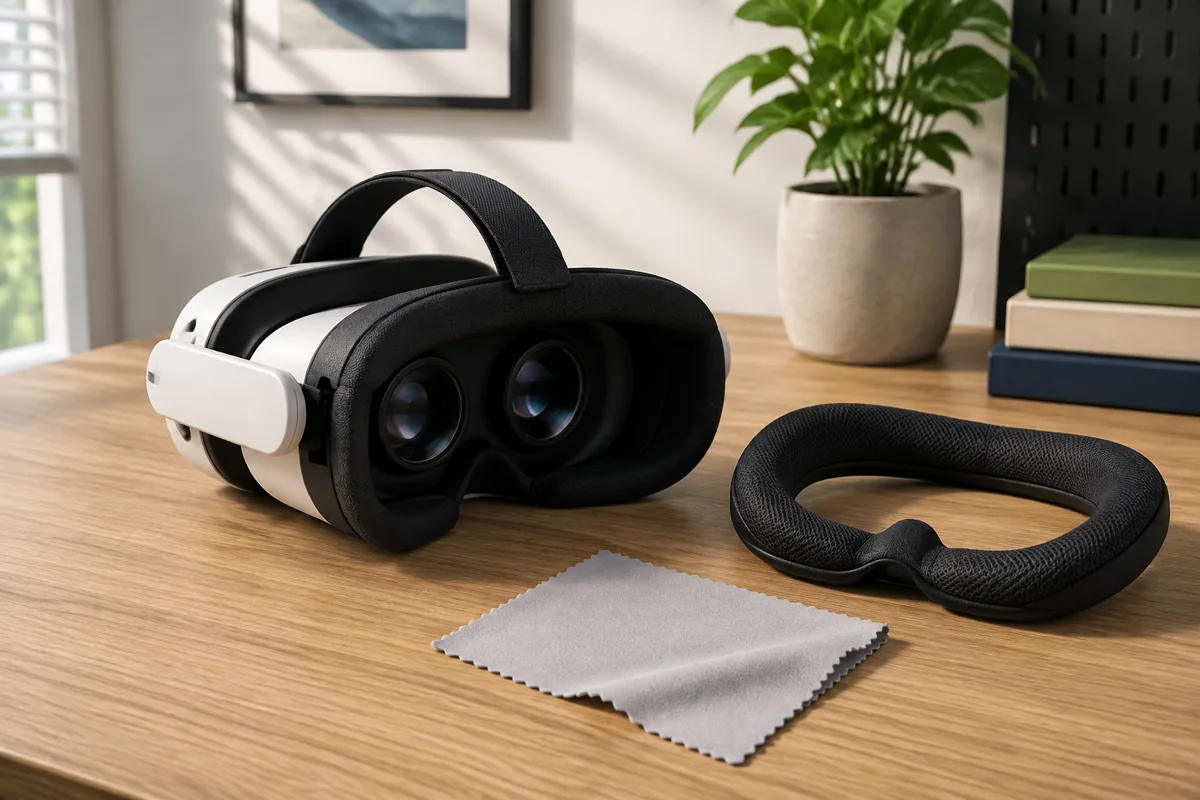
Top 3 picks at a glance
Why VR Lens Cleanliness Affects Image Quality More Than You’d Expect
A VR lens sits only a few centimeters from your eye, magnifying every imperfection on its surface far more than a phone screen or monitor would. A thin layer of facial oil, roughly a few microns thick, is enough to soften fine text, introduce a hazy glow around bright light sources, and reduce perceived contrast in dark scenes, even though the same layer would be invisible on a flat display viewed from arm’s length.
This matters most in text-heavy applications like flight sims, racing sims with cockpit dashboards, and any productivity or social VR app where reading UI elements is constant. Players often attribute this softness to the headset’s display resolution or the game’s rendering settings, adjust supersampling or resolution scale to compensate, and never realize a simple cleaning pass would have solved it without any performance cost.
Glare and light scatter are the second major symptom of dirty lenses. Facial oil and dust don’t just block light evenly, they scatter it unevenly across the lens surface, which shows up as a hazy bloom around bright objects, streetlights in a night driving scene, or muzzle flashes in a shooter. This scatter effect is often mistaken for a display or optics quality issue with the headset itself rather than a cleaning problem.
Fingerprints deposit a particularly stubborn combination of oil and salt residue that dries and becomes harder to remove the longer it sits, which is why a quick wipe immediately after noticing a smudge is far more effective than letting it dry and cleaning it days later. The residue can also attract additional dust once dry, compounding the visual impact over time.
Beyond image quality, dirty lenses accelerate the perception of eye strain during long sessions, since your visual system works harder to resolve detail through a hazy layer, similar to reading through smudged glasses for an extended period. Clean lenses reduce this fatigue even when the underlying content and brightness settings haven’t changed at all.
Fresnel Versus Pancake Lenses: Why The Design Changes Your Cleaning Method
Fresnel lenses, used in headsets like the original Meta Quest 2, Valve Index, and HTC Vive Pro 2, are built from a series of concentric ridges etched into a flat plastic surface that bend light the same way a much thicker curved lens would, at a fraction of the weight and thickness. Those ridges create physical grooves that trap dust and skin cells far more effectively than a smooth surface, which is why Fresnel lenses need a dry brush pass before any wet cleaning.
Pancake lenses, found in newer headsets including the Meta Quest 3, Meta Quest 3S, PlayStation VR2, and the Bigscreen Beyond, use stacked flat optical elements with polarizing and reflective layers that fold the light path, resulting in a much thinner headset with a smooth, largely flat outer surface. Without ridges to trap debris, pancake lenses collect dust as a fine even layer rather than concentrated grooves, and a light wipe alone is usually sufficient without a dedicated brushing step.
The coating chemistry differs slightly between the two designs as well. Pancake lenses rely on multiple thin-film layers working together to fold light correctly, and aggressive cleaning solutions have a higher chance of degrading one of those layers unevenly, which can introduce visible color fringing at the edge of the field of view. Fresnel lenses use a simpler single coating, making them somewhat more tolerant of a slightly more assertive wipe, though the same gentle approach is still the safer default for both.
Neither lens type should be cleaned with the same cloth used on a phone screen or camera lens without first checking it for embedded grit. A cloth that’s picked up dust from a bag or pocket can introduce fine scratches on a VR lens even though it feels soft to the touch, so keeping a lens cloth dedicated solely to the headset and stored in a sealed pouch prevents cross-contamination.
Knowing which lens type your headset uses also determines realistic expectations for post-cleaning clarity. Fresnel lenses inherently produce some level of “god rays,” starburst-like light scatter around bright points, that no amount of cleaning removes since it’s a property of the ridge design itself, while pancake lenses largely eliminate this effect through their different optical path.
Tools To Have Ready Before You Start Cleaning
A proper VR lens cleaning kit is inexpensive and reusable for years, so it’s worth assembling once rather than improvising each time. The core tools are a soft-bristle lens brush or a clean, unused makeup brush reserved only for this purpose, two or more microfiber cloths (one dry, one for damp use), and either distilled water or a cleaning solution labeled safe for coated camera or eyeglass lenses.
Compressed air, sold as canned duster spray, is useful for Fresnel lens grooves where a brush alone can’t fully dislodge fine dust, but it should be used in short bursts from at least 15cm away and held upright, since tilting the can can spray propellant liquid onto the lens surface instead of air. Avoid pointing compressed air directly at the lens edge seals, which can force debris further into the housing rather than out of it.
Distilled water is preferable to tap water because tap water contains dissolved minerals that leave faint spots as it evaporates, similar to hard water spots on a car windshield. A small spray bottle of distilled water, lightly misted onto the microfiber cloth rather than directly onto the lens, gives enough moisture to lift oil without risking liquid pooling around the lens edge where it could seep into the housing.
For headsets shared between multiple people, a UV sanitizing box or disposable lens-safe wipes designed for eyewear add a hygiene layer beyond visual cleanliness. These are worth the modest cost for households, gyms, or arcades running the same headset across many users per day, where oil and moisture buildup happens far faster than single-owner use.
Store the entire kit in a small pouch alongside the headset case so cleaning tools are always on hand rather than requiring a search through drawers each time. This alone significantly increases how consistently lenses actually get cleaned, since the barrier to doing it drops close to zero when the tools are already sitting next to the headset.
Step-By-Step Cleaning Process For Fresnel Lenses
Start by powering off the headset and, where the design allows, removing the facial interface foam to get clearer access to the lens edges without smudging the foam itself. Devices like the Quest 2 and Vive Pro 2 have magnetic or clip-on facial interfaces that detach in seconds and make the whole process meaningfully easier.
Use the soft brush first, working in short strokes that follow the direction of the concentric ridges rather than across them, to lift loose dust out of the grooves. This step alone resolves a surprising amount of visible haze, since dry dust in the ridges is often the larger contributor to blurriness compared to oil film on the raised surface.
Next, lightly mist a clean microfiber cloth with distilled water or lens solution, never spraying directly onto the lens itself, and fold the cloth so you’re using a fresh section rather than one that’s already picked up debris. Wipe in a single direction across the ridges, from the nose side toward the outer edge, rather than circular motions that can drag trapped grit across the surface and create fine scratch lines.
Follow immediately with a dry section of a second microfiber cloth to remove any remaining moisture before it has a chance to dry into water spots, especially important if using anything other than fully distilled water. Check the lens under a bright light at an angle, which reveals residual smudges far more clearly than looking straight through it.
Repeat the brush-then-wipe sequence on the second lens using the same clean sections of cloth, and reattach the facial interface once both lenses are fully dry to the touch. The entire process for both lenses typically takes 3 to 5 minutes once the kit is assembled and the routine becomes familiar.
Step-By-Step Cleaning Process For Pancake Lenses
Pancake lens cleaning skips the dedicated dry-brush step in most cases, since the flat surface doesn’t trap dust in grooves the way Fresnel ridges do, though a quick brush pass is still worthwhile if the headset has been stored without a lens cover for an extended period. Power off the headset and remove the facial interface if the design permits easy access, which applies to the Quest 3 and Quest 3S but is more limited on the fixed-interface PSVR2.
Lightly mist a microfiber cloth rather than the lens directly, and wipe with a single smooth pass from center to edge rather than a scrubbing motion. Because pancake lens coatings involve multiple thin-film layers working together, a lighter touch than you might use on Fresnel lenses is the safer default, letting the moisture and cloth fibers do the work rather than pressure.
Pay particular attention to the very edge of the lens near the housing seal, where oil tends to accumulate from repeated headset removal and where a stiff brush or fingernail can accidentally catch the seal material. A cotton swab lightly dampened with distilled water works well for this edge area specifically, kept away from the central optical zone.
Dry immediately with a fresh section of microfiber cloth, checking for streaking under angled light. Pancake lens coatings are more prone to visible streaking than Fresnel if moisture is left to air-dry rather than actively wiped, since the flat reflective layers show uneven drying patterns more readily than a ridged surface would.
For the PSVR2’s largely fixed facial interface, work carefully around the interface foam rather than attempting to remove it, using a folded cloth corner to reach the lens edge without pressing the foam itself, which can trap moisture against the headset’s internal electronics if oversaturated.
What Never To Use On VR Lenses
Paper towels, tissues, and regular cotton cloth all contain wood fibers or weave patterns coarse enough to create fine scratch patterns on a coated lens surface, even when they feel soft to the touch. These materials are fine for cleaning a headset’s outer plastic shell but should never touch the lens surface itself, since micro-scratches accumulate invisibly over repeated use and eventually show up as diffuse haze under bright light.
Household glass cleaners like ammonia-based window sprays are formulated for uncoated glass and will actively strip anti-reflective and anti-fingerprint coatings from VR lenses within a small number of applications. The same applies to alcohol-based hand sanitizer and most disinfecting wipes marketed for electronics, many of which contain isopropyl alcohol concentrations well above what coated optics tolerate.
Acetone-based nail polish remover, sometimes reached for as a strong solvent for stubborn residue, will dissolve certain plastic lens coatings on contact and should never come near a VR headset under any circumstance. Even trace amounts transferred from a cloth previously used for nail polish removal can leave a permanent cloudy patch.
Compressed air used incorrectly, specifically tilted at an angle that lets propellant liquid escape rather than pure air, can leave an oily residue on the lens that’s harder to remove than the dust it was meant to clear. Always test a burst away from the headset first if you’re unfamiliar with a specific can’s behavior when tilted.
Finally, avoid pressing down firmly regardless of what cloth or solution is being used. Pressure, not moisture, is the primary driver of scratch formation, since even a soft microfiber cloth can grind trapped dust particles into the coating if enough force is applied during the wipe.
Removing Stubborn Fingerprints, Sunscreen And Makeup Residue
Sunscreen and heavy makeup, particularly foundation and sunscreen products containing zinc oxide or titanium dioxide, leave a residue that a single light wipe often won’t fully remove, since these products are formulated to resist being wiped away from skin. Rather than pressing harder with a dry cloth, which risks grinding the particulate residue into the coating, use a slightly more saturated (but still not dripping) damp cloth and let the extra moisture soften the residue for a few seconds before wiping.
A second pass with a dry cloth immediately after is usually necessary for these heavier residues, since a single wipe often just smears the product across a wider area rather than lifting it off entirely. Checking the lens under a flashlight held at a steep angle after the first pass reveals whether a second cleaning cycle is needed before reattaching the facial interface.
For makeup and sunscreen wearers who use VR regularly, a barrier layer such as a disposable VR face cover or a silicone lens protector cut to fit reduces how much residue reaches the lens directly in the first place. These accessories add a small amount of upkeep of their own but meaningfully cut down on deep-cleaning frequency for the lens itself.
Sweat during active VR fitness sessions poses a related but distinct problem, since sweat carries salt that can leave a fine white residue as it dries on the lens edge, similar to hard water spots. Wiping down immediately after a fitness session, rather than letting the headset sit until the next use, prevents this residue from setting.
Old, dried residue that’s been sitting for days is meaningfully harder to remove than fresh smudges and may require two or three gentle cleaning passes rather than one, with a short pause between passes to let moisture work on the residue rather than attempting to force it off in a single aggressive wipe.
How Often To Clean And Preventing Buildup Between Sessions
The table below outlines a practical cleaning cadence based on usage pattern, balancing lens clarity against unnecessary wear from over-cleaning.
| Usage Pattern | Dry Brush | Full Wet Clean |
|---|---|---|
| Single owner, casual (1-2 sessions/week) | Before each session | Every 2 weeks |
| Single owner, daily use | Before each session | Weekly |
| Shared household headset | Before each session | After every session |
| Gym, arcade or commercial use | Between every user | Daily |
| VR fitness / high-sweat use | N/A | Immediately after each session |
Storing the headset lens-down or lens-forward without a cover between sessions is one of the biggest contributors to avoidable buildup, since it exposes the lens to ambient dust settling out of the air over hours or days. Nearly every headset ships with or supports an aftermarket lens cover, and using it consistently cuts dry-brushing frequency significantly.
Washing hands before putting on the headset, a habit borrowed from contact lens care, reduces how much oil transfers from your fingers to the facial interface and then indirectly to the lens surface during adjustment. This is a low-effort habit that compounds over months of regular use.
For multi-user setups, assigning each user their own facial interface insert where the headset supports swappable foam, rather than sharing one interface across different skin types and skincare routines, reduces the variability in oil and product residue reaching the lenses.
Lens Coatings, Micro-Scratches And When Replacement Makes Sense
Every modern VR lens ships with at least an anti-reflective coating, and most also include an anti-fingerprint (oleophobic) layer designed to make oil bead up rather than spread into a film. These coatings degrade gradually with repeated cleaning regardless of technique, which is why gentler, less frequent full wet cleans paired with more frequent dry brushing extends coating life compared to aggressive daily wet wiping.
A light coating wear pattern typically shows up first as slightly reduced oleophobic performance, meaning oil beads less effectively and smudges spread faster than when the headset was new, well before any visible scratching appears. This is a normal outcome of years of use and doesn’t necessarily mean cleaning technique was wrong, though switching to gentler solutions and lower cleaning frequency can slow further degradation.
True scratches, physical marks in the lens material itself rather than coating wear, are usually only a practical problem if they fall within the central 60-70 percent of the lens where the eye’s focus is concentrated during normal use. A scratch near the outer edge, closer to where the lens meets the housing, is often invisible during actual gameplay even though it’s clearly visible when inspecting the lens directly under bright light.
Headset manufacturers generally do not offer lens-only replacement for consumer devices, meaning a significantly scratched lens usually means either living with the reduced clarity or a full headset repair or replacement through official channels. Third-party lens protector inserts, thin films or clip-on covers designed for specific headset models, are a preventive option worth considering for households or commercial settings with heavy use, since they can be replaced individually far more cheaply than the lens itself.
If a headset’s image has grown persistently soft or hazy despite following proper cleaning technique and confirming there’s no visible residue, and the issue doesn’t improve after a careful full clean, coating degradation or an internal fogging issue between lens layers (more common on multi-element pancake designs) is worth suspecting over lens surface dirt.
Troubleshooting: What To Do If Cleaning Doesn’t Fix Blurriness Or Fog
If a thorough clean following the steps above doesn’t resolve blurriness, first rule out the IPD (interpupillary distance) setting rather than assuming a lens or cleaning problem, since a misaligned IPD relative to your actual eye spacing produces a soft, doubled image that looks remarkably similar to a dirty lens from the wearer’s perspective. Most headsets expose this as a physical slider or software setting, and it’s worth re-measuring and re-adjusting before further cleaning attempts.
Internal fogging, which appears as haze that seems to be behind the lens surface rather than on it, and that doesn’t respond to any amount of external wiping, typically indicates moisture has entered the housing, most often from heavy sweat during fitness use or from cleaning solution that seeped past the lens edge seal. This requires letting the headset sit powered off in a dry, room-temperature environment for at least 24-48 hours before further troubleshooting, and persistent internal fog after that period generally means a warranty or repair claim rather than further home cleaning attempts.
Check for condensation specifically after moving a headset between very different temperatures, such as from a cold car into a warm house, since this can cause temporary internal fogging that resolves on its own once the device reaches ambient temperature and shouldn’t be mistaken for a lens defect.
If blurriness is isolated to one eye only, confirm it’s not a display panel or cable issue by testing in a simple menu screen where both eyes should render an identical, symmetric image; asymmetric blur pointing to only one side is more likely an electronics or cable fault than anything related to the lens surface.
When cleaning, IPD adjustment, and a cool-down period all fail to resolve persistent haze or blur, document the issue with a photo through the lens if the headset allows it and contact the manufacturer’s support channel, since most major headset makers cover optical defects under standard warranty terms separate from physical damage exclusions.
Frequently Asked Questions
Can I use regular glasses cleaner on VR lenses?
Most commercial glasses sprays contain ammonia or alcohol concentrations that can degrade the anti-reflective coating on Fresnel and pancake VR lenses over repeated use, so a distilled water and microfiber approach or a cleaner specifically labeled safe for coated optics is the safer default.
Why do my VR lenses look smudged again right after cleaning?
Facial oils transfer from your skin to the foam interface and then onto the lens surface almost immediately during use, so a lens that looks clean right after wiping can pick up a light film within a single session, which is normal and not a sign of a cleaning mistake.
Is it safe to clean Fresnel lenses the same way as pancake lenses?
The cloth and solution can be the same, but Fresnel lenses have raised concentric ridges that trap dust in the grooves, so they need a soft dry brush pass before any wet wipe, while flat pancake lenses can go straight to a damp microfiber wipe.
What should I do if there’s a scratch on my VR lens?
A light surface scratch on the outer coating is usually only visible up close and rarely affects the in-headset image because it sits far outside the eye’s focal path, but a deep scratch across the central viewing area typically requires lens or headset replacement since polishing kits are not reliable on coated VR optics.
How often should VR lenses actually be cleaned?
For headsets used several times a week, a light dry brush before each session and a full wet clean once every one to two weeks keeps oil buildup from affecting clarity, while headsets shared between multiple users benefit from a wipe after every session.
If clarity issues persist after cleaning, mismatched vision correction is worth ruling out — see our guide to best prescription lenses for VR. For general upkeep tools beyond the lens itself, our best VR covers and pads roundup covers facial interface hygiene, and the best VR accessories guide rounds up cleaning kits and cases. Comfort adjustments that reduce how often the headset shifts against your face are covered in our best VR headset strap picks.