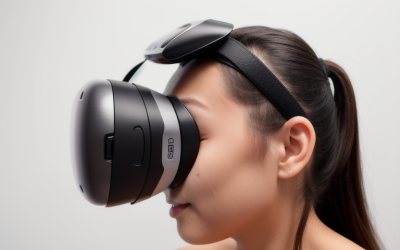
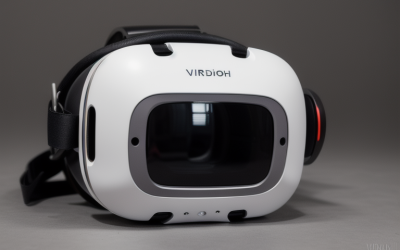
If you wear glasses, stepping into virtual reality often feels less like entering the future and more like stuffing a delicate, expensive wire frame into a plastic vise. For years, VR users have tolerated the pinched nose bridges, the fogged-up lenses, and the terrifying, high-pitched screech of glass scraping against plastic. Attempting to wear everyday spectacles inside a headset is the single biggest mistake new VR owners make. Not only does it ruin the ergonomics of a carefully balanced headset, but a single deep scratch on your headset’s non-replaceable native lenses can instantly turn a $500 device into a paperweight.
The solution is prescription lens inserts—custom-made optical glass or plastic that snaps directly over the headset’s displays. However, shopping for these accessories is a minefield of confusing optical terminology, misleading listings, and varying manufacturing standards. Many buyers rush into purchasing the cheapest option they find online, only to discover the lenses are too thick, pop out during active gameplay, or distort the peripheral view. To get the most out of your hardware, you need to understand exactly how these inserts interact with your headset’s optics, your facial structure, and your specific vision prescription.
As an Amazon Associate we earn from qualifying purchases at no extra cost to you.


Our Top Picks


Top 3 picks at a glance
Decide These 3 Things First
Before you begin comparing lens coatings or price points, you must establish three baseline parameters. Skipping these decisions usually results in return shipping fees or, worse, custom-made lenses that you cannot use.
- Your Headset’s Shared Status: Do you share your VR headset with family members or roommates, or are you the sole user? If multiple people use the device, permanent snap-on inserts will be a constant source of frustration. You will need magnetic quick-swap mounts that can be pulled off in under two seconds. If you are the only user, semi-permanent friction-fit inserts are perfectly fine and often save you money.
- Real Lenses vs. Physical Spacers: Make sure you actually need prescription lenses. If you wear contacts while gaming, or if your vision is clear at a distance of 4 to 6 feet (the typical focal distance of VR headsets), you do not need corrective inserts. Instead, you should look for physical silicone or rubber glasses spacers. These are simple, inexpensive plastic rings (typically costing $12 to $18 and measuring 4mm to 6mm in thickness) that physically block your glasses frames from touching the VR lenses.
- Your Exact, Up-to-Date Prescription: You cannot use an expired prescription or “guess” your numbers. VR displays project light at a fixed focal distance (usually between 1.3 and 2.0 meters). This means your distance prescription is what matters, not your reading prescription. You will need your Sphere (SPH), Cylinder (CYL), Axis, and ideally your Pupillary Distance (PD), though many modern headsets let you adjust the IPD physically on the device itself.
1. Lens Material and Refractive Index
The material of your VR inserts dictates their weight, clarity, and optical thickness. Because VR headsets hold the lenses mere millimeters from your eyelashes, lens thickness is a critical comfort factor. If a lens is too thick, your eyelashes will brush against it every time you blink, leaving oily streaks that blur your view.
Standard prescription lenses are made of CR-39 plastic, which has a refractive index of 1.50. This is perfectly fine for mild prescriptions (SPH between -2.00 and +2.00). However, if your prescription is stronger, CR-39 lenses will be thick and bulbous. For prescriptions stronger than -3.00 or +3.00, you must look for high-index materials, such as 1.61 or 1.67 index lenses. These materials bend light more efficiently, allowing the lens to be up to 35% thinner and lighter. High-index lenses also reduce peripheral distortion (the “fishbowl” effect) at the edges of your vision, which is vital for maintaining immersion in fast-paced games.
2. Mounting Construction: Magnetic vs. Snap-On
How the lens insert attaches to your headset’s optical pod affects both durability and ease of use. There are two primary mounting styles on the market today:
Friction-Fit / Snap-On: These inserts feature a single-piece plastic frame that presses directly over the rubber or plastic rim surrounding the headset’s native lenses. They are highly secure and lightweight, typically weighing between 3 and 5 grams per eye. Because they have no moving parts, they are highly durable. However, they are difficult to remove quickly, making them a poor choice for shared households.
Magnetic Two-Piece Systems: These systems use a base ring that snaps permanently onto the headset, paired with a secondary lens frame that attaches to the base via tiny neodymium magnets. This design is incredibly convenient for multi-user households. However, you must pay attention to the weight and profile. Poorly designed magnetic frames can add 8 to 10 grams of weight per eye and protrude an extra 2mm to 3mm toward your face, reducing your overall Field of View (FOV) and increasing the likelihood of forehead or eyelash contact.
3. Lens Coatings and Defense Layers
Bare optical plastic is highly susceptible to scratching, glare, and smudging. When selecting your inserts, look for the following coatings, which are typically offered as cheap upgrades or standard features depending on the price tier:
- Anti-Reflective (AR) Coating: This is non-negotiable. VR screens reflect light back and forth between the display and your eyes. Without a high-quality AR coating, you will experience distracting “god rays” and ghosting artifacts, especially in dark scenes with bright text.
- Anti-Scratch Hard Coating: VR inserts are cleaned frequently to remove facial oils and dust. A double-sided hard scratch-resistant coating ensures that wiping them down with a microfiber cloth won’t leave micro-abrasions over time.
- Oleophobic/Hydrophobic Coating: This prevents sweat, facial oils, and condensation from sticking to the lens. It makes cleaning the lenses a five-second task rather than a smear-filled ordeal.
- Blue Light Blocking: Many manufacturers charge an extra $10 to $15 for blue light filtration. While it can reduce eye strain during late-night gaming sessions, be aware that heavy blue-blocking coatings can introduce a noticeable yellow tint to your games, altering the intended color palette of the developers.
4. Prescription Limits and Cylinder Tolerances
Many budget-friendly, off-the-shelf lens inserts sold on online marketplaces are mass-produced with fixed prescriptions (such as a flat -2.00 or -3.50 SPH) and zero astigmatism correction (CYL). While these are incredibly cheap—often priced between $15 and $25 per lens—they are only suitable for users with simple near-sightedness and no astigmatism.
If you have astigmatism (indicated by a CYL value on your prescription sheet), you must purchase custom-ground lenses. Most premium optical labs can accommodate astigmatism values from -0.50 up to -4.00, and sphere values from -10.00 down to +6.00. Keep in mind that high-cylinder and high-plus prescriptions require precision alignment; if the lens is rotated even a few degrees out of its correct axis inside the frame, your vision will be blurry and can cause severe headaches within minutes of play.
5. Physical Clearance and Field of View (FOV) Impact
As we look ahead to the VR hardware landscape of 2026, headsets are getting slimmer, utilizing pancake optics that sit incredibly close to the user’s eyes. This makes physical clearance a paramount concern. Every millimeter that a lens insert protrudes from the native housing pushes your eyes further away from the display’s sweet spot.
For every 2mm of extra distance created by a thick lens insert, you lose approximately 3 to 5 degrees of horizontal Field of View. Look for low-profile frames that feature a recessed lens design. The total stack height of the insert (the distance it protrudes from the headset’s native lens frame) should ideally be under 6mm. If you have a deep brow or long eyelashes, look for inserts that are compatible with your headset’s original facial interface spacer settings so you can back the facial interface out by one click if necessary.
Spec Checklist
Use this quick-reference specification table to understand what features and tolerances you should expect based on your budget range.
| Specification | Budget ($15 – $30) | Mid-Range ($30 – $70) | Premium ($70 – $150+) |
|---|---|---|---|
| Mounting Type | Friction-fit / Plastic snap-on | Snap-on or basic magnetic | Ultra-low profile magnetic alloy/ABS |
| Lens Material | Standard CR-39 Plastic (1.50 Index) | Polycarbonate or 1.61 High-Index | 1.67 or 1.74 Ultra High-Index Glass/Resin |
| Prescription Range | Fixed steps (e.g., -2.00, -3.00), no CYL | SPH -6.00 to +3.00, CYL to -2.00 | Fully custom (SPH -15.00 to +10.00, CYL to -6.00) |
| Coatings Included | Basic anti-scratch | Anti-reflective, anti-scratch, oleophobic | Multi-layer AR, super-hydrophobic, anti-static, blue-cut |
| Frame Thickness | 7mm – 10mm | 5mm – 7mm | 3mm – 5mm (ultra-thin profile) |
Red Flags
When shopping for VR inserts, watch out for these warning signs that indicate a poor-quality product or a listing designed to mislead buyers:
- “Sold Individually” Trickery: Read the product listings incredibly carefully. Some budget brands list inserts at an eye-catchingly low price (e.g., around $19), only for you to realize in the fine print that the price is for a single lens (one eye) rather than a complete set. A true pair will double your calculated cost.
- Generic “One-Size-Fits-All” Claims: Headset lenses vary wildly in shape. A lens designed for the Quest 2 will absolutely not fit a Quest 3 or Quest 3S due to the shift from Fresnel to pancake lenses. If a listing claims compatibility across multiple vastly different headset generations without distinct model options, avoid it.
- Excessive Yellow or Blue Tint: If customer reviews complain about a heavy, muddy yellow color cast on “blue light blocking” models, it means the manufacturer is using cheap, non-optical-grade dye instead of a vacuum-deposited spectral coating. This ruins the color accuracy of your virtual environments.
- No Axis Specification for Astigmatism: If a seller asks for your astigmatism (CYL) value but does not ask for your Axis (a number between 1 and 180), run away. It is physically impossible to correct astigmatism accurately without knowing the rotational axis of the lens.
FAQ
Can I use my everyday glasses prescription for VR inserts?
Yes, you should use your standard distance vision prescription. However, you must ignore any “ADD” values meant for reading glasses or progressives. VR headsets project light at a fixed distance (usually around 4 to 6 feet away), so your eyes only need to focus on that specific plane. If your prescription is older than two years, get an eye exam before ordering, as even minor changes in astigmatism can cause severe eye strain in VR.
Will VR prescription lenses scratch my headset’s native lenses?
If installed correctly, they will not. Quality inserts are designed with a small air gap (typically 1mm to 2mm) between the custom lens and the headset’s optical glass. However, if you have a very strong prescription and buy cheap, low-index lenses that are exceptionally thick, the center of the insert lens may bow outward and rub against the headset lens. Always opt for high-index materials if your prescription is over -3.00 SPH to prevent this.
Do I need blue light blocking coatings for VR?
While blue light blocking is a popular upsell, it is rarely necessary for most users. Modern VR headsets have built-in software-level night modes that warm up the display colors without costing you extra money or reducing physical light transmission. Furthermore, cheap blue-blocking coatings can create distracting yellow reflections inside the lens barrel, actually lowering your visual contrast.
How do I clean VR prescription inserts safely?
Treat your inserts exactly like high-end camera lenses. Blow away loose dust or grit first using a hand-powered air bulb. Then, gently wipe the surface in a circular motion using a clean, dry microfiber cloth. Never use paper towels, t-shirts, or household glass cleaners (like Windex), as the harsh chemicals and rough fibers will permanently strip away the delicate anti-reflective coatings.