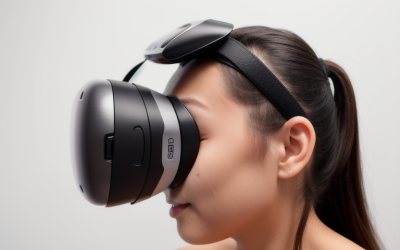
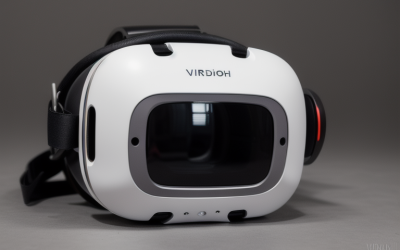
VR lenses look tough, but most use a lightweight plastic with an anti-glare and anti-fog coating that scratches far more easily than glass. Clean them the wrong way once with a paper towel, t-shirt, or household glass cleaner and you can leave permanent micro-scratches, hazy swirls, or a patch where the coating has been stripped off. That damage shows up as glare, blur, and light flare the next time you put the headset on, and it cannot be polished out without making it worse. The good news is that safe cleaning takes less than three minutes and requires no special skills if you use the right technique and light pressure.
Our Top Picks


What You Need
Gather everything before you start so you are not tempted to improvise with what is nearby. All of these items cost between $6 and $18 individually and are widely available at optical shops and electronics retailers.
As an Amazon Associate we earn from qualifying purchases at no extra cost to you.


| Item | Why You Need It | Optional? |
|---|---|---|
| Dry microfiber cloth, 6 x 7 inches or larger, 200-300 GSM | Lifts dust and oils without abrading the coating; the tight weave traps particles instead of dragging them | No |
| Soft lens blower or manual air blower | Removes loose dust and grit without contact so you do not grind debris into the lens | No |
| Lens cleaning solution made for coated optics, alcohol-free | Dissolves fingerprints and face oils without solvents that can soften coatings | Yes, for dry dust only |
| Cotton swabs with tightly wound tips | Reaches the edge where the lens meets the housing without touching the center coating | Yes |
| Small soft brush, lens-grade | Sweeps debris from recessed rims and facial interface before it falls onto the lens | Yes |
| Protective storage case or lens cover, such as TPU film covers sized for your specific headset model around $9 for a multi-pack | Keeps dust off between uses and prevents contact with sunlight, keys, or other hard objects | Yes |
| Silicone spacer ring or glasses spacer, typically $12 to $18 such as a Quest 2 compatible spacer around $15 | Creates a physical gap so eyeglasses never touch and scratch the VR lens | Yes, if you wear glasses in-headset |
Step-by-Step
Work in a clean, well-lit area away from direct sunlight and wind. Wash and dry your hands, then power off and unplug the headset. As of early 2026, most current VR headsets still use similar coated plastic optics, so this process applies across major brands.
Step 1: Prepare and Inspect the Headset – 30 seconds
Remove the facial interface if it detaches easily and set the headset lens-side up on a stable, padded surface. Hold it under a neutral light and look at each lens at an angle. Note where you see dust specks, fingerprints, or smudges near the edges. This quick check keeps you from over-wiping clean areas and helps you target only what needs attention.
Step 2: Remove Loose Dust With Air – 45 seconds
Hold the headset so the lenses face downward to let gravity help. Give 3 to 4 gentle puffs with a manual lens blower from about 2 to 3 inches away. Move around the rim in a circle rather than blasting straight into the center. Never use compressed air cans, canned duster, or your mouth to blow. Those can deliver too much pressure, propel liquid propellant, or add saliva micro-droplets that spot the coating.
Step 3: Sweep Away Remaining Particles With a Dry Microfiber – 60 seconds
Use a fresh, clean microfiber cloth that has been laundered without fabric softener. Fold it into a 2-inch square pad so your fingertips do not press through to the lens. With almost no pressure, lightly sweep in one direction from the center outward, then lift and reposition. Do not scrub in circles or press hard. If the cloth picks up grit, refold to a clean section. For debris trapped at the lens edge, use the edge of the folded cloth or a dry, lens-grade soft brush to flick it out.
Step 4: Spot-Treat Fingerprints and Oils – 60 to 90 seconds
If smudges remain after a dry sweep, you need moisture but very little of it. Lightly mist 1 spray of alcohol-free lens solution onto the cloth, never directly onto the lens. The cloth should be barely damp, not wet. Using the same light, center-to-edge motion, wipe only the affected area once or twice. Flip to a dry section of the cloth and immediately buff gently to remove any streaks. If you do not have solution, breathe very lightly near the lens to create a faint fog and buff with a dry cloth, but do not exhale hard or repeatedly.
Step 5: Detail the Edges and Housing – 45 seconds
Dust often hides where the lens meets the plastic housing and later migrates back onto the optics. Wrap a dry cotton swab or the tip of your microfiber around your fingertip and trace the seam in one direction. Keep the swab on the housing and the very edge, avoiding soaking or rubbing the coated center. Replace the swab if the tip loosens or frays.
Step 6: Final Check and Cover – 30 seconds
Inspect the lenses again under angled light while they still face down. If you still see a single streak, give one final light buff with a dry, clean section of the cloth. When both lenses are clear, reinstall the facial interface if removed and place a lens cover or return the headset to its case. Store it lens-side away from windows, because prolonged sun exposure through the lenses can damage internal displays, and heat above about 95 degrees Fahrenheit can warp the housing over time.
Mistakes to Avoid
The most common damage comes from everyday materials and cleaners that feel safe but are abrasive to coated plastic. Avoid these entirely:
Paper products and clothing: Tissues, paper towels, toilet paper, and t-shirts contain wood fibers or rough weaves that act like fine sandpaper on coatings. Even a single firm pass can leave visible swirls.
Household cleaners and high-alcohol products: Glass cleaners with ammonia, vinegar solutions, hand sanitizer, and 70% isopropyl alcohol can cloud, crack, or strip anti-reflective coatings. Only use a solution explicitly labeled safe for coated lenses and optics.
Direct spraying and soaking: Spraying liquid onto the lens lets it seep under the bezel and leaves residue rings that are hard to remove. Always apply to the cloth first and keep the cloth only slightly damp.
Pressure and circular scrubbing: Pressing hard or rubbing in tight circles grinds any remaining dust into the surface. Use lifting sweeps and let the cloth do the work. If you feel friction, stop, re-blow, and refold.
Cleaning while wearing the headset or while it is warm: Heat and sweat make oils smear rather than lift. Let the headset cool to room temperature before cleaning and never clean the lenses while they are fogged from body heat.
Using eyeglasses without protection: Prescription lenses that tap against VR optics will pit the center of the coating quickly. If you must wear glasses inside, install a soft silicone spacer ring sized for your exact headset model to maintain a 2 to 4 mm gap and check fit before each session.
How Often
Light maintenance preserves the coating far better than aggressive deep cleaning. For daily or every-other-day users, use a blower and a dry microfiber sweep after every 2 to 3 sessions to remove dust and facial oils before they build up. Use a damp-cloth spot treatment only when you see fingerprints or feels-like haze, typically every 1 to 2 weeks for most people. If you share the headset, wipe the facial interface with a separate cloth and do a quick lens dust-off between users, but avoid over-cleaning the lenses themselves. In dusty homes, homes with pets, or after travel, add a quick inspection before you put the headset on rather than increasing pressure or frequency. Always store with a cover on to cut down on how often any cleaning is needed at all.
When to Call a Pro or Replace
Stop cleaning and seek help if you notice a permanent spot that does not move when you change viewing angle, a spiderweb of fine lines visible in bright light, a flaking or rainbow-colored patch where the coating appears to have lifted, or internal dust or fogging between lens layers. Those indicate physical wear or delamination, not surface dirt, and further wiping will enlarge the damaged area. Contact the headset manufacturer or an authorized service provider if the device is under warranty or offers lens module replacement. For out-of-warranty units, compare the price of a factory lens replacement, often $49 to $149 depending on model, against the cost of the headset. Do not attempt to polish, buff with toothpaste or abrasives, or reapply aftermarket coatings. If vision remains blurry after cleaning, check IPD adjustment, eye relief, and prescription needs before assuming the lens is at fault.
FAQ
Can I use isopropyl alcohol or eyeglass wipes that contain alcohol?
Avoid it. Most VR lenses have a thin anti-reflective layer that alcohol can dull or craze, especially with repeated use. Even pre-moistened wipes marketed for eyeglasses often contain 20 to 30 percent isopropyl alcohol and surfactants that leave streaks on larger VR optics. Choose a wipe or spray labeled alcohol-free and safe for coated camera or VR lenses, and use it sparingly on the cloth.
What cloth is actually safe if I do not have a microfiber on hand?
Wait until you have one. A proper lens microfiber is washable, lint-free, and has a dense 200 to 300 GSM knit that traps particles. Muslin, cotton rags, and microfiber labeled for kitchen or automotive use are too coarse or leave lint. Keep two dedicated 6 x 7 inch or larger cloths for VR only, launder them separately without fabric softener, and replace them when they feel thin or hold onto odors.
Why do my lenses fog and does cleaning help?
Fogging is condensation from warmth and humidity, not dirt, so cleaning alone will not prevent it. Make sure the facial interface has airflow, take a 10 minute break to let the headset acclimate if you moved it from a cold room, and ensure vents are clear. A gentle dry buff after the headset cools is enough. Do not apply anti-fog sprays meant for mirrors or cars unless the product is explicitly approved for coated VR optics by the headset maker.
How do I protect lenses if I wear glasses?
The safest options are prescription lens inserts made for your exact headset model or contact lenses. If you wear regular eyeglasses inside, install a soft silicone spacer or anti-scratch ring that creates clearance between the two lens surfaces and check that your frames are narrower than the headset cavity, typically under 5.5 inches total width. Add a TPU film cover when stored, keep both sets of lenses clean with separate cloths, and remove the headset straight forward rather than tilting to avoid clipping the VR lenses.