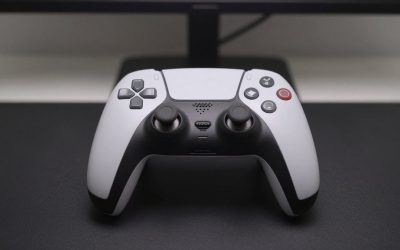
A crackling headset, intermittent audio cutouts, or a microphone that suddenly refuses to register your voice can instantly ruin an immersive gaming session. More often than not, the culprit is not a broken headset or a system glitch; it is simply a build-up of pocket lint, dust, skin flakes, and pet dander inside your controller’s auxiliary port. Learning how to clean ps5 controller aux audio jack port is a vital maintenance skill for any gamer. However, because this 3.5mm port is incredibly small and houses highly sensitive electrical contacts, taking a careless approach can result in permanent damage.
If you tackle this job badly, you risk bending or snapping the delicate, gold-plated spring contacts inside the port. Using the wrong tools—such as steel sewing needles, metal paperclips, or excessive liquid cleaner—can scrape away the conductive plating or cause a short circuit on the controller’s main printed circuit board (PCB). Instead of solving a minor dust issue, an improper cleaning attempt can turn a simple fix into a ruined controller. To protect your gear, follow this safe, professional guide to restoring crystal-clear audio to your PlayStation 5 DualSense controller.
What You Need
Before beginning, gather the correct tools. Avoid using household items that shed fibers or conduct electricity, as they can worsen the clog or short out the controller’s internal hardware.
| Item | Why | Optional? |
|---|---|---|
| 99% Isopropyl Alcohol ($3 – $6 per bottle) | Cleans grease and grime; evaporates almost instantly without leaving water residue behind. | No |
| Wooden Toothpicks or Plastic Floss Picks ($1 – $3) | Safely scrapes out compressed lint without conducting electricity or scratching metal contacts. | No |
| Micro-Tip Cotton Swabs (1.5mm – 2.0mm tip size, $5 – $8) | Fits perfectly inside the 3.5mm port without shedding cotton fibers like standard cosmetic swabs. | No |
| Can of Compressed Air (10 oz, $6 – $10) | Blows out loose debris and fibers from deep inside the port recess. | Yes |
| LED Flashlight or Headlamp ($10 – $15) | Illuminates the tiny 3.5mm opening so you can see exactly where the debris is trapped. | No |
Step-by-Step
Follow these steps in order. Take your time, work under bright lighting, and never force any tool into the port.
Step 1: Power Down and Disconnect (Time: 1 Minute)
Safety is the first priority when dealing with electronic ports. Turn off your PlayStation 5 console completely. Unplug the DualSense controller from any USB-C charging cables. Press and hold the PlayStation button on the controller for approximately 10 seconds to ensure the controller is fully powered off and not suspended in standby mode. This prevents any accidental button presses or electrical shorts during the cleaning process.
Step 2: Inspect the Port Under Direct Light (Time: 2 Minutes)
Hold the controller with the bottom edge facing upward. Position your LED flashlight or headlamp directly over the 3.5mm auxiliary port. Peer straight down into the opening. Look for gray clumps of pocket lint, hair, or dark dirt build-up. Note the position of the gold-plated metal contact pins along the sides of the interior chamber. Knowing where these pins are located helps you avoid scraping them directly in the next step.
Step 3: Perform a Dry Extraction (Time: 4-5 Minutes)
Take a wooden toothpick or a plastic dental floss pick. If using a wooden toothpick, use a clean utility knife to gently shave down the tip to make it slightly thinner and flatter. Carefully insert the tip into the port, keeping it pressed against the side wall to avoid hitting the delicate spring contacts. Gently sweep the toothpick in a circular motion around the bottom of the port, then hook the tip under any compacted lint and pull it straight outward. Do not push inward, as this will pack the debris tighter against the electrical connections.
Step 4: Use Compressed Air to Clear Loose Dust (Time: 1-2 Minutes)
Hold the can of compressed air upright to prevent liquid propellant from spraying out. Position the nozzle about 2 inches away from the aux port at a slight 45-degree angle. Administer two or three short, controlled bursts of air. This dislodges any remaining loose fibers shaken free by the toothpick. Avoid inserting the straw of the compressed air can directly into the port, as the pressure can be too intense and may misalign the internal pins.
Step 5: Clean with Isopropyl Alcohol (Time: 3-4 Minutes)
Pour a small amount of 99% isopropyl alcohol into its cap. Dip a micro-tip cotton swab into the alcohol. The swab should be damp, not dripping wet. Press the swab against a clean paper towel to remove any excess liquid. Insert the damp swab into the port and rotate it gently clockwise and counter-clockwise. The alcohol will dissolve oils, sweat, and sticky residues left behind by hands or spilled drinks. Pull the swab straight out; you will likely see a dark ring of dirt on the tip.
Step 6: Dry and Test the Connection (Time: 10 Minutes)
Although 99% isopropyl alcohol evaporates very quickly, let the controller sit undisturbed for 10 minutes to guarantee all moisture is gone. Once dry, plug your headset’s 3.5mm jack into the port. You should feel a distinct, firm click when the jack is fully seated. Turn on your console, start a game, and test the audio quality, mic input, and volume controls to ensure the connection is clear and static-free.
Mistakes to Avoid
Avoid these common mistakes to prevent destroying your controller’s audio functionality:
- Using Metal Tools: Never use sewing needles, safety pins, paperclips, or tweezers. Metal will scrape away the microscopic gold plating on the contacts, leading to rapid oxidation and permanent static. It can also bend the pins out of alignment permanently.
- Using 70% Rubbing Alcohol: Low-grade rubbing alcohol contains 30% water, which dries slowly and can cause rust on the internal solder joints. Always stick to 99% purity.
- Blowing with Your Mouth: Human breath contains high levels of moisture and saliva. Blowing directly into the port introduces corrosive elements that can degrade the contacts over time.
- Using Standard Cotton Swabs: Standard cosmetic cotton swabs are too large (typically 5mm wide) and shed loose fibers easily, which will clog the 3.5mm port further. Use precision micro-swabs instead.
How Often
How frequently you need to clean your controller depends on your environment and gaming habits. As we transition into 2026, high-fidelity spatial audio in games makes a clean connection more important than ever. If you store your controller in a drawer or a protective case, a light cleaning once every six months is sufficient. However, if you frequently leave your controller on a dusty desk, live with shedding pets, or eat snacks while gaming, perform a quick dry inspection once a month to prevent debris from compacting deep inside the port.
When to Call a Pro or Replace
Sometimes, cleaning is not enough to solve the problem. If you look inside the port with a flashlight and notice that the gold contact prongs are visibly bent flat or broken off entirely, cleaning will not restore your audio. Similarly, if your headset plug feels loose, wobbles, or falls out of the port without any resistance, the internal retaining springs have worn out.
In these cases, you have a few options. A replacement internal headphone jack port module is inexpensive, usually costing between $5 and $8 online. However, replacing it requires opening the controller’s outer shell and unscrewing the main board, which can be difficult for beginners and will void any active warranties. A professional electronics repair shop will charge between $30 and $50 for the labor. Given that a brand new 280-gram DualSense controller retails for $70 to $75, if your controller is several years old and also suffers from thumbstick drift, investing in a replacement controller is often the most practical and cost-effective choice.
FAQ
Can I use WD-40 to clean my PS5 controller headphone jack?
No, you should never use standard WD-40 inside a controller. Standard WD-40 leaves behind a non-conductive, oily residue that attracts more dust and eventually insulates the metal pins, completely blocking the audio signal. If you must use a spray, use a specialized, quick-drying electrical contact cleaner designed specifically for sensitive electronics.
Why does my headset sound staticy even after cleaning the port?
If the controller port is perfectly clean, the issue may lie with the headset plug itself. Over time, the metal rings on a 3.5mm male plug can accumulate oils from your fingers or develop thin layers of oxidation. Clean the metal plug of your headset using a lint-free microfiber cloth dipped in 99% isopropyl alcohol, wipe it dry, and try inserting it again.
Is it safe to use a toothpick if it breaks inside the port?
Wooden toothpicks are safe because they do not conduct electricity, but they can splinter if you apply too much lateral pressure. To prevent this, always use light pressure and pull straight outward. If a piece of toothpick does snap off inside the port, do not use metal tweezers to get it out. Instead, use a drop of hot glue on the end of another toothpick, press it against the broken piece, let it cool for 30 seconds, and pull it out.
Will cleaning the aux port fix my headset microphone issues?
Yes, it can. The standard 3.5mm aux port on the PS5 controller uses a TRRS (Tip-Ring-Ring-Sleeve) configuration, where different sections of the jack handle the left audio, right audio, ground, and microphone signals. Dust sitting on the very bottom contact ring can block the microphone connection while leaving the headphone audio working perfectly. Cleaning the deep bottom section of the port often restores microphone functionality.
Related guides
- Best Free MMOs on Steam: Subscription Limits, Pay-to-Win and Time Cost (2026)
- Best Free Horror Games on Steam: How to Pick One That Fits Your PC and Your Nerves (2026)
- Black Frame Insertion vs VRR: Which Smoothness Feature Should You Use?
- Best Webcams for Streaming: 11 Listings Compared by Resolution, Focus and Light (2026)