As a home and gaming setup editor, I often see gorgeous entertainment centers ruined by a chaotic tangle of external hard drives, power bricks, and messy cords. When your console runs out of space, the temptation is to grab any cheap external drive and drape it over your media console. However, standard USB external drives cannot play next-generation optimized games directly; they can only store them. To play modern titles without constant shuffling, you need a dedicated solid-state solution. Learning how to set up xbox series x storage expansion card is the absolute cleanest, most efficient way to upgrade your console’s capacity without compromising your living room’s aesthetic or your system’s performance.
But don’t just jam the card into the back of your machine. If done poorly, you risk permanently bending the delicate proprietary PCIe 4.0 connection pins inside the console’s rear port. This can result in a ruined expansion card or a damaged motherboard slot, requiring a professional repair that can easily cost upwards of $200. Furthermore, placing your console in a cramped, dusty media cabinet without proper clearance can cause the system to run hot, especially when high-speed storage components are working under load.
What You Need
Before beginning, clear off a flat, stable surface. The Xbox Series X is a substantial machine, measuring 5.9 by 5.9 by 11.8 inches and weighing 9.8 pounds. It draws up to 315 watts of power under load, meaning it needs a stable, well-ventilated home. Gather the following items to ensure a smooth, damage-free installation:
| Item | Why You Need It | Optional? |
|---|---|---|
| Xbox Series X Console | The host system requiring the storage upgrade. | No |
| Storage Expansion Card | The physical NVMe SSD that plugs directly into the console’s high-speed architecture (e.g., the WD_Black 1TB C50 or a DIY solution like the Furfox Expansion Card Enclosure priced at around $190). | No |
| Microfiber Cloth | Used to clean away dust from the console’s rear port before insertion to prevent connection errors. | Yes |
| Flashlight or Phone Light | Helps you clearly see the orientation of the rear slot to avoid forcing the card in backward. | Yes |
Step-by-Step
Setting up your expansion card is incredibly simple because the Xbox Series X architecture is built around a plug-and-play standard. Follow these steps to complete the physical and digital setup safely.
Step 1: Prep and Power Down (Time Estimate: 2 minutes)
While the storage expansion port technically supports hot-swapping (inserting or removing the card while the console is turned on), it is always safest to power down your console first, especially during the initial setup. Navigate to the Xbox guide, select “Profile & system,” go to “Power,” and choose “Turn off console.” Alternatively, hold down the power button on the front of the console for 10 seconds until the light stops flashing. Ensure the rear of the console is easily accessible and free of heavy dust buildup.
Step 2: Clean and Inspect the Port (Time Estimate: 1 minute)
Locate the dedicated “Storage Expansion” port on the back of your Xbox Series X. It is situated directly between the HDMI Out port and the rear USB ports. Use your flashlight to inspect the slot. If you see lint, pet hair, or dust bunnies clinging to the opening, gently wipe the area with a dry microfiber cloth. Avoid using compressed air directly into the port, as this can push dust deeper into the console’s internal chassis.
As an Amazon Associate we earn from qualifying purchases at no extra cost to you.
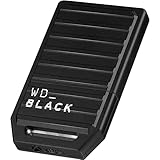

Step 3: Insert the Expansion Card (Time Estimate: 1 minute)
Remove any protective plastic caps from your storage expansion card. Hold the card by its plastic grip. The card measures approximately 1.2 by 2.0 inches and weighs a mere 0.1 pounds. Ensure the brand logo (such as the WD_Black branding) is facing the correct direction—typically facing away from the main HDMI port, though this can vary by card design. Slide the card straight into the port. It should slide in smoothly. Push firmly until you feel a distinct click or until the card is flush with the rear panel. If you feel resistance, stop immediately, pull the card out, and verify that it is oriented correctly.
Step 4: Power On and Format (Time Estimate: 1 minute)
Plug your console back in if you disconnected the power cable, and press the Xbox power button. Once the dashboard loads, a pop-up notification should automatically appear on your screen, indicating that a external storage device has been detected. The console will ask if you plan to use the card primarily on this console or if you want to swap it between multiple consoles. Select your preference. To verify the storage is active, navigate to Settings > System > Storage devices. You should see your internal drive and the new expansion card listed side-by-side, displaying your newly expanded storage pool.
Mistakes to Avoid
- Forcing the Card in Backward: The proprietary slot is keyed to fit only one way. Forcing a card in upside down can bend the internal pins, ruining the $100 to $200 card and the console’s port.
- Neglecting Ventilation Space: High-speed NVMe storage cards can get quite warm during intense gaming sessions. Ensure there is at least 4 to 6 inches of open space behind your console’s rear ports so heat can dissipate efficiently.
- Hot-Swapping During Active Writes: While the cards are designed to be swappable, pulling the card out while a game is actively saving, updating, or loading can corrupt your save files and partition table. Always close your games before removing the card.
- Buying Standard USB Enclosures for Series X|S Games: Ensure you do not confuse a standard external USB hard drive enclosure with a dedicated PCIe Gen 4 expansion card. Only official expansion cards or specialized DIY kits like the Furfox system can run native Series X|S optimized games directly.
How Often
Because these cards are incredibly durable, you only need to perform the physical installation once. However, from a maintenance perspective, you should inspect the rear of your console for dust buildup every 3 to 6 months. If you live in a dusty environment or have pets, dust can accumulate around the expansion card’s exposed edges, which can trap heat. Simply power down the system, remove the card, wipe the area down with a dry microfiber cloth, and reinsert it.
When to Call a Pro or Replace
If you insert your card and the console consistently fails to recognize it, first try cleaning the contacts with a drop of isopropyl alcohol on a cotton swab and letting it dry completely. If the card still does not register, test it in another Xbox Series X console if possible. If the card works elsewhere but not on your machine, your console’s internal port pins may be bent or broken. In this scenario, do not attempt to bend the pins back yourself with tweezers; you could short-circuit the motherboard. Contact Microsoft support or a professional local console repair technician.
As we look ahead to 2026, game file sizes are only expected to grow, with some titles easily surpassing 150GB to 200GB. If you find yourself constantly deleting games even with a 1TB expansion card installed, it might simply be time to upgrade to a larger 2TB model rather than trying to service your existing drive.
FAQ
Can I play Xbox Series X|S optimized games directly from this expansion card?
Yes. Unlike standard external USB hard drives, these storage expansion cards tap directly into the Xbox Velocity Architecture. They match the exact speed and performance of the console’s internal custom NVMe SSD, meaning you will experience identical load times, Quick Resume features, and graphical performance.
Does the expansion card require an external power source?
No. The card draws all necessary power directly from the console’s proprietary motherboard slot. It does not require any extra power cables, bricks, or USB connections, keeping your entertainment center completely clean and clutter-free.
How do I set the expansion card as my default install location?
Go to Settings > System > Storage devices. From there, select “Change installation locations.” You can choose to install all new games, backward-compatible games, or apps directly to the expansion card by default.
Can I share this card with a friend’s Xbox Series X?
Yes, the cards are fully portable. You can unplug your expansion card, take it to a friend’s house, and plug it into their Xbox Series X or Series S. As long as you log into your Xbox profile on their console, you can immediately play any games installed on the card without needing to redownload them.
Related guides
- Best Free MMOs on Steam: Subscription Limits, Pay-to-Win and Time Cost (2026)
- Best Free Horror Games on Steam: How to Pick One That Fits Your PC and Your Nerves (2026)
- Black Frame Insertion vs VRR: Which Smoothness Feature Should You Use?
- Best Webcams for Streaming: 11 Listings Compared by Resolution, Focus and Light (2026)