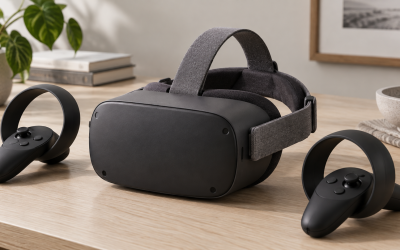
Your PCVR headset lights up, Windows makes the familiar USB connection chime, and then SteamVR or Meta Quest Link flashes red with “USB Connection Error,” “Headset Not Detected,” or “USB Device Not Recognized.” Sometimes the headset appears briefly in Device Manager before vanishing, or it stays visible but shows a yellow warning icon and refuses to start VR. The image in the headset stays black or freezes on three dots while your PC acts like nothing is plugged in.
This is an urgent stop-error because you cannot enter VR at all until the USB handshake completes, and repeatedly replugging can force Windows to disable the port for power protection. Do not keep hot-swapping the same port every few seconds. Work through the checks below in order instead, as most PCVR USB failures as of early 2026 are caused by power, driver, or port compatibility issues that take less than ten minutes to correct without buying new hardware.
Likely Causes
| Cause | How to confirm | Fix difficulty |
|---|---|---|
| Wrong USB port type or bandwidth contention | Headset only fails on front-panel or USB 2.0 ports; works on rear USB 3.0/3.1 Gen 1 port marked SS or SS10; Device Manager shows “Unknown USB Device” | Easy |
| Windows USB power saving enabled | Error appears after idle, sleep, or mid-session disconnect; reconnecting temporarily fixes it; Power settings show USB selective suspend on | Easy |
| Corrupted or generic USB controller driver | Device Manager > Universal Serial Bus controllers lists “Generic USB Hub” or shows yellow bang on “USB xHCI Compliant Host Controller”; headset worked before a Windows Update | Moderate |
| Faulty, loose, or out-of-spec cable, adapter, or hub | Wiggling the cable triggers disconnect chime; error persists across different PCs; using a hub or extension in the chain | Moderate |
| BIOS XHCI Hand-off or Legacy USB conflict | Headset not detected at all until Windows fully boots; other USB 3.0 devices also unstable; BIOS is on default or “Auto” for XHCI | Moderate |
| Conflicting VR runtime or device driver cache | Oculus/Meta app, SteamVR, or Windows Mixed Reality Portal shows headset as offline while Device Manager shows it correctly; reinstalling runtime helped previously | Advanced |
Fix 1: Switch to a Compatible Rear USB 3.0 Port and Remove Hubs
What causes it
PCVR headsets require a true USB 3.0 or higher data path with 900 mA sustained power. Front-panel headers, USB 2.0 ports, and passive hubs often cannot negotiate SuperSpeed and fall back to USB 2.0, which triggers the connection error. Shared internal hubs handling your case ports also create bandwidth contention.
How to check
Look at the port color and label: USB 3.0 is typically blue or labeled SS, SS10, or SuperSpeed, while USB 2.0 is black or white. Open Device Manager > Universal Serial Bus controllers and plug the headset in while watching the list. If you see “Unknown USB Device (Device Descriptor Request Failed)” or the entry appears under “Generic USB Hub” rather than “USB xHCI Compliant Host Controller,” the port is not negotiating correctly.
What to do
Power off the headset, unplug all USB hubs, extensions, and adapters. Plug the headset cable directly into a USB 3.0 Type-A port on the back of your motherboard I/O panel, not the case front. If you have multiple rear USB 3.0 ports, try one controlled by a different controller, usually the top-most ports near the PS/2 or Ethernet jack are on the primary controller. Wait 10 seconds after plugging in before launching your VR runtime. In SteamVR, go to SteamVR > Settings > Developer > Developer Settings and check that the headset appears under Devices without a red USB icon.
How to undo it
Return the cable to your preferred port or reattach your hub. If the error returns, that hub or port is incompatible and should be avoided for VR.
Fix 2: Disable USB Selective Suspend and Power Management
What causes it
Windows is set by default to cut power to idle USB ports to save energy. With Selective Suspend enabled, Windows will suspend the headset port during loading screens or after sleep, which breaks the continuous connection PCVR requires.
How to check
Press Windows key + R, type powercfg.cpl, press Enter. Click Change plan settings next to your active plan > Change advanced power settings. Expand USB settings > USB selective suspend setting. If it says Enabled for On battery and Plugged in, it is active. Next, open Device Manager > Universal Serial Bus controllers, right-click each USB Hub and USB xHCI Host Controller > Properties > Power Management tab. If “Allow the computer to turn off this device to save power” is checked, power management is interfering.
What to do
In Advanced Power Settings, set USB selective suspend setting to Disabled for both On battery and Plugged in, then click Apply. In Device Manager, for every entry named USB Root Hub (USB 3.0), Generic USB Hub, and USB xHCI Compliant Host Controller, open Properties > Power Management and uncheck “Allow the computer to turn off this device to save power,” then click OK. Restart the PC with the headset unplugged, then reconnect after login.
How to undo it
Recheck “Allow the computer to turn off this device to save power” and set USB selective suspend setting back to Enabled. Reapply the power plan defaults.
Fix 3: Reset and Update the USB Controller Driver
What causes it
A corrupted, outdated, or generic Microsoft driver for the xHCI controller can misidentify the headset. This frequently happens after a major Windows Update replaces the motherboard manufacturer driver with a generic one.
How to check
Open Device Manager > Universal Serial Bus controllers. Look for any entry with a yellow triangle, or a controller listed only as “Generic USB xHCI Host Controller.” Right-click USB xHCI Compliant Host Controller > Properties > Driver tab > Driver Details. If Provider is listed as Microsoft and Driver Date is older than your motherboard support page, you are on the generic driver.
What to do
Right-click USB xHCI Compliant Host Controller > Uninstall device > check “Attempt to remove the driver for this device” if present > Uninstall. Do not uninstall all controllers at once. Restart Windows, which will reinstall a clean copy of the driver automatically. For a permanent fix, install the official driver: go to your motherboard manufacturer’s Support page > enter your exact motherboard model > Drivers > Chipset or USB, download the AMD Chipset Driver or Intel Chipset Device Software and the ASMedia or Intel USB 3.0 driver if listed, then run the installer and restart. After reboot, reconnect the headset directly to the rear port.
How to undo it
In Device Manager > USB xHCI Compliant Host Controller > Properties > Driver tab, click Roll Back Driver if available, or run System Restore to the restore point created before the driver change.
Fix 4: Inspect the Cable, Seating, and Adapters
What causes it
A partially seated connector, bent pin, frayed cable, or passive USB-C to USB-A adapter that does not pass USB 3.0 SuperSpeed signals will cause repeated descriptor failures. Many included Link cables need firm, full insertion to maintain all nine pins of contact.
How to check
With the headset unplugged, inspect both ends of the cable and the headset socket for dust, lint, or bent pins using a flashlight. Check the cable for kinks within six inches of each connector. Press Windows key + X > Device Manager and keep the window open while you firmly reseat the cable with a straight push until you feel a solid click. If Windows plays the disconnect and connect chime rapidly when you wiggle the cable gently, the cable or port is physically failing. Test with a different certified USB 3.0 cable if you have one, without any extension.
What to do
Disconnect the cable at both the PC and the headset end, if detachable. Blow out dust with short bursts of compressed air, then reseat firmly until the plug housing sits flush with the port. Remove any gender changers, right-angle adapters, or extension cables. If you must use USB-C on the PC, use an active USB-C to USB-A 3.0 adapter rated for 10 Gbps and 3A, or better, a native USB-C 3.1 Gen 2 port on the motherboard. For Meta Quest headsets, ensure the cable clicks twice into the headset USB-C port, past the initial friction point.
How to undo it
Reattach your original extension or adapter. Keep the known-good cable as a spare if the original cable proves faulty.
Fix 5: Clear the VR Runtime USB Cache and Re-authorize the Device
What causes it
SteamVR, Meta Quest Link, and Windows Mixed Reality cache the USB device instance. When Windows re-enumerates the headset to a new port or driver, the runtime may still try to use the old device path, showing Offline or USB Error even though Device Manager is clean.
How to check
Open Device Manager > View > Show hidden devices. Expand Universal Serial Bus devices and Mixed Reality devices. If you see grayed-out entries for your headset alongside an active one, you have stale instances. In the Meta Quest Link desktop app > Settings > General, if the headset shows as Not Connected while Device Manager shows “Oculus XRSP Interface” without error, the runtime cache is desynced.
What to do
Close SteamVR and the Meta Quest Link app completely from the system tray. Open Device Manager > Universal Serial Bus devices, right-click every grayed-out headset entry > Uninstall device. Also uninstall the active headset entry once. Disconnect the headset. Press Windows key + R, type %ProgramData%\Oculus and delete the contents of the DeviceCache folder if present. Press Windows key + R, type steam://flushconfig and confirm in the dialog, then restart Steam. Reconnect the headset and allow Windows to reinstall it, then launch only one runtime at a time and authorize the headset when prompted inside the headset display.
How to undo it
Reinstall your VR runtime from its installer if devices no longer appear. SteamVR configs can be restored from steam\config\steamvr.vrsettings.bak if you need previous bindings.
Fix 6: Enable XHCI Hand-off in BIOS and Disable Legacy USB Auto
What causes it
If the BIOS is set to handle USB itself instead of handing control to Windows, the xHCI controller may initialize in a compatibility mode that does not provide full USB 3.0 power and timing for VR headsets during early boot enumeration.
How to check
Restart and press Delete or F2 repeatedly during boot to enter BIOS Setup. Navigate to Advanced > USB Configuration or Settings > Advanced > USB Configuration depending on your board. Look for settings named XHCI Hand-off, XHCI Mode, and Legacy USB Support.
What to do
Set XHCI Hand-off to Enabled, XHCI Mode to Enabled or Smart Auto rather than Auto, and Legacy USB Support to Disabled or Auto. If you see ErP Ready or Deep Sleep, set them to Disabled. Press F10 to Save and Exit. After Windows boots, reconnect the headset to the same rear port and test again. Do not change unrelated CPU or memory timings in this menu.
How to undo it
Re-enter BIOS and set XHCI Hand-off back to Disabled and Legacy USB Support back to Enabled, then Save and Exit.
Fix 7: Fully Power Cycle the Headset and Reset Its USB Connection State
What causes it
Headsets retain error states in memory after a failed USB negotiation. A soft reboot from the menu does not clear the USB controller on the headset itself, so the same descriptor error repeats on every plug-in.
How to check
Unplug the headset USB but leave power connected if it has separate power. Hold the headset power button for 20 to 30 seconds until the status LED fully turns off and does not pulse. For tethered PCVR headsets like Valve Index or HTC Vive, unplug the breakout box from wall power as well.
What to do
Shut down the PC fully via Start > Power > Shut down, not Restart. Unplug the PC from wall power or switch off the PSU for 30 seconds to drain residual power to the USB controllers. With everything off, disconnect the headset cable from both ends. Power the PC back on. Plug the headset cable firmly into the rear USB 3.0 port first, then connect it to the headset, then hold the headset power button for 3 seconds to boot. Launch your VR runtime only after Windows finishes the “Setting up device” notification.
How to undo it
No persistent change is made, so no undo is needed. Your previous power states will return naturally after normal shutdowns.
If Nothing Works
If the error persists on every rear port after the fixes above, test isolation to identify hardware failure. Try the headset and cable on a different PC or laptop with a known USB 3.0 port. If it fails there as well with the same Unknown Device error, the cable or headset USB board is faulty and needs warranty service. If it works on the other PC, the issue is your motherboard’s USB subsystem. As a workaround, install a powered PCIe USB 3.0 expansion card with a dedicated Fresco Logic or Renesas controller and a SATA or Molex power connector, which bypasses the motherboard controller entirely and provides clean, high-current USB power. Before contacting support, gather Device Manager > USB xHCI Compliant Host Controller > Properties > Events log text, your motherboard model and BIOS version from System Information (msinfo32), and the exact error string shown in SteamVR > Settings > Developer or the Meta app logs.
FAQ
Why does my headset show USB 2.0 instead of USB 3.0 and fail?
The headset negotiated down to USB 2.0 because the port, hub, or adapter cannot pass SuperSpeed signals or deliver enough current. Device Manager will show it under a Generic Hub instead of the xHCI controller. Use a direct connection to a rear motherboard USB 3.0 port labeled SS or SS10 and remove all passive adapters and unpowered hubs.
Should I use a USB hub or extension for my PCVR cable?
Avoid hubs and passive extensions for the primary connection. If you need length, use a single active or fiber-optic USB 3.0 extension rated for 5 Gbps or higher with external power, and keep the total chain to one extension plus the original cable. Daisy-chaining two extensions almost always triggers USB descriptor failures.
Can a Windows Update cause the USB connection error overnight?
Yes. Windows Update can replace the manufacturer USB controller driver with a generic one or re-enable Selective Suspend after an update. After any major update, recheck Device Manager > Universal Serial Bus controllers > Driver Provider, and verify Control Panel > Power Options > Advanced settings > USB selective suspend setting is still Disabled.
Will a USB-C port fix it if all my USB-A ports fail?
Sometimes. A native USB-C 3.1 Gen 2 or USB 3.2 Gen 2 port on the rear I/O often runs on a separate controller with better power delivery than older USB-A ports. Use a high-quality USB-C to USB-C or USB-C to USB-A 3.0 cable rated for 10 Gbps data and 3A power, connected directly without adapters, and ensure XHCI Hand-off is Enabled in BIOS.