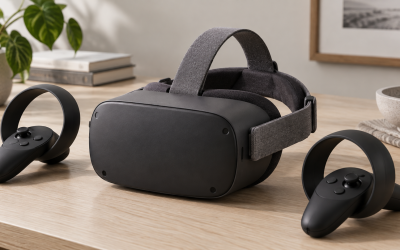
When Meta Quest 3 linking to PC fails, you get the same frustrating loop every time: the headset shows a black screen with three dots, the PC app says Quest 3 not found or connected with no headset audio, or Link immediately drops back to the home environment after you click Enable. With Air Link it is often stuck on Searching or Pairing, while with a wired Link cable you may see a brief Connected then Not Connected flicker, or an error that the cable cannot be verified.
This is an urgent fix because a broken Link connection blocks your entire PC VR library and leaves the headset unable to access SteamVR or Oculus PC apps. Before you reinstall Windows or buy a new cable, work through the checks below in order. Most linking failures are caused by a mismatched setting, driver, or USB or network handoff, not by faulty hardware, and can be restored in a few minutes without losing your game data.
Likely Causes
| Cause | How to confirm | Fix difficulty |
|---|---|---|
| Meta Quest Link app not updated or not set as active OpenXR runtime | Open Meta Quest Link app > Settings > General shows Update Available, or Settings > General > OpenXR Runtime shows Set as active is clickable | Easy |
| USB power saving or incompatible port/cable | Headset connects for 5 to 10 seconds then disconnects, or Device Manager shows Unknown USB Device. Works briefly on a different USB port | Easy |
| Air Link pairing mismatch or network isolation | PC and headset are on different Wi-Fi bands or the PC is on Ethernet while headset is on 2.4 GHz guest network. Headset never finds the PC name in Air Link | Easy |
| Graphics driver conflict or integrated GPU selected | Meta Quest Link app > Devices > Graphics Preferences shows warning, or Task Manager > Performance shows Link using Intel UHD instead of NVIDIA/AMD GPU | Moderate |
| Windows firewall or antivirus blocking OVRService | Link works after disabling firewall temporarily, or Windows Security > Firewall & network protection shows blocked OVRServiceLauncher and OVRServer_x64.exe | Moderate |
| Corrupted Link configuration or headset pairing data | Link failed after a Quest software update or after switching PCs, and remains broken after cable and network fixes. Factory reset prompt appears on headset | Moderate |
Fix 1: Restart and Reseat the Link Handshake Correctly
What causes it
The OVRService on your PC and the Link service on the headset can desynchronize if either device sleeps, disconnects abruptly, or receives a background update. This leaves a ghost session where both sides think they are already connected.
How to check
On PC, press Ctrl + Shift + Esc to open Task Manager, select Processes, and look for OVR Service, OVRServiceLauncher, and OVRServer_x64.exe. If any show Not Responding or are missing while the Meta Quest Link app says Connected, the handshake is stuck. On the headset, go to Quick Settings > Link and check if it says Connected without showing your PC name.
What to do
Close the Meta Quest Link app fully. In Task Manager, select OVRService and click End Task, then go to the Services tab, right-click OVRService and choose Restart. Turn off the headset completely by holding the power button and selecting Power Off, not just Restart. Unplug the Link cable from both ends. Wait 30 seconds, power on the headset, open the Meta Quest Link app on PC, then plug the cable back in directly to the PC without a hub or adapter. In the headset, go to Quick Settings > System > Quest Link and click Launch, then approve Allow access to data when prompted and enable Quest Link.
How to undo it
No changes need to be reverted. If this did not help, simply leave the cable plugged in and continue to the next fix. This process does not alter settings or delete data.
Fix 2: Force the Correct OpenXR Runtime and Update the Quest PC App
What causes it
If SteamVR or another app has set itself as the OpenXR active runtime, Meta Quest Link cannot take control of the VR compositor. An outdated Quest Link PC app also mismatches the headset OS after automatic headset updates, which as of early 2026 are delivered on version 68 and later.
How to check
On PC, open Meta Quest Link > Settings > General. Look at the top for Software Update and at the bottom for OpenXR Runtime. If you see an Update Available banner or a button that says Set Meta Quest Link as active OpenXR Runtime, this fix applies. You can also check C:\Program Files\Oculus\Support\oculus-runtime\OVRServiceLauncher.exe properties > Details to verify the version is below what the app reports.
What to do
In Meta Quest Link > Settings > General, click Set Meta Quest Link as active OpenXR Runtime. Then click Update or go to Settings > General > Software Update > Check for Updates and install any pending update. After updating, click Library > Updates to verify no restart is pending. Restart the PC, then on the headset go to Settings > System > Software Update and confirm No Update Available. Launch Link again from Quick Settings > Quest Link.
How to undo it
To restore another runtime, open the other app such as SteamVR > Settings > OpenXR > Set SteamVR as OpenXR Runtime. To revert the app update, you would need to uninstall and reinstall the previous version, which is not recommended. Leave Meta Quest Link as the active runtime if you primarily use Quest Link.
Fix 3: Fix USB Port, Cable, and Power Management for Wired Link
What causes it
Windows USB Selective Suspend and power saving can cut power to the Link cable mid-session. Front-panel ports, USB 2.0 ports, and USB hubs often provide insufficient bandwidth or power, causing Code 43 or Link speed limited to USB 2.0 warnings.
How to check
Open Device Manager > Universal Serial Bus controllers. Expand USB Root Hub (USB 3.0) and check for a yellow warning icon. Run a cable test in Meta Quest Link > Devices > Quest 3 and Touch > Connection Preferences > Run Test. If the test shows USB 2.0 or 0.3 Gbps or less, or Device Manager > Universal Serial Bus controllers > Properties > Power Management shows Allow the computer to turn off this device to save power is checked, apply this fix.
What to do
Plug the official Link cable or a certified USB 3.0 cable rated for 5 Gbps directly into a rear motherboard USB 3.2 Gen 1 port, usually marked with a blue insert or SS label. Avoid adapters and docks. In Device Manager, right-click each USB Root Hub (USB 3.0) and Generic SuperSpeed USB Hub > Properties > Power Management > uncheck Allow the computer to turn off this device to save power. Then go to Control Panel > Hardware and Sound > Power Options > Change plan settings > Change advanced power settings > USB settings > USB selective suspend setting > set to Disabled. Set Windows Settings > Bluetooth & devices > USB > USB power saving to Off if present. Unplug and replug the cable and accept the Allow USB debugging prompt inside the headset if it appears.
How to undo it
Return to Device Manager > USB Root Hub Properties > Power Management and recheck Allow the computer to turn off this device. In Power Options > USB selective suspend setting, set it back to Enabled. Reconnect to your original USB port if needed.
Fix 4: Correct Air Link Network and Pairing Settings
What causes it
Air Link requires the PC and Quest 3 to be on the same local network with low latency and without client isolation. Separate subnets, a guest network, or a router with AP isolation enabled will prevent discovery, even if both devices have internet.
How to check
On PC, press Windows + R, type cmd, then type ipconfig and note the IPv4 Address and Default Gateway. On the headset, go to Settings > Wi-Fi > select your connected network > view IP Address. If the first three octets differ, for example 192.168.1.x on PC and 192.168.2.x on headset, they are on different subnets. Also check if your PC is on Ethernet while the router broadcasts separate 2.4 GHz and 5 GHz networks with different names.
What to do
Connect both devices to the same 5 GHz Wi-Fi network name. If your PC is on Ethernet, ensure that Ethernet and Wi-Fi are on the same router and that the router setting for Wireless Isolation, AP Isolation, or Client Isolation is Disabled in your router admin page. In Meta Quest Link > Settings > Beta > Air Link, toggle Air Link Off and On. On the headset, go to Settings > System > Quest Link > Quest Link settings > enable Air Link, then select your PC name and click Pair. When the 6-digit pairing code appears, confirm it matches on both screens. Set Graphics Preferences > Encode bitrate to 150 to 200 Mbps over Wi-Fi 5 or 200 to 250 Mbps over Wi-Fi 6. Keep the headset within 15 feet of the router with line of sight.
How to undo it
To disable Air Link again, go to Meta Quest Link > Settings > Beta and toggle Air Link Off, and on the headset go to Settings > System > Quest Link > disable Air Link. Re-enable Wireless Isolation in your router if you previously required it for your network setup.
Fix 5: Set the Dedicated GPU and Clean Reinstall Graphics Drivers
What causes it
Link may try to encode video on the integrated GPU, which lacks the encoder needed for Link. Corrupted or auto-updated NVIDIA or AMD drivers can also break the Oculus Virtual Audio Device and tracking compositor, showing a black screen after Link connects.
How to check
Press Windows + X > Device Manager > Display adapters. If you see both Intel UHD or AMD Radeon Graphics and an NVIDIA GeForce RTX or AMD Radeon RX card, check which is active. Open Windows Settings > System > Display > Graphics, find OVRServer_x64.exe and OculusClient.exe, and see if they are set to Power saving. Open Task Manager > Performance while Link is running to see GPU 0 versus GPU 1 usage.
What to do
Go to Windows Settings > System > Display > Graphics > Add desktop app > browse to C:\Program Files\Oculus\Support\oculus-runtime\OVRServer_x64.exe and C:\Program Files\Oculus\Support\oculus-client\OculusClient.exe > Options > set to High performance. For NVIDIA, open NVIDIA Control Panel > Manage 3D settings > Program Settings > select OVRServer_x64.exe > set Preferred graphics processor to High-performance NVIDIA processor. Then perform a clean driver install: download the latest driver from NVIDIA or AMD, run the installer, choose Custom install and check Perform a clean installation. Restart the PC. In Meta Quest Link > Devices > Graphics Preferences, set Refresh Rate to 72 Hz and Render Resolution to 1.0x for testing, then increase gradually to 90 Hz or 120 Hz and 1.2x if stable.
How to undo it
Return to Windows Settings > System > Display > Graphics and set the apps back to Let Windows decide. In NVIDIA Control Panel, set Preferred graphics processor back to Auto-select. You cannot undo a driver clean install directly, but you can install the previous driver version again over the current one.
Fix 6: Allow OVRService Through Windows Firewall and Antivirus
What causes it
Windows Defender Firewall and third-party antivirus can block OVRServiceLauncher, OVRServer_x64.exe, and OVRServer, causing Link to fail at the authentication step with no error code or with cannot reach Oculus service.
How to check
Go to Windows Security > Firewall & network protection > Allow an app through firewall > Change settings. Look for OVRServiceLauncher, OVR Service, and OculusClient. If they are unchecked for Private or Public, or missing entirely, this is likely the cause. Check your antivirus quarantine or history for recently blocked files under C:\Program Files\Oculus\.
What to do
In Windows Security > Firewall & network protection > Allow an app through firewall > Change settings > Allow another app > Browse > add C:\Program Files\Oculus\Support\oculus-runtime\OVRServiceLauncher.exe, C:\Program Files\Oculus\Support\oculus-runtime\OVRServer_x64.exe, and C:\Program Files\Oculus\Support\oculus-client\OculusClient.exe, and check both Private and Public for each. If you use third-party antivirus, open its Settings > Exceptions or Allow list > add the entire folder C:\Program Files\Oculus\ and C:\ProgramData\Oculus\. Then press Windows + R, type services.msc, find OVRService > right-click > Restart. Launch Meta Quest Link as administrator by right-clicking its shortcut and choosing Run as administrator.
How to undo it
Return to Allow an app through firewall and uncheck the entries you added or click Remove. Remove the folder exceptions from your antivirus Allow list and restart OVRService again from services.msc.
Fix 7: Reset Link Configuration and Repair the Quest PC App
What causes it
Pairing tokens in C:\ProgramData\Oculus and headset Link settings can become corrupted after switching PCs, changing Windows user accounts, or interrupted updates. A standard reinstall does not always clear these files.
How to check
If Link fails on both cable and Air Link after all previous fixes, and the headset shows Quest Link keeps crashing back to home or the PC app shows No headset connected after a fresh pairing attempt, the configuration store is likely corrupted. Check C:\Users\[YourName]\AppData\Local\Oculus\ for logs showing repeated Error 1001 or entitlement errors.
What to do
On PC, go to Windows Settings > Apps > Installed apps > Meta Quest Link > Modify or Repair > select Repair and follow prompts. If Repair fails, choose Uninstall, then manually delete C:\ProgramData\Oculus\ and C:\Users\[YourName]\AppData\Local\Oculus\ and C:\Users\[YourName]\AppData\Roaming\Oculus\ after uninstall. Restart the PC, download and install the latest Meta Quest Link app, and log in. On the headset, go to Settings > System > Quest Link > remove the previously paired PC by selecting your PC name and choosing Forget. Restart the headset by holding power for 10 seconds, then pair fresh via Air Link or cable and approve the new pairing code.
How to undo it
This fix deletes pairing data and cannot be directly undone, but you can re-pair any previously removed PCs by repeating the pairing process. If you backed up C:\ProgramData\Oculus\ before deleting, you can restore that folder and restart OVRService to return to the previous state. Reinstalling the app does not delete headset game saves stored on the device.
If Nothing Works
Test with a second high-quality USB 3.0 cable and a different USB 3.2 port to rule out a marginal cable. Try a different PC or laptop with Meta Quest Link installed to confirm whether the headset itself can link at all. If another PC links successfully, reset your Windows network stack by opening Command Prompt as administrator and running netsh winsock reset and netsh int ip reset, then restart. If no PC connects, perform a headset factory reset as a last resort by going to Settings > System > About > Factory Reset, or by powering off then holding Power + Volume Down to enter the boot menu and selecting Factory Reset with volume keys. Back up photos and files from Internal Storage via USB file transfer before resetting. If the headset still fails after a factory reset, contact Meta Store Support with your headset serial number from Settings > System > About and the Oculus logs from C:\Users\[YourName]\AppData\Local\Oculus\Diagnostics\.
FAQ
Why does my Quest 3 show connected but the screen stays black in Link?
This usually means the encoder is running on the wrong GPU or the refresh rate is too high for your hardware. Set the Quest Link PC app to use your dedicated NVIDIA or AMD GPU in Windows Graphics settings, set refresh rate to 72 Hz and render resolution to 1.0x, and run a clean install of your graphics driver. Also ensure the PC display resolution is not set above 3840 x 2160 while testing.
Should I use Air Link or cable for the most stable connection?
A certified USB 3.0 cable at 5 Gbps provides the lowest latency and most stable link and is best for troubleshooting. Air Link requires a 5 GHz Wi-Fi 6 or Wi-Fi 6E router with the PC connected via Ethernet to the same router and the headset within 15 feet without walls in between. Use cable for initial setup and switch to Air Link only after cable works.
Do I need Developer Mode to fix Quest 3 linking to PC?
No. Developer Mode under Settings > System > Developer is only needed for sideloading or ADB commands. For standard Link and Air Link, leave Developer Mode off. Enabling it can add extra prompts for USB debugging authorization that complicate normal pairing, so disable it unless a specific development task requires it.
Why does Air Link keep asking to pair every time?
Repeated pairing prompts happen when the pairing token fails to save due to firewall blocking or corrupted ProgramData. Add the Oculus folders to your firewall and antivirus allow list, run Meta Quest Link as administrator, pair once, then restart both devices without clicking Forget. If you switch Windows user accounts, you must pair again because tokens are stored per user under AppData\Local\Oculus\.