Our Top Picks
 MNN 15.6" FHD 60Hz Portable Monitor USB-C HDMI15.6" 1080P14.48 x 8.85 x 0.3 Inches1.53 PoundsCheck on Amazon
 ASUS BE249CGN 24 Inch 1080P 120Hz Computer Monitor24 Inch8.8 x 21.3 x 19.9 inches12.4 PoundsCheck on Amazon


Top 3 picks at a glance

Quick Comparison
The table below maps every display and dock in this roundup to the reader it fits best. Prices are given as tiers rather than figures because USB-C display pricing moves constantly with panel supply and seasonal sales.
| Product | Best for | Key specs | Price tier |
|---|---|---|---|
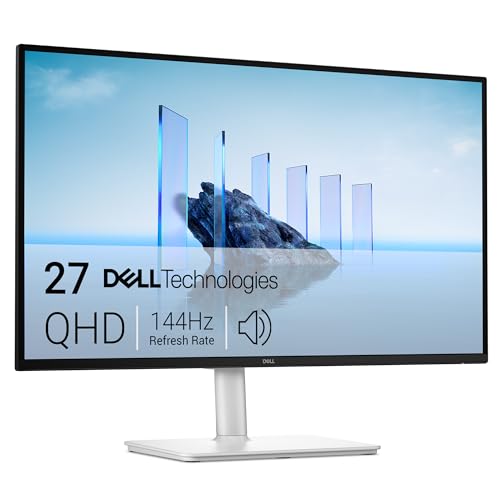
| Dell 27 Plus QHD USB-C Monitor – S2725DC | Best overall desktop USB-C monitor for most MacBook owners | 27-inch QHD 2560×1440, 144Hz, 1ms, 2 x 3W speakers, USB-C video + data, HDMI | Premium |
| ASUS ProArt PA247CV | Colour-accurate 24-inch work for photo and video editors | 24-inch 1080p IPS, USB-C with power delivery, professional colour tuning, ergonomic stand | Premium |
| ASUS BE249CGN | Office and IT desks that need wired networking through the monitor | 24-inch 1080p, 120Hz, USB-C 96W power delivery, HDMI, RJ45 Ethernet | Premium |
| InnoView 15.6″ Portable Monitor | Second screen for travel and hot-desking | 15.6-inch FHD 1080p IPS, HDMI + USB-C input, slim folding cover | Mid-range |
| cocopar 15.6″ Portable Monitor | Budget portable second screen with speakers | 15.6-inch FHD 1080p, 60Hz, 85% sRGB, built-in speakers, HDMI + USB-C | Mid-range |
| MNN 15.6″ FHD Portable Monitor | Cheapest usable portable panel | 15.6-inch FHD, 60Hz, IPS, HDR, USB-C + HDMI | Budget |
| VILVA 15.6″ Portable Monitor | Lightweight travel second display | 15.6-inch FHD IPS, USB-C + HDMI, bus-powered single-cable use | Budget |
| ASUS ZenScreen MB16ACV | Premium ultraportable with the cleanest cable story | 15.6-inch 1080p, USB-C single-cable, hybrid signal handling, foldable stand | Premium |
| Anker 11-in-1 USB-C Hub (4K HDMI + DP) | Two external displays plus laptop power from one cable | 11 ports, dual monitor HDMI + DisplayPort, 4K HDMI, USB-C power delivery passthrough | Mid-range |
| Anker 8-in-1 Laptop Docking Station | Single external 4K display plus full peripheral set | 8 ports, 4K HDMI, USB-C hub, card and USB-A expansion | Mid-range |
| Anker 7-in-1 USB-C Hub | Budget dual-monitor docking for lighter MacBooks | 7 ports, dual monitor outputs, USB-C, compact body | Budget |
| Acer USB-C Docking Station (9-in-1, 2 x HDMI) | Cheapest route to two HDMI displays from one port | 9 ports, dual HDMI, USB-C laptop connection, USB-A expansion | Budget |
How We Chose
Selection started from the ports, not the pixels. A monitor earns a place in this list only if it can carry video over USB-C in a way a MacBook actually supports, and only if its operating model matches how people really use a laptop on a desk: plug in one cable, get picture, peripherals and as much charge as the panel can supply. Anything that needed a dongle chain to reach a modern MacBook was pushed down or left out.
From there we filtered on category fit. Some readers want a fixed desktop panel, some want a second screen that folds into a bag, and some already own a good display but need more ports, so hubs and docks sit alongside monitors here rather than in a separate article. Each entry was weighed on the upgrade path it leaves open: does the panel’s resolution and refresh still make sense in three years, does the hub’s port mix survive a laptop swap, and does the portable screen stay useful once the original laptop is retired.
We also weighted the boring details that decide daily satisfaction: power delivery headroom, whether a single cable can run the panel at full brightness while charging, built-in speakers for desks without external audio, stand ergonomics, and how many downstream ports remain free after the display takes its share. We have not tested, benchmarked or owned any of these products; every claim below comes from manufacturer specifications, published documentation and the well-established behaviour of macOS with USB-C displays and docks.
1. Dell 27 Plus QHD USB-C Monitor – S2725DC – Best for most MacBook desks
As an Amazon Associate we earn from qualifying purchases at no extra cost to you.

If you want one screen that does everything a MacBook user needs at a desk, this is the pick that gets the fewest things wrong. The 27-inch panel runs 2560×1440 at 144Hz with a 1ms response rating, which puts it in a different class from the 1080p office monitors most people default to. For macOS in particular, 27 inches at QHD is a genuinely comfortable pixel density: text is sharper than on a 1080p 27-inch panel without pushing the Mac into the tiny-text scaling territory that 4K at 27 inches can produce.
It suits anyone who writes, codes, edits photos or plays games on a MacBook and wants that work to land on one large, fast panel. Two 3W speakers mean a docking-free desk can produce sound without adding a speaker bar, and the USB-C connection handles video and data alongside HDMI for a second source, so a games console or a work PC can share the screen.
Key specs
- 27-inch QHD, 2560×1440 resolution
- 144Hz refresh rate with 1ms response rating
- Two 3W integrated speakers
- USB-C video and data connection, plus HDMI
- Height and tilt adjustable stand class typical of Dell’s Plus series
The refresh rate is the headline advantage over the ASUS ProArt PA247CV and the ASUS BE249CGN in this list. Both of those are excellent 24-inch tools, but 1080p at 24 inches and 60Hz-class motion make them business machines, not entertainment ones. The Dell also out-resolves them by a wide margin at the same desk footprint. The trade-off is size: 27 inches at QHD is not a colour-critical reference panel in the way ASUS markets the ProArt line, so if print-accurate colour is the job, the ProArt is the more honest choice even at lower resolution.
Where this monitor earns its premium tier is the combination rather than any single number. A 144Hz QHD panel with speakers, USB-C input and HDMI switching is the configuration that makes a MacBook feel like a desktop without a dock, and it removes the most common regret people have after buying a 1080p 27-inch screen: visible pixel structure and a soft desktop.
Pros
- QHD at 27 inches is a sweet spot for macOS text rendering
- 144Hz makes scrolling, cursor movement and motion feel dramatically smoother than 60Hz
- Built-in speakers reduce desk clutter
- USB-C plus HDMI covers a laptop and a second source
- Fast panel suits gaming as well as work
Cons
- Premium tier pricing for a QHD panel rather than 4K
- 27 inches is too large for small desks and awkward as a travel screen
- Not positioned as a colour-managed reference display
- No wired Ethernet, unlike the ASUS BE249CGN
Against the nearest alternative, the ASUS ProArt PA247CV, the decision is simple: choose the Dell for size, resolution and motion, choose the ProArt for colour discipline and a smaller 24-inch footprint. Against the ASUS BE249CGN, choose the Dell unless you specifically need RJ45 networking and 96W charging through the monitor itself.
2. MNN 15.6″ FHD Portable Monitor – Best for the lowest-cost second screen

At the budget end, the question is not whether a portable monitor is as good as a desktop panel, because it is not, but whether it is good enough to justify carrying. The MNN 15.6-inch unit answers that with a 1080p IPS panel, 60Hz refresh, HDR support and both USB-C and HDMI inputs. It suits students, travellers and anyone who works from a laptop bag and wants a second window for reference material, chat or a PDF while the main laptop screen handles the primary task.
It also suits a specific MacBook pattern that desktop monitors cannot serve: a second display that needs no wall power. Driven from a MacBook’s USB-C port, a panel like this draws its power from the laptop, so the “one cable” promise is literal and there is no brick to find in a café or a hotel room.
Key specs
- 15.6-inch FHD 1080p IPS panel
- 60Hz refresh rate
- USB-C and HDMI inputs
- HDR support as listed
- Slim portable chassis with a protective cover stand
The reasoning behind recommending this over the InnoView or cocopar units in the same size class comes down to price-to-capability. All three are 15.6-inch 1080p portables, so the meaningful differences are speaker presence, colour coverage claims, build quality and bundled cables. The MNN sits at the entry point and is the sensible choice if the panel will be a secondary screen used a few hours a week rather than a daily driver.
A realistic caution applies to every bus-powered portable monitor: the MacBook is now supplying both signal and panel power, so battery run time drops. As a worked estimate, adding a roughly 7–8W portable panel to a MacBook Air drawing about 6–8W at light load takes total draw to around 14–16W, which on a 52.6Wh battery is roughly three and a half hours rather than seven. That matters on long flights and full-day offsite work.
Pros
- Lowest-cost way to add real screen area to a MacBook
- Bus-powered over USB-C, so no power adapter needed
- HDMI input means it also works with consoles and older laptops
- Folds flat and travels in a laptop sleeve
Cons
- 60Hz and 1080p at 15.6 inches is basic image quality
- No meaningful colour-accuracy claims for creative work
- Drains MacBook battery faster when bus-powered
- Stand and cover ergonomics are usually the weak point of budget portables
Compared with the InnoView 15.6-inch, the MNN is the cheaper route to the same core experience; the InnoView is the better pick if you want a slightly more polished mid-range package. Compared with the ASUS ZenScreen MB16ACV, it gives up hybrid signal handling, build refinement and the premium single-cable experience in exchange for a much lower price tier.
3. ASUS ProArt PA247CV 24 Inch 1080p USB-C Professional Monitor – Best for colour-accurate creative work
The ProArt line exists for people whose deliverable depends on colour being right before it leaves the screen. This 24-inch 1080p panel with USB-C connectivity suits photographers, illustrators, video editors and designers working on a MacBook who need a calibrated, colour-managed second surface rather than a large fast one. Paired with macOS colour management, a display in this class is the difference between grading to a target and guessing.
It suits a 24-inch desk, which is the size many people underestimate until they sit at one. A 24-inch 1080p panel keeps text at a comfortable size on macOS without scaling gymnastics, and it leaves room on the desk for a keyboard, a tablet and a laptop stand. That is a real advantage over a 27-inch QHD screen in a narrow room.
Key specs
- 24-inch 1080p IPS panel
- USB-C connection with power delivery to the laptop
- Professional-oriented colour tuning and factory calibration approach typical of the ProArt series
- Ergonomic stand class with height, tilt, swivel and pivot adjustment
- HDMI and DisplayPort inputs for additional sources
The charging side deserves a number. USB-C power delivery on professional 24-inch monitors in this class is commonly 65W to 90W. A 13-inch or 14-inch Apple silicon MacBook Pro ships with a charger in the 67W to 96W range, while a MacBook Air typically comes with 30W to 35W. Reading that against the monitor: the ProArt class will comfortably run and charge a MacBook Air and will hold a 14-inch MacBook Pro at or near full charge under normal loads, but a sustained heavy export on a 14-inch or 16-inch Pro may still draw more than the display can supply, in which case the battery trickles down slowly. That single calculation decides whether a monitor’s USB-C port is a genuine dock replacement for your specific Mac.
Pros
- Colour-focused positioning suits photo and video work
- USB-C with power delivery simplifies the desk
- Fully ergonomic stand including pivot for vertical document work
- 24-inch footprint fits tight desks
- Multiple inputs allow a second machine to share the panel
Cons
- 1080p at 24 inches is not a high-density panel
- No high refresh rate for gaming
- Premium price for the resolution on paper
- No integrated speakers worth relying on for serious audio work
Against the Dell 27 Plus QHD, the ProArt wins on colour discipline, ergonomics and desk fit, and loses decisively on resolution, refresh rate and entertainment value. Against the ASUS BE249CGN, it wins on colour and pivot flexibility and loses on refresh and networking. If your work is judged on final colour, this is the list’s specialist pick.
4. ASUS BE249CGN 24 Inch 1080P 120Hz Monitor – Best for office desks that need Ethernet

This is the most practical monitor in the roundup for a specific and very common situation: a corporate or home office desk where the laptop connects through one cable and expects wired networking at the same time. Its standout feature is not the panel but the RJ45 port beside the USB-C input, combined with 96W power delivery over the same cable. That combination turns the monitor into a dock for free.
It suits IT-standardised environments, remote workers on managed laptops, and anyone whose Wi-Fi is unreliable enough that a cable run to the desk is worth it. The 24-inch 1080p panel with a 120Hz refresh is also a step above plain 60Hz office screens, so scrolling and cursor movement are noticeably smoother than the typical business monitor.
Key specs
- 24-inch 1080p panel
- 120Hz refresh rate
- USB-C with 96W power delivery
- RJ45 Ethernet port for wired networking through the display
- HDMI input for a second source
The 96W figure is the important number here and it is worth doing the arithmetic against real MacBook chargers. A 16-inch MacBook Pro ships with a 140W adapter; a 14-inch Pro commonly ships with 67W or 96W depending on configuration; a MacBook Air ships with 30W to 35W. At 96W, this monitor can fully replace the charger for every MacBook Air and nearly every 14-inch MacBook Pro, and it will keep a 16-inch Pro charging under all but the heaviest sustained CPU and GPU loads, where the 140W brick would still be faster. In other words: one cable, full-speed charging for most MacBooks, plus gigabit-class wired networking, without a separate dock.
Pros
- 96W power delivery covers almost every MacBook under normal load
- Built-in RJ45 removes the need for a USB-C Ethernet adapter
- 120Hz refresh is unusually smooth for a business monitor
- Single-cable setup keeps the desk clean
- 24-inch 1080p is predictable and cheap to deploy in volume
Cons
- 1080p resolution is dated for creative work
- Premium tier for a full HD panel
- Not a gaming-oriented display despite the 120Hz panel
- Colour capabilities sit below the ProArt line
Against the ASUS ProArt PA247CV, this is a clear trade: give up colour tuning and pivot flexibility, gain Ethernet and a higher refresh. Against the Dell 27 Plus QHD, it trades resolution and size for networking and simpler deployment. If your desk has a network cable within reach and your laptop is your only computer, this is the most efficient single purchase in the list.
5. InnoView 15.6″ Portable Monitor – Best for a polished mid-range travel second screen

InnoView’s 15.6-inch FHD panel sits between the budget portables and the premium ASUS ZenScreen, and that middle position is exactly where most second-screen buyers should land. It is a 1080p HDMI and USB-C monitor designed as an external display for laptops, desktops and MacBooks, with a folding cover that doubles as a stand. It suits commuters, consultants and anyone who wants one extra screen without paying premium prices.
The case for a mid-range portable over the cheapest option is durability and consistency. Panels in this tier tend to ship with better covers, more reliable USB-C negotiation and more predictable brightness uniformity. If the screen will be unfolded and refolded five days a week, that difference shows up within months.
Key specs
- 15.6-inch FHD 1080p IPS panel
- HDMI and USB-C inputs
- Folding protective cover that acts as a stand
- Designed as a second external monitor for laptops and desktops
- Bus-powered operation over USB-C on MacBook, with HDMI as fallback
The compatibility note that matters most with MacBooks is signal type. Some portable monitors accept USB-C video natively, some use USB-C only for power and require HDMI for the picture. Before buying any portable, check whether the listing describes USB-C as a display input or as a power input. If a panel only takes power over USB-C and video over HDMI, a MacBook needs an HDMI adapter, which breaks the single-cable idea entirely. This class of InnoView listing generally supports USB-C video input, but the check is worth doing on any portable purchase.
Pros
- Better build and cover quality than entry-level portables
- 1080p IPS is fine for documents, chat, terminals and video
- Works with MacBook, Windows laptops and desktops
- Mid-range pricing keeps it a low-risk purchase
- HDMI input makes it useful with games consoles too
Cons
- 1080p on 15.6 inches is modest pixel density
- No high refresh rate
- Speaker quality is basic across this category
- Brightness is usually below what a sunny window demands
Against the MNN and VILVA budget portables, the InnoView costs more and behaves more predictably, which is the whole point of the mid tier. Against the ASUS ZenScreen MB16ACV, it gives up the premium single-cable refinement and lighter chassis in exchange for a substantially lower price. Against the cocopar, the two are close siblings; pick the one with the better cover design for your bag.
6. cocopar Portable Monitor 15.6 Inch – Best for a budget second screen with speakers

cocopar’s 15.6-inch 1080p 60Hz portable monitor with 85% sRGB coverage and built-in speakers is a straightforward proposition: a travel second screen with audio included. It suits people who use hotel room desks and shared working spaces where a laptop’s tiny speakers are not enough and headphones are not always practical. It also suits anyone pairing a portable with a mini PC or console, since HDMI input is included alongside USB-C.
The 85% sRGB figure is worth understanding rather than dismissing. sRGB is the colour space most web content, documents and video are authored in, and 85% coverage means a large majority of everyday colour reproduction is present, with the weakest performance in the most saturated reds and greens. For spreadsheets, code, email and streaming, that is ample. For photo retouching or print preparation, it is not.
Key specs
- 15.6-inch FHD 1080p panel at 60Hz
- 85% sRGB colour coverage as listed
- Built-in speakers
- HDMI and USB-C inputs
- Folding cover stand, travel-oriented build
The practical advantage over the MNN and VILVA entry builds is the speaker set, which is a genuine convenience when the monitor is used for video calls or casual streaming at a shared desk. The disadvantage is the same as every 1080p portable: no meaningful upgrade headroom. In three years this screen will still be a 1080p 60Hz panel, so it is best thought of as a companion device rather than a long-term display investment.
Pros
- Built-in speakers make it self-contained for calls and streaming
- HDMI and USB-C cover both modern and older sources
- Undemanding price for a 15.6-inch portable
- 85% sRGB is sufficient for documents, code and video
- Light enough to live permanently in a laptop bag
Cons
- 60Hz panel with no motion smoothing
- 85% sRGB is not enough for colour-critical editing
- Speakers are functional rather than good
- Portable stands rarely hold a stable angle on soft surfaces
Against the InnoView, this is a near-tie decided by speakers and cover design rather than performance. Against the ASUS ZenScreen MB16ACV, it is a much cheaper screen with a considerably less refined cable and build story. Against the MNN, it is the better choice if speakers matter and the more expensive choice if they do not.
7. VILVA 15.6″ FHD IPS Portable Monitor – Best for a lightweight no-fuss second display

VILVA’s 15.6-inch FHD IPS panel with USB-C and HDMI inputs is another entry-tier portable aimed at exactly the same buyer as the MNN: someone who wants more screen area for the least money and is not chasing colour or refresh. It suits occasional use, backup duty and secondary setups such as a monitor attached to a console or mini PC for a few hours at a time.
Its USB-C and HDMI input combination is the key feature. On a MacBook, USB-C carries both power and picture so there is nothing else to plug in; on older hardware, HDMI does the job. That dual-input design is the single most useful trait a budget portable can have, because it keeps the panel relevant across multiple machines.
Key specs
- 15.6-inch FHD IPS panel
- USB-C and HDMI inputs
- Bus-powered operation over USB-C
- Slim travel chassis with cover stand
- Entry-tier pricing within the portable category
Two cautions apply at this tier and neither is unique to VILVA. First, brightness: budget portables often peak below what a bright window or an outdoor table requires, so a café seat facing sunlight may look washed out. Second, USB-C video support varies between production runs; if a listing does not explicitly state that USB-C carries video, treat HDMI as the reliable path and budget for an adapter.
Pros
- Very low cost for a 15.6-inch extra screen
- Dual inputs keep it useful across old and new machines
- Slim enough to slide beside a laptop in a bag
- Adds real productivity area to a MacBook on the road
Cons
- Entry-tier build and cover quality
- 1080p 60Hz only
- Limited brightness and colour claims
- No speakers as capable as the cocopar’s
Against the MNN, the two are directly comparable and the decision comes down to whichever is cheaper at the time of purchase plus the bundled cable quality. Against the InnoView, the VILVA saves money and gives up mid-range consistency, cover quality and general polish.
8. ASUS ZenScreen MB16ACV 15.6 Inch 1080p USB-C Portable Monitor – Best for the cleanest one-cable travel setup

The ZenScreen MB16ACV is the portable monitor to buy when the cable experience matters as much as the panel. It is a 15.6-inch 1080p USB-C display designed around single-cable connection, with a foldable stand and a hybrid signal approach that lets it work from a USB-C port without a separate power feed. It suits frequent travellers, hot-deskers and anyone who has been irritated by portable monitors that need two cables before they show a picture.
It suits MacBook users particularly well because macOS handles single-cable USB-C displays without fuss, and the ZenScreen’s design assumes that pattern. There is no adapter, no HDMI dongle and no power brick in the equation when connected to a USB-C MacBook.
Key specs
- 15.6-inch 1080p panel
- USB-C single-cable connection for video and power
- Hybrid signal handling for broader source compatibility
- Foldable stand that doubles as a cover
- Premium build class within the portable category
The cost of that convenience is price. In the portable category, the ZenScreen sits at the premium tier, and the same 1080p 60Hz panel specification can be had for much less from InnoView, cocopar, MNN or VILVA. The premium buys build quality, weight, hinge and stand design, cable reliability and a better chance that USB-C video negotiation works first time on any given laptop. For daily travellers, that reliability is worth more than the spec sheet suggests; for occasional users, it is not.
Pros
- Genuine single-cable operation over USB-C with a MacBook
- Lighter and better built than most portables
- Foldable stand is more usable than typical cover stands
- Strong compatibility across USB-C hosts
- Ideal companion for a MacBook Air on the move
Cons
- Premium price for 1080p 60Hz
- No high refresh rate or high colour coverage claims
- Bus-powered, so it shortens MacBook battery life
- Small screen next to any desktop monitor
Against the InnoView and cocopar mid-range portables, the ZenScreen wins on build, weight and cable simplicity, and loses badly on price-per-pixel. Against the MNN and VILVA, the gap is wider in both directions. If you travel weekly, buy the ZenScreen; if you travel monthly, the mid-range portables are the smarter spend.
9. Anker 11-in-1 USB-C Hub Docking Station – Best for two displays plus charging from one cable

If you already own good monitors and the problem is ports, the answer is a dock rather than another screen. Anker’s 11-in-1 USB-C hub with 4K HDMI and DisplayPort outputs is the most capable dock in this list, designed to drive two external displays, expand USB peripherals and pass power back to the laptop through a single USB-C connection. It suits MacBook owners running a fixed desk who want two monitors, wired peripherals, card access and charging without a tangle of adapters.
The critical caveat with any dual-display dock on a Mac is the distinction between Mirror and Extend modes, and this applies across the whole docking section. Entry-level Apple silicon MacBook Air and base MacBook Pro models have historically supported only one external display natively, with additional displays requiring DisplayLink-class software or a mirror of the internal screen. Higher-tier MacBook Pro chips, including Max variants, support multiple external displays. Before buying any dual-monitor dock, confirm which display support your specific MacBook model provides, because a dock cannot create display streams the Mac does not output.
Key specs
- 11 ports including dual monitor outputs
- 4K HDMI and DisplayPort video outputs
- USB-C connection to the laptop with power delivery passthrough
- USB-A expansion for peripherals
- Compact desktop-friendly chassis
On the bandwidth side, a useful rule of thumb: a single 4K 60Hz display needs roughly 12–13 Gbps of usable data rate after overhead, and DisplayPort 1.4 with DSC or HDMI 2.1 handles that comfortably. Two 4K 60Hz streams need about 25 Gbps, which is why dual-4K docks rely on DisplayPort 1.4 with DSC or on compression-free lower resolutions. If a dock advertises dual 4K, check whether that means dual 4K 60Hz or dual 4K 30Hz, because 30Hz feels sluggish for mouse work and is a common compromise at lower price tiers.
Pros
- Most ports in this roundup, so fewer adapters on the desk
- Dual monitor outputs including HDMI and DisplayPort
- Power delivery passthrough simplifies charging
- Suits a fixed desk with two existing monitors
- Anker build and support reputation in the accessory category
Cons
- Dual external displays depend on your MacBook’s native display support
- Mid-range price for an accessory that adds no screen
- DisplayLink-class software may be needed for base Apple silicon models
- Adds one more box on the desk
Against the Anker 8-in-1 dock, the 11-in-1 buys extra ports and a second monitor output at a higher price; choose the 8-in-1 if you only need one external display. Against the Acer 9-in-1 dock, the Anker unit offers a broader port mix and the DisplayPort output, while the Acer competes on price for a simple dual-HDMI setup.
10. Anker 8-in-1 Laptop Docking Station – Best for one 4K display and a full peripheral set

Not everyone wants two external monitors, and for those people an 8-in-1 dock is the right size. Anker’s 8-in-1 USB-C hub with 4K HDMI covers the common desk: one external display at 4K, USB-A ports for keyboard, mouse and storage, card access and power delivery to the laptop. It suits MacBook owners with a single monitor who are tired of rotating adapters between ports all day.
It also suits hybrid workers who move a laptop between office and home. A dock that stays fixed at each desk with all peripherals attached and a single cable to the laptop is the least-friction arrangement, and this class of hub is the cheapest way to build it.
Key specs
- 8 ports including 4K HDMI output
- USB-C host connection with power delivery passthrough
- Multiple USB-A ports for peripherals
- Memory card reader class expansion
- Compact body suited to permanent desk mounting
When driving a single 4K 60Hz display, bandwidth is not a concern; roughly 12–13 Gbps of a 40 Gbps USB-C link leaves plenty of headroom for USB peripherals and power delivery. That is the practical argument for the 8-in-1 over the 11-in-1 for single-monitor users: you are not paying for display outputs and electronics you will never use, and the failure surface is smaller.
Pros
- Full peripheral set from one cable
- 4K HDMI output for a single high-resolution monitor
- Simplifies hybrid office and home desk switching
- Mid-range price and widely available
- Leaves bandwidth headroom for USB devices at 4K 60Hz
Cons
- Only one external display output
- No DisplayPort option as on the 11-in-1
- Power delivery passthrough means the laptop charger still occupies a socket
- Does not solve display limits on base Apple silicon MacBooks
Against the Anker 11-in-1, this is the value pick for a one-monitor desk and the wrong pick if you plan to add a second screen within a year. Against the Anker 7-in-1, it adds ports and a better display output for a modest step up in price. Against the Acer 9-in-1, the choice is port layout preference rather than capability.
11. Anker 7-in-1 USB-C Hub – Best for budget dual-monitor docking
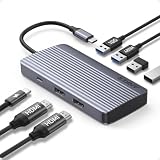
Anker’s 7-in-1 USB-C hub is the entry point to dual-monitor docking. It provides a compact set of ports including dual monitor outputs, USB expansion and USB-C host connection at a budget tier. It suits a small desk, a secondary setup or anyone testing whether a dock improves their workflow before spending more.
It suits MacBook Air owners especially, provided the display limitations are understood. A base Apple silicon MacBook Air driving two external screens usually needs DisplayLink-class software or a mirrored arrangement, so the dock is only half the answer; the other half is confirming what the Mac will output.
Key specs
- 7 ports including dual monitor outputs
- USB-C host connection
- USB-A expansion ports
- Compact travel-friendly body
- Budget tier pricing
The trade-offs at this tier are heat and sustained throughput. Small hubs without metal bodies or active cooling can throttle during long file transfers or sustained display output, and power delivery passthrough ratings are usually lower than on mid-range docks, so charging may be slower than the laptop’s own adapter. Neither is disqualifying at the price, but both are worth knowing before buying.
Pros
- Cheapest way to add a second monitor output and USB ports
- Small enough to travel with the laptop
- Anker reliability at the budget end
- Simple plug-and-play setup
Cons
- Fewer ports leaves less room for peripherals
- Lower power delivery passthrough than mid-range docks
- Can run warm under sustained load
- Still bound by the MacBook’s own external display limit
Against the Anker 11-in-1 and 8-in-1 docks, this is the trial purchase: buy it to find out whether docking suits you, then upgrade if you keep running out of ports. Against the Acer 9-in-1, the difference is port count and brand preference more than capability.
12. Acer USB-C Docking Station 9-in-1 – Best for the cheapest dual-HDMI desk

Acer’s 9-in-1 USB-C docking station with dual HDMI outputs is the most direct route to two monitors on a desk without adapters, at a budget tier. It suits home offices with two HDMI-only monitors, which is a very common situation, and it suits buyers who want a known brand at the lowest sensible price.
Dual HDMI is the practical asset here. Many older and mid-priced monitors offer HDMI and VGA or HDMI and DVI rather than DisplayPort, so a dock with two HDMI outputs avoids the need for DP-to-HDMI adapter cables. It also suits mixed setups where one screen is a television.
Key specs
- 9 ports including dual HDMI outputs
- USB-C connection to the laptop
- USB-A expansion ports
- Compact desktop body
- Budget tier pricing
The same macOS caveat applies as to every dual-display dock in this list: check your MacBook’s native external display support before assuming two screens will extend rather than mirror. On supported MacBook Pro configurations, two external displays work normally. On base Apple silicon laptops, expect to need DisplayLink-class software for true extension, and expect some loss of refresh rate and a slight latency penalty in that mode.
Pros
- Dual HDMI suits monitors and TVs without DisplayPort
- Lowest-cost dual-display docking option here
- Nine ports covers keyboard, mouse, storage and cards
- Straightforward setup for a fixed desk
Cons
- No DisplayPort output
- Budget-tier power delivery passthrough
- Display support limited by the host MacBook
- Less brand recognition in the docking category than Anker
Against the Anker 7-in-1, this dock offers more ports and two HDMI outputs rather than a mixed output set, which is decisive if your monitors are HDMI-only. Against the Anker 11-in-1, it is the cheaper path to two screens and the less flexible one for everything else.
How to Choose
Work through these criteria in order, because the later decisions depend on the earlier ones and getting the sequence wrong is how people end up with a monitor that will not do what they assumed.
Step 1: Confirm what your MacBook will actually drive
This comes first because it eliminates options rather than narrowing them. Apple silicon MacBook Air and base MacBook Pro models have historically supported a single external display natively, with additional displays requiring DisplayLink-class software or a mirrored output. MacBook Pro models with Max-class chips support multiple external displays. If you own a base MacBook Air and plan two monitors, your realistic paths are a dock with DisplayLink-class support, or accepting a mirrored second screen. Confirm your specific model’s external display support before buying any dock or second monitor, because this single fact decides roughly half the list.
Step 2: Size the panel to the desk and the scaling you want
macOS scaling behaves differently from Windows, and it rewards certain combinations. Practical guidance:
- 24 inches at 1080p — comfortable text size with no scaling, minimal desk space. Good for offices and tight rooms; visibly coarse for photo work.
- 27 inches at 1440p — the most forgiving desktop combination for macOS. Text is sharp enough for long sessions, and the interface stays at a sensible size without fractional scaling.
- 27 inches at 4K — very sharp, but pushes macOS toward scaled modes that render at a higher internal resolution and then downsample, which costs some GPU headroom and can make text slightly soft on non-native settings.
- 32 inches at 4K — a popular compromise where the panel is large enough that native scaling looks right and text is crisp.
If you write or code all day, 27-inch 1440p is usually the least regretful purchase. If you edit photos, a smaller colour-accurate panel beats a larger inaccurate one, which is why the 24-inch ProArt earns its place despite the lower resolution.
Step 3: Match charging wattage to your MacBook’s adapter
This is the calculation most buyers skip and later resent. Compare the monitor’s USB-C power delivery figure with the wattage of the charger that came with your MacBook:
- MacBook Air class, 30W–35W adapter: almost any USB-C monitor with power delivery in the 45W–65W range will charge it fully, even under load. Even a 96W monitor is fine; the laptop draws what it needs.
- 14-inch MacBook Pro class, 67W–96W adapter: a monitor rated 90W–96W will hold charge under all but sustained heavy export loads. A 65W monitor will charge it while idle and slowly lose ground during long renders.
- 16-inch MacBook Pro class, 140W adapter: no monitor in this list matches that figure. A 96W monitor charges it while browsing, writing and streaming, and falls behind during sustained high-load work, at which point the battery drains slowly or you connect the original charger in parallel.
Read the power figure as a ceiling on convenience, not a specification to ignore. If you regularly export video or compile large projects, plan to keep the laptop’s own charger connected alongside the monitor cable.
Step 4: Decide desktop panel versus portable panel
The split is about location, not quality. A desktop monitor wins on size, resolution, refresh rate, ergonomics, speakers and port count, and loses on mobility. A portable monitor wins on portability and cable simplicity, and loses on brightness, colour, refresh and stability. The ASUS BE249CGN’s built-in Ethernet and 96W charging make it the strongest single-cable desktop choice for a laptop-only desk. The ASUS ZenScreen MB16ACV is the strongest single-cable portable for a laptop bag. Buying both is common and reasonable: a good desk monitor for the office and a portable for travel costs less than one premium laptop upgrade.
Step 5: Count ports before you buy, and count them twice
List what you will plug in: keyboard, mouse, webcam, external SSD, SD card, Ethernet, second monitor, charger. Then check the monitor or dock against that list. A monitor with USB-C plus HDMI and no USB-A downstream ports looks fine until the keyboard and mouse need somewhere to go. This is where the Anker and Acer docks in this list earn their place: they exist because monitors rarely provide enough downstream expansion, and a monitor with a good USB hub built in is rarer than the marketing suggests.
Step 6: Understand daisy chaining and when it is worth it
Daisy chaining means connecting monitor one to the MacBook and monitor two to monitor one over DisplayPort MST, so only one cable reaches the laptop. The appeal is obvious. The complications are also real. Daisy chaining requires DisplayPort 1.2 or later on both panels, and the second display in the chain is typically limited to the same or lower resolution and refresh. Most importantly, macOS support for DisplayPort MST-based chaining has been inconsistent compared with Windows, so a chain that works perfectly on a Windows PC may mirror or fail on a Mac. If daisy chaining is central to your plan, verify Mac support for the specific monitor pair before purchasing, or use a dock with two independent outputs instead, which is the more predictable route on macOS.
Step 7: Weigh materials, stand and build for the long term
The stand and hinge decide whether a monitor is pleasant in year three. Look for height adjustment at minimum, and pivot if you read long documents or code vertically. Portable monitors live or die by their cover hinges; cheap hinges lose tension within months, which is the main reason to pay for a mid-range portable like the InnoView or a premium one like the ZenScreen. For docks, a metal body dissipates heat better than plastic, which matters if the hub will run warm during all-day display output.
Step 8: Budget by tier, not by brand
In this category, tiers are meaningful and prices inside them move constantly. Budget tier buys entry-level portables and simple dual-output hubs: adequate, replaceable, and a fine starting point. Mid-range buys better portable panels, better hinges and dual-monitor docks with more ports and power delivery headroom. Premium buys desktop panels with high resolution or high refresh, colour-managed displays and premium portables with reliable single-cable operation. The sensible strategy is to spend premium on the thing you look at every day, which is the monitor, and budget on the thing that merely splits ports, unless you change desks daily, in which case the dock or the premium portable earns the premium spend instead.
Step 9: Plan the upgrade path
Ask what each purchase looks like after your next laptop. A 27-inch 1440p 144Hz monitor will still be a good monitor in five years. A 1080p 60Hz portable will still be a usable second screen. A dock with power delivery passthrough will still work, though its charging ceiling ages with each laptop generation. The purchases that age worst are the ones fixed to a single resolution and refresh with no headroom. When two options are close in price, favour the one with higher resolution, higher refresh or more ports, because those are the specifications that stay useful longest.
Frequently Asked Questions
Can a single USB-C cable really charge my MacBook and carry the display signal at the same time?
Yes, provided the monitor’s USB-C port supports both power delivery and DisplayPort Alt Mode, which is how video travels over USB-C. The monitor supplies power to the laptop and receives the display signal on the same connector. The limitation is wattage: the monitor can only deliver what its power delivery rating allows, so a 65W display will not fully keep up with a 16-inch MacBook Pro during heavy sustained work.
Why does my MacBook mirror the second monitor instead of extending it?
This is almost always a display support limitation rather than a cable fault. Base Apple silicon MacBook Air and entry MacBook Pro configurations have historically supported only one external display natively, so a second screen mirrors the first. Fixes are to use a dock with DisplayLink-class software support, or to accept the mirrored output, or to use a higher-tier MacBook Pro with multi-display support.
Is a 27-inch 1440p monitor a good match for macOS?
It is one of the best matches available. At 2560×1440 on 27 inches, text is noticeably sharper than 1080p at the same size, and the interface stays at a comfortable scale without the fractional scaling that 4K at 27 inches often triggers. It is the combination most likely to satisfy a MacBook user who writes, codes and browses for long stretches.
Do USB-C monitors work with older MacBooks that only have Thunderbolt 3 or USB-C without DisplayPort Alt Mode?
Thunderbolt 3 ports support DisplayPort Alt Mode, so they work with USB-C monitors exactly as a modern port would. Older USB-C-only ports that lack DisplayPort Alt Mode cannot carry video, so those machines need an HDMI or DisplayPort adapter instead. If in doubt, the machine’s specification sheet will state whether the USB-C port supports video output.
What is the difference between a USB-C hub and a docking station for a MacBook?
In practice the terms overlap. A hub is usually smaller, bus-powered and focused on adding ports, while a docking station is larger, often powered, and adds display outputs plus a full peripheral set. Both connect to the MacBook over a single USB-C cable. The meaningful distinction is display outputs and power delivery headroom, not the label on the box.
Will a portable monitor drain my MacBook battery quickly?
It will speed up the drain because the laptop is powering the panel over USB-C. A rough estimate: adding a portable panel in the 7–8W range to a laptop idling at 6–8W roughly doubles total draw, which can cut battery run time from around seven hours to around three and a half on a typical MacBook Air. If you need long off-grid sessions, carry a power bank with USB-C output or use a panel that accepts its own power input.
Is daisy chaining two monitors reliable on macOS?
It is less predictable than on Windows. DisplayPort MST daisy chaining requires both displays to support the feature and depends on macOS handling the chain correctly, which has varied across versions and monitor combinations. A dock with two independent video outputs is the more dependable way to run two external displays on a Mac, and it avoids the resolution and refresh limits that chaining often imposes on the second screen.
Do I need a 4K monitor for a MacBook, or is 1440p enough?
1440p at 27 inches is enough for most people and is often the better choice, because it avoids the scaled rendering modes that macOS uses on 4K panels at that size. Choose 4K if your work benefits from very fine detail, such as photo retouching at 100% zoom, or if you plan a 32-inch panel where 4K scaling looks natural. Choose 1440p for text-heavy work, general productivity and gaming on a Mac.
Which One to Buy
For a single no-regrets desktop purchase, the Dell 27 Plus QHD S2725DC is the pick for most MacBook owners: 27 inches at 2560×1440 with 144Hz, speakers, USB-C and HDMI covers work and play without asking you to compromise on scaling. If your work is judged on colour, take the ASUS ProArt PA247CV instead. If your desk has a network cable and your laptop is your only computer, the ASUS BE249CGN with 96W charging and RJ45 is the most efficient single purchase here. If you travel weekly and want the cleanest one-cable second screen, buy the ASUS ZenScreen MB16ACV; if you travel occasionally, the InnoView or cocopar 15.6-inch panels deliver most of the experience for far less. And if your monitors are already good and the problem is ports, match the dock to your display count: the Anker 8-in-1 for one external screen, the Anker 11-in-1 for two, and the Anker 7-in-1 or Acer 9-in-1 when budget decides.