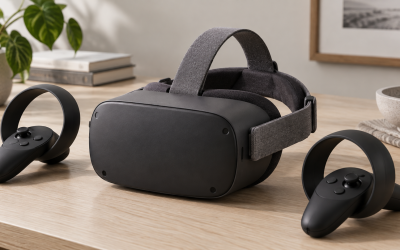
Quest passthrough is supposed to look like a slightly soft video feed of your room, not a storm of grain and flicker. When it suddenly looks noisy, discolored, or low-resolution, the problem is almost always a mix of lighting, software settings, and lens or sensor issues rather than a hardware failure. This guide walks you through how to identify the exact cause and fix it with reversible changes you can undo if they do not help.
As of early 2026, Meta has moved most passthrough and camera controls into the main Settings app on Quest 3 and Quest 3S, while Quest 2 and Quest Pro still keep some options under Experimental Features. The paths below cover all current headsets.
Most Common Causes
| Cause | Symptom | Likelihood |
|---|---|---|
| Low or incorrect lighting | Heavy luminance grain, slow auto-exposure, flicker under bulbs, warm or green tint | Very High |
| Dirty, smudged, or scratched lenses and tracking cameras | Soft haze with localized blurry patches, grain that does not change with lighting, light flare | High |
| Software glitch or pending update | Grain appears suddenly after an update or crash, passthrough is darker than usual, double image or judder | High |
| Screen brightness, eye relief, or IPD mismatch | Grain is more visible in dark scenes, eye strain, passthrough looks better when you move the headset slightly | Medium |
| Developer or experimental settings changed | Extreme grain after using SideQuest, ADB commands, or Quest Link/Air Link tweaks | Medium |
| Failing cameras or damaged headset | Persistent heavy noise in one eye, black spots, vertical lines, grain that persists after factory reset | Low |
Diagnose Step by Step
Work through these checks in order. Stop when you find a clear change in grain level so you know what helped.
1. Check Your Lighting First
Stand in the center of your play space and look at a white wall through passthrough. Turn on overhead lights to a comfortable daylight level. If the grain noticeably drops within 2 to 3 seconds as auto-exposure adjusts, lighting is the main factor. Also check for mixed lighting, such as a window on one side and a warm bulb on the other, which forces the cameras to raise ISO and creates grain.
2. Inspect Lenses and Cameras
Remove the headset and inspect the four tracking cameras on the front and sides and the two inner lenses you look through. Use a bright phone flashlight at an angle. Look for fingerprints, dust, hair, or micro-scratches. Smudges on the outer cameras scatter light and look like uniform grain in passthrough, while smudges on the inner lenses look like haze directly in front of your eyes.
3. Test Brightness and Fit
Go to Settings > Display > Brightness and set the slider to the middle, then adjust up and down while in passthrough. Put the headset on correctly: loosen the strap, place the rear cradle low on the back of your head, tighten until the image is stable, then adjust the depth with the facial interface dial or relief button. An incorrect fit makes the sweet spot smaller and exaggerates any softness or noise.
4. Compare Passthrough Modes
Double-tap the side of the headset or use the passthrough shortcut to toggle it: Settings > System > Passthrough > Double Tap for Passthrough. Check if grain appears in full passthrough, in the boundary outline view, and inside an app that uses passthrough mixed reality. If grain only appears in one app, the app is using a low-resolution passthrough layer to save performance.
5. Check Software Version and Recent Changes
Go to Settings > System > Software Update and note your version number. If you are on Public Test Channel or have just updated, note the build. Also recall if you recently used Meta Quest Developer Hub, SideQuest, ADB commands, or changed refresh rate or encode settings for Link. Any recent change points to a software cause.
6. Isolate Environmental Flicker
Turn off LED strips, dimmer switches, and fluorescent lights one at a time. Many low-cost LED bulbs run at low pulse-width modulation dimming levels that cause passthrough cameras to show banding and extra noise. If grain or horizontal flicker lines vanish when a specific light is off, that light is incompatible with the camera exposure system.
Fixes by Cause
Low or Incorrect Lighting
What causes it: Quest passthrough cameras are small, fixed-aperture sensors. In dim rooms they raise gain to brighten the image, which creates luminance grain exactly like a phone camera in low light.
How to check: Open passthrough in a dim room, then turn on a 5000K to 6500K daylight bulb overhead. If grain clears within seconds, lighting is confirmed. Check Settings > System > Passthrough during the test and observe if exposure pumping stops.
What to do: Light the room evenly from above rather than from a single lamp behind you. Use bulbs rated 800 lumens or higher with a Color Rendering Index of 80 or greater. Avoid pointing a bright window directly behind your play area. If you use dimmers, set them to 80 percent or higher. For night use, add a single diffuse ceiling light instead of relying on RGB strips.
How to undo: Return dimmers and bulbs to your previous setup. No setting is changed on the headset, so no reset is needed.
Dirty or Smudged Cameras and Lenses
What causes it: Oil from hands, dust, and fibers on the outer cameras diffuse incoming light before it hits the sensor, adding a grainy haze. Inner lens smudges reduce contrast and make existing camera noise more obvious.
How to check: Power off the headset completely by holding the Power button and selecting Power Off. Shine a light across each outer camera. If you see a rainbow smear or dust halo, cleaning will help.
What to do: With the headset powered off, use a dry microfiber cloth to gently wipe each outer camera in a circular motion. For stubborn spots, lightly dampen a corner of the cloth with distilled water only, not alcohol or lens cleaner, and dry immediately. Use a separate dry microfiber for the inner lenses. Remove any facial interface that blocks access, then reseat it. Clean the top and bottom sensors as well.
How to undo: This is fully reversible. If you over-wiped, let any moisture evaporate for 10 minutes before powering on. No setting changes to revert.
Software Glitch, Bad Update, or Cache Build-Up
What causes it: A stuck passthrough service, corrupted system cache, or incomplete update can lock exposure and sharpening values, leaving the feed darker and noisier than normal.
How to check: Go to Settings > System > Software Update. If it says Update Available or Restart Required, you have a pending update. If passthrough became grainy right after a restart, a glitch is likely.
What to do: First, do a soft restart: hold Power > Restart. If grain remains, do a full power cycle: hold Power for 10 seconds until the headset shuts off completely, wait 30 seconds, then power on. Next, check for and install any system update and allow the headset to restart on its own while on the charger. If passthrough is still grainy, clear boundary data at Settings > Environment > Boundary > Clear Boundary History, then recreate your boundary in good light. This forces the tracker to recalibrate exposure.
How to undo: Restarting and updating cannot be undone, but they do not delete games or saves. If you cleared boundary history, you can recreate your old boundary dimensions by re-walking the same perimeter.
Brightness, IPD, and Fit Settings
What causes it: Low display brightness crushes shadow detail, making camera noise more visible. An incorrect interpupillary distance or loose fit moves your eyes out of the lens sweet spot, which adds chromatic blur that looks like grain.
How to check: Go to Settings > Display > Brightness and note the value. Go to Settings > System > Headset > IPD or use the IPD wheel/button on the bottom of the headset. If the on-screen IPD number does not match the position where text looks sharpest, fit is off.
What to do: Set Brightness to 60 to 75 percent for passthrough testing. Adjust IPD using the roller on Quest 3/3S or the button on Quest 2 until the passthrough overlay and menus look sharpest. Hold the headset with one hand and slide the facial interface forward or back until the image is clearest, then tighten the strap so the headset does not shift when you move your head. Disable Night Display at Settings > Display > Night Display if enabled, as it tints passthrough.
How to undo: Return Brightness to your preference and set IPD back to your previous measured value. Re-enable Night Display if you use it in the evening.
Experimental and Developer Settings Left Enabled
What causes it: Commands like adb shell setprop debug.oculus.passthrough or SideQuest tweaks for texture size, sharpening, or refresh rate can persist across reboots and affect passthrough quality.
How to check: Check Settings > System > Developer and see if Developer Mode is on. If you use Meta Quest Developer Hub on PC, connect the headset via USB and look in Device Manager > View Device Logs for any passthrough flags. On the headset, check Settings > Experimental Features for options like Increased Viewport Sharpness or similar toggles.
What to do: Turn off any Experimental passthrough sharpening toggles. If you used ADB, connect via USB, allow USB debugging, and run adb shell setprop debug.oculus.passthrough 0 followed by adb reboot. In Developer Hub, select your headset > Settings > Restore Defaults for ADB properties. Also check Quest Link PC app > Settings > Graphics Preferences > Encode Resolution and set it back to Automatic.
How to undo: You can re-enable Developer Mode at Settings > System > Developer > Developer Mode. Reapply any ADB commands you need for development by running them again, then reboot.
When to Replace or Reinstall
If passthrough still looks grainy after cleaning, good lighting, a restart, and an update, try a factory reset as a last software step. Back up first. Go to Settings > System > Backup and confirm cloud backup is complete. You can also back up saves manually via USB to the folder Quest 3 > Android > data. Then go to Settings > System > Reset > Factory Reset. Set up the headset again and test passthrough before reinstalling apps.
Do not factory reset more than once if it does not help. At that point the issue is likely hardware. Contact support if you see any of these signs: grain that is drastically worse in one eye only, a fixed dark spot or scratch that does not move when you clean the cameras, heavy purple or green banding, orpassthrough that instantly becomes grainy again after a full reset in good light. If the headset is under warranty, capture a short screen recording of passthrough at Settings > Camera > Record Video and keep your purchase receipt and serial number from Settings > System > About.
For out-of-warranty headsets, replacing the facial interface or adding a proper overhead light is far cheaper than replacing cameras. Only consider repair or replacement when a hardware fault is confirmed by the factory reset test.
FAQ
Why does passthrough look grainier at night than during the day?
Passthrough cameras need a lot of light to keep gain low. Daylight provides even, high-CRI illumination. At night, warm bulbs, dimmed LEDs, and shadows force the sensor to amplify the signal, which adds grain. Adding a single diffuse overhead daylight bulb and turning dimmers up usually fixes it without changing any headset settings.
Will a screen protector or cover make passthrough more grainy?
Any film or cover placed over the outer tracking cameras will diffuse the image and increase haze and noise. Screen protectors are for the inner display lenses only. Keep the four outer cameras completely uncovered and clean. If you use a silicone cover for travel, remove it before using passthrough.
Does changing refresh rate affect passthrough grain?
Setting the headset to 90Hz, 120Hz, or 144Hz at Settings > System > Display > Refresh Rate does not directly change camera exposure, but some apps lower passthrough resolution at higher refresh rates to maintain performance. If passthrough looks grainier only inside a specific mixed reality app, try setting the system refresh rate back to 90Hz and restarting the app to see if clarity improves.
Why does passthrough look grainy only in recordings or casting?
When you cast or record at Settings > Camera > Cast or Record Video, the headset encodes video at a lower bitrate than what you see in the headset. Compression artifacts look like extra grain. To test true headset quality, look directly through passthrough without casting. If you must record, use a USB connection and set recording stabilization off to reduce added softness.